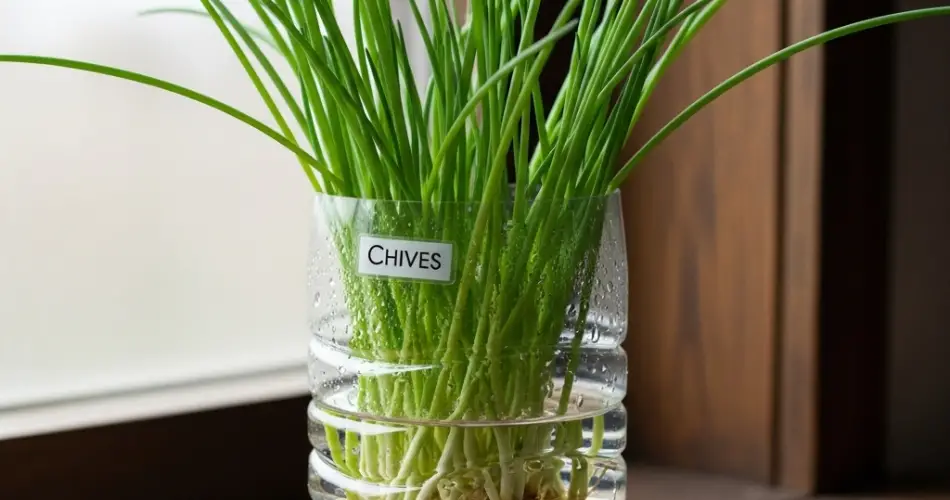
Chives are a popular, easy-to-grow herb valued for their mild onion flavor and vibrant green color. While chives are commonly bought from stores, propagating them at home ensures a constant supply for cooking and garnishing. A simple and effective method for multiplying chives is using clear bottles. This approach provides a small-space, eco-friendly solution while allowing gardeners to observe root development and enjoy hands-on herb gardening.
Using clear bottles as propagation containers offers a controlled environment that promotes healthy root growth. The transparency allows you to watch the roots develop, giving insight into the growth process and ensuring optimal care. This method is ideal for windowsills, balconies, or small patios, making chive propagation accessible to urban gardeners and small-space growers.
Why Clear Bottles Are Ideal for Chives
Clear bottles offer several advantages when propagating chives:
-
Root visibility: Watching roots grow allows you to monitor plant health and adjust watering or soil conditions.
-
Space efficiency: Bottles fit easily in small spaces, making them suitable for indoor gardening.
-
Humidity control: The enclosed space retains moisture, promoting faster rooting and reducing plant stress.
-
Sustainable gardening: Reusing plastic bottles reduces waste while providing an affordable propagation solution.
These benefits make clear bottle propagation both practical and educational, allowing gardeners to cultivate chives efficiently.
Materials Needed
To propagate chives using clear bottles, you will need:
-
Healthy chive clumps or cuttings
-
Clean clear plastic bottles (1–2 liters recommended)
-
Scissors or a sharp knife
-
Potting soil or a well-draining medium (sand, perlite, or a mix)
-
Water
-
Optional: small pebbles for drainage
Clean tools and containers are essential to prevent disease and encourage strong, healthy root development.
Selecting and Preparing Chive Clumps
Choosing the right material is critical for successful propagation:
-
Healthy clumps: Select mature, green chives with strong stems. Avoid yellowing or diseased plants.
-
Size: Divide clumps into small sections with 3–5 healthy stems each.
-
Trimming: Cut leaves to about 4 inches to reduce moisture loss and encourage new growth.
Proper selection and preparation maximize the chances of successful propagation.
Preparing the Bottle
Preparing the bottle correctly creates an optimal rooting environment:
-
Cut or open the bottle: Slice the top off or cut horizontally to create a planter opening.
-
Drainage: Add a thin layer of small pebbles at the bottom if using soil to prevent waterlogging.
-
Add soil or medium: Fill with lightweight, well-draining potting soil, or a mix of sand and perlite.
-
Moisture: Lightly water the soil until damp but not saturated.
A well-prepared bottle balances moisture retention and aeration, essential for chive root development.
Planting Chives
Planting chives correctly ensures fast and healthy growth:
-
Insert clumps: Plant each clump 1–2 inches deep in the soil or medium.
-
Stabilize: Firm the soil gently around the base to keep stems upright.
-
Humidity cover: Use the top portion of the bottle as a mini-greenhouse to maintain humidity. Remove briefly each day to allow airflow and prevent mold.
Correct planting depth and stabilization help chives establish strong roots and produce vigorous new growth.
Caring for Bottle-Grown Chives
Proper care is essential for successful propagation:
-
Light: Place bottles in bright, indirect sunlight. Direct sun may overheat the container.
-
Temperature: Keep the environment between 60–75°F (16–24°C) for optimal growth.
-
Watering: Maintain lightly moist soil, misting occasionally. Avoid waterlogging to prevent root rot.
Chive roots usually establish within 2–4 weeks, after which new shoots will begin to grow.
Transplanting and Maintenance
Once roots are established, chives can be transferred to larger containers or garden beds:
-
Check roots: Ensure the roots are well-developed before transplanting.
-
Prepare containers: Use well-draining soil in larger pots or garden soil.
-
Plant carefully: Place rooted clumps, firming soil around the base, and water lightly.
-
Acclimate gradually: If moving outdoors, gradually expose plants to direct sunlight and outdoor conditions.
Regular harvesting of leaves encourages continuous growth and prevents overcrowding.
Common Challenges
-
Overwatering: Too much water can cause root rot; maintain light, consistent moisture.
-
Poor ventilation: Remove bottle covers briefly each day to prevent mold or fungus.
-
Weak clumps: Use healthy, vigorous stems for best results.
Monitoring and adjusting care ensures healthy chive propagation.
Final Thoughts
Multiplying chives using clear bottles is an easy, sustainable, and space-saving method for home gardeners. By selecting healthy clumps, preparing a suitable bottle environment, and maintaining proper care, gardeners can enjoy a constant supply of fresh, flavorful chives.
This method combines eco-conscious gardening, hands-on observation, and practical space management. With patience and consistent attention, bottle-grown chives can flourish indoors or outdoors, providing aromatic, homegrown herbs for cooking, garnishes, and salads year-round.


