Chives are a versatile, easy-to-grow herb that adds fresh, mild onion flavor to a wide range of dishes, from salads to soups and sauces. Growing chives at home ensures a continuous supply of aromatic leaves, and bottle gardening offers a simple, space-saving, and sustainable method for indoor propagation. By using recycled plastic bottles, gardeners can create an ideal microenvironment for fast root development while reusing household materials. This guide provides step-by-step instructions for cultivating fast-growing chives in bottle gardens.
Why Grow Chives in Bottles
Bottle gardening is an excellent approach for growing chives indoors, especially for urban gardeners with limited space. Some key benefits include:
-
Space Efficiency: Small bottles fit easily on kitchen counters, windowsills, or balconies.
-
Fast Rooting: Chives establish roots quickly in water or soil within bottles.
-
Eco-Friendly: Reusing plastic bottles reduces waste while providing an effective propagation container.
-
Controlled Environment: Bottles maintain humidity and moisture, promoting healthier, faster growth.
By creating a bottle garden, you provide chive cuttings with a protected environment that encourages rapid root formation and robust plant development.
Selecting and Preparing Chive Cuttings
Start with healthy, green chive stems, either from an established indoor plant or a fresh bunch purchased from a market. Each cutting should be approximately 4–6 inches long and free from yellowing or damaged leaves.
Trim the lower portion of the cutting just above a node, as roots will emerge from this area. Remove the lower leaves to prevent them from sitting in water or soil, which can cause rot. Keep a few leaves at the top to maintain photosynthesis and ensure continued growth during rooting. Using clean, sharp scissors or a knife ensures a fresh cut and increases the likelihood of successful propagation.
Preparing Plastic Bottles for Propagation
Plastic bottles act as mini-greenhouses, creating a humid, controlled environment that promotes rapid growth. Follow these steps to prepare your bottle garden:
-
Choose a clear plastic bottle of 500 ml to 1 liter to monitor root development.
-
Cut the bottle horizontally in half, creating a bottom section for water or soil and a top section to act as a humidity dome.
-
Fill the bottom half with clean water for water-based propagation or with well-draining soil for soil-based rooting.
-
Place the chive cutting into the medium, ensuring the base is stable and leaves remain above the water or soil.
-
Cover the cutting with the top half of the bottle to maintain humidity.
This setup reduces moisture loss, encourages root development, and provides protection from drafts or temperature fluctuations.
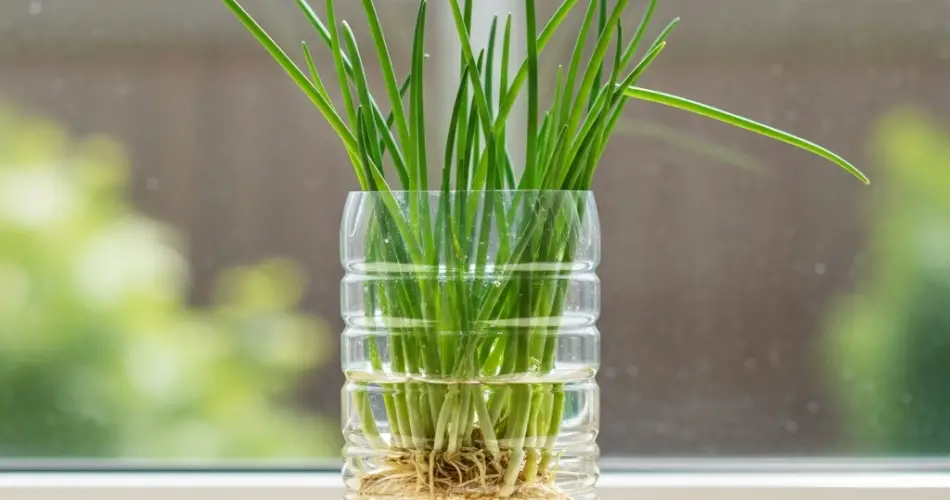
Rooting Chives in Water
Water propagation is particularly effective for fast-growing chives:
-
Insert the prepared cuttings into a bottle filled with clean, room-temperature water, keeping the base submerged while leaves remain above water.
-
Position the bottle in bright, indirect sunlight to stimulate root growth without overheating the stems.
-
Change the water every 2–3 days to prevent stagnation and maintain oxygen levels.
Within 1–2 weeks, white roots will begin to emerge from the nodes. Once the roots reach approximately 2 inches in length, the chives are ready to be transplanted into soil for long-term growth.
Soil-Based Bottle Propagation
Chives can also be rooted directly in soil within a bottle garden:
-
Fill the bottom section of the bottle with a well-draining soil mix or a combination of sand and compost.
-
Insert the cutting, ensuring it is stable and upright.
-
Cover with the top half of the bottle to maintain humidity.
-
Keep the soil lightly moist but avoid overwatering, which can lead to root rot.
Soil-based propagation typically produces robust, long-lasting plants, ready for harvest in 3–4 weeks.
Caring for Rooted Chives
After the chives have established roots, follow these care tips to encourage ongoing growth:
-
Watering: Keep the soil consistently moist without waterlogging.
-
Light: Provide 4–6 hours of bright, indirect sunlight daily.
-
Temperature: Ideal indoor temperatures range from 60–75°F (15–24°C).
-
Fertilization: Apply a balanced, diluted fertilizer every 2–3 weeks to promote healthy leaves.
Regularly harvesting the outer leaves stimulates new growth and prevents the plant from becoming overcrowded.
Benefits of Bottle Gardening for Chives
-
Fast root establishment and growth
-
Space-saving solution for indoor gardening
-
Eco-friendly use of recycled plastic bottles
-
Controlled environment encourages healthier plants
-
Easy to monitor root development and adjust care
Final Thoughts
Bottle gardening is a simple, sustainable, and highly effective method for growing fast-growing chives indoors. By selecting healthy cuttings, preparing bottles properly, and maintaining consistent care, gardeners can enjoy a continuous supply of fresh, flavorful chives throughout the year. This approach is ideal for small apartments, urban homes, and eco-conscious gardeners seeking a practical way to cultivate herbs indoors. With patience and proper care, chives grown in bottle gardens will develop into robust, aromatic plants that enhance both your cooking and indoor gardening experience.


