Lavender is a fragrant, versatile herb cherished for its aromatic flowers, culinary uses, and ornamental appeal. While lavender can be purchased as mature plants, propagating it at home is a rewarding way to expand your garden and ensure a continuous supply. One effective and budget-friendly method is creating a DIY bottle dome, which provides a mini-greenhouse environment ideal for young lavender cuttings.
Using a bottle dome for propagation offers numerous benefits. It retains humidity, encourages strong root development, and protects delicate cuttings from environmental stress and pests. This method is perfect for gardeners with limited space, balcony growers, and anyone interested in sustainable, hands-on gardening.
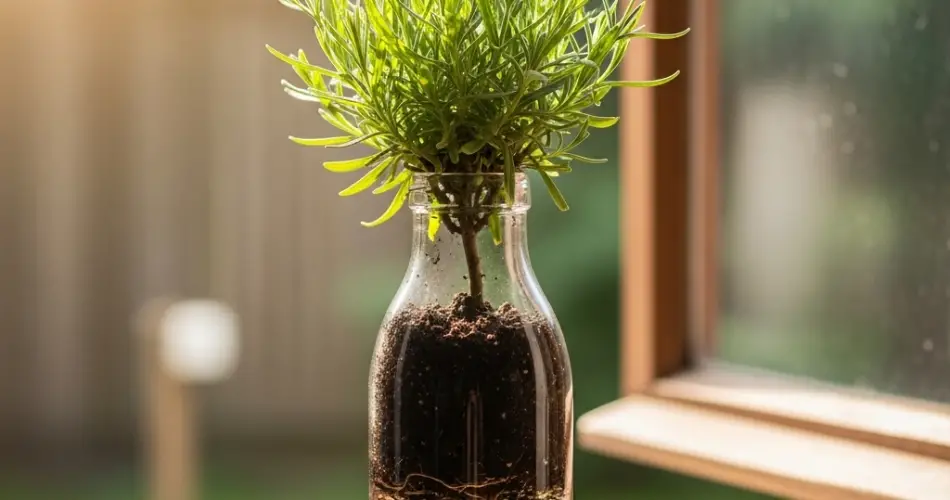
Why a Bottle Dome Works for Lavender
A bottle dome mimics greenhouse conditions, providing the ideal environment for lavender propagation:
-
Humidity control: The enclosed space keeps moisture levels consistent, preventing cuttings from drying out.
-
Temperature regulation: The dome maintains warmth, promoting faster root formation.
-
Pest protection: Elevated cuttings under the dome are less exposed to soil-borne pests and small insects.
-
Space-saving: Recycled bottles can be used vertically or horizontally, making them ideal for small patios, balconies, or windowsills.
By creating this microenvironment, gardeners can increase the success rate of lavender propagation while reusing materials in an eco-friendly way.
Materials Needed
To set up a DIY bottle dome for lavender, you will need:
-
Healthy lavender cuttings (3–5 inches long)
-
A clean plastic bottle (1–2 liters works well)
-
Scissors or a sharp knife
-
Potting soil or a well-draining medium (sand, perlite, or a mix)
-
Water
-
Optional: small pebbles for drainage
Ensuring all tools and bottles are clean helps prevent disease and encourages healthy growth.
Selecting Lavender Cuttings
The success of propagation depends largely on the quality of your cuttings:
-
Healthy stems: Choose young, non-flowering stems that are strong and vibrant.
-
Length: Cuttings should be 3–5 inches long to encourage root formation.
-
Leaf removal: Strip the lower 2 inches of leaves to reduce moisture loss and prevent rotting.
Proper selection of cuttings ensures faster rooting and stronger plants.
Preparing the Bottle Dome
Setting up the bottle correctly is key to creating a conducive propagation environment:
-
Cut the bottle: Slice a plastic bottle horizontally or remove the bottom. The top half can serve as the dome cover.
-
Drainage: Add a thin layer of small pebbles at the bottom if using soil to prevent waterlogging.
-
Add soil or medium: Fill the bottle with well-draining potting soil or a sand-perlite mix.
-
Moisture: Lightly water the medium until damp, but avoid saturation.
This setup maintains the right balance of moisture, drainage, and aeration for lavender cuttings.
Planting Lavender Cuttings
Planting cuttings properly ensures healthy root development:
-
Insert cuttings: Place each stem 1–2 inches into the soil or medium.
-
Stabilize: Firm the soil gently around the base to hold the cuttings upright.
-
Cover with dome: Place the top portion of the bottle over the cuttings to retain humidity. Remove briefly once a day to allow airflow and prevent mold.
Correct planting depth and stabilization help cuttings establish strong roots and grow vigorously.
Caring for Lavender Under the Dome
Once planted, lavender cuttings require consistent care:
-
Light: Place the bottle dome in bright, indirect sunlight. Direct sun can overheat the cuttings and damage young stems.
-
Temperature: Maintain a moderate temperature between 65–75°F (18–24°C) for optimal growth.
-
Watering: Keep the soil lightly moist. Mist occasionally if the environment becomes too dry, but avoid overwatering to prevent rot.
Roots typically form within 3–5 weeks, depending on environmental conditions.
Transplanting Rooted Lavender
After roots have developed, the cuttings can be transferred to permanent containers or garden beds:
-
Check roots: Ensure a healthy root system before transplanting.
-
Prepare soil: Use well-draining soil in pots or garden beds with proper drainage.
-
Plant carefully: Place rooted cuttings in soil, firming gently at the base, and water lightly.
-
Acclimate gradually: If moving outdoors, gradually introduce plants to direct sunlight and outdoor conditions.
Proper transplantation ensures long-term growth and abundant lavender foliage and flowers.
Common Challenges
-
Overwatering: Excess moisture can lead to root rot; maintain light, consistent soil dampness.
-
Poor airflow: Keep the dome ventilated briefly each day to prevent mold or fungal growth.
-
Weak cuttings: Use healthy, vigorous stems for best results.
Monitoring and adjusting care can help overcome these challenges and promote thriving plants.
Final Thoughts
Creating a simple DIY bottle dome is an easy, cost-effective, and eco-friendly way to propagate lavender. By selecting healthy cuttings, preparing a suitable bottle environment, and providing consistent care, gardeners can multiply lavender plants efficiently.
This method combines practicality, sustainability, and small-space gardening solutions, allowing you to enjoy fresh, aromatic lavender for cooking, decoration, and relaxation year-round.


