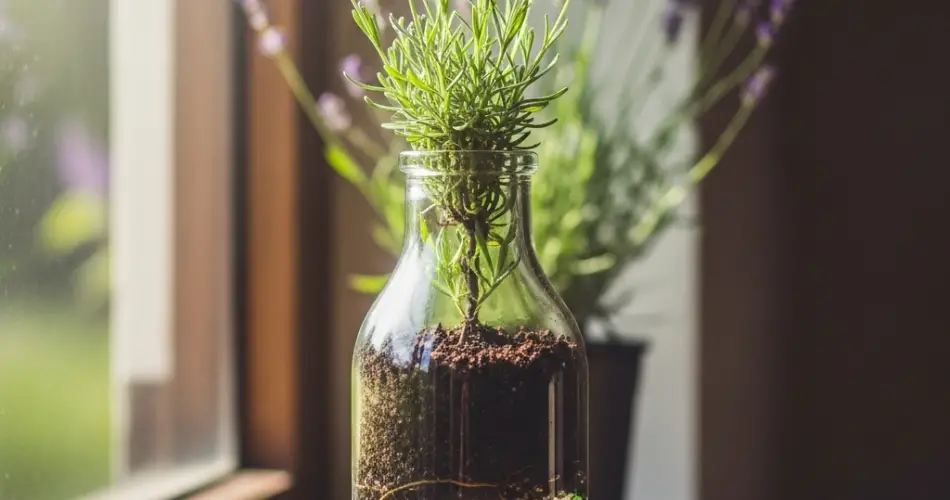
Lavender is a fragrant, versatile herb widely appreciated for its aromatic flowers, culinary uses, and decorative appeal. Growing lavender at home not only ensures a fresh supply but also adds beauty and fragrance to your living space. One of the simplest and most rewarding ways to cultivate lavender indoors is using clear bottles on your windowsill. This method allows you to observe root development, monitor growth closely, and enjoy hands-on gardening without needing a large outdoor area.
Using clear bottles for propagation creates a controlled environment that promotes healthy root development while conserving space and materials. This approach is perfect for urban gardeners, apartment dwellers, or anyone looking to multiply their lavender plants efficiently.
Why Clear Bottles Are Ideal for Lavender
Clear bottles offer several advantages for growing lavender indoors:
-
Root visibility: Being able to see the roots grow helps you monitor plant health and adjust care as needed.
-
Humidity retention: The enclosed space keeps soil and air moist, which is ideal for rooting young cuttings.
-
Space efficiency: Bottles fit neatly on windowsills or shelves, making them perfect for small areas.
-
Eco-friendly: Repurposing bottles reduces waste while providing an affordable propagation method.
This combination of benefits makes clear bottle propagation both practical and educational, allowing you to enjoy gardening in a compact space.
Materials Needed
To grow lavender in clear bottles, gather the following items:
-
Healthy lavender stems (cuttings of 3–5 inches)
-
Clean clear plastic bottles (1–2 liters recommended)
-
Scissors or a sharp knife
-
Potting soil or a well-draining medium (sand, perlite, or a mix)
-
Water
-
Optional: small pebbles for drainage
Ensuring that all materials are clean helps prevent disease and promotes healthy growth.
Selecting Lavender Cuttings
Choosing the right cuttings is critical for success:
-
Healthy stems: Select young, vibrant stems that are free from flowers or disease.
-
Cutting length: 3–5 inches is ideal for encouraging root formation.
-
Leaf removal: Strip the lower 2 inches of leaves to reduce moisture loss and prevent rot.
Well-prepared cuttings develop roots faster and grow into stronger, more resilient plants.
Preparing the Clear Bottle
Proper preparation of the bottle is key to creating an optimal microenvironment:
-
Cut the bottle: Slice the top off or cut horizontally, leaving a removable lid portion to serve as a mini-greenhouse dome.
-
Drainage layer: Add small pebbles or gravel at the bottom if using soil to prevent waterlogging.
-
Add soil or medium: Fill the bottle with a lightweight, well-draining medium such as potting soil combined with perlite.
-
Moisture: Lightly water the medium until damp but not saturated.
This setup balances moisture, drainage, and airflow, providing the perfect conditions for lavender cuttings to root.
Planting Lavender Cuttings
Planting cuttings correctly ensures healthy root growth:
-
Insert cuttings: Place each cutting 1–2 inches deep into the soil or medium.
-
Stabilize stems: Firm the medium gently around the base to hold the cuttings upright.
-
Cover with dome: Use the top portion of the bottle as a mini-greenhouse to maintain humidity. Remove briefly once daily to allow air circulation and prevent mold.
Proper depth and stabilization promote strong root systems and vigorous new growth.
Caring for Bottle-Grown Lavender
Lavender under a bottle dome requires consistent care:
-
Light: Place bottles on a windowsill with bright, indirect sunlight. Avoid intense direct sunlight that could overheat the cuttings.
-
Temperature: Maintain a moderate temperature range of 65–75°F (18–24°C).
-
Watering: Keep the soil lightly moist and mist occasionally. Avoid overwatering to prevent root rot.
Roots typically develop within 3–5 weeks, after which new shoots begin to appear.
Transplanting Rooted Lavender
Once roots are established, transplant the cuttings to larger containers or garden beds:
-
Check roots: Ensure the root system is healthy before transplanting.
-
Prepare containers: Use well-draining soil in pots or raised garden beds.
-
Plant carefully: Place rooted cuttings into soil, firming gently at the base, and water lightly.
-
Acclimate gradually: If moving outdoors, gradually expose plants to direct sunlight and outdoor conditions.
Regular harvesting and maintenance encourage strong growth and abundant aromatic foliage.
Common Challenges
-
Overwatering: Excess moisture can cause root rot. Maintain light, consistent dampness.
-
Poor airflow: Remove the bottle lid briefly each day to prevent mold and fungal growth.
-
Weak cuttings: Use vigorous, healthy stems to maximize rooting success.
Monitoring and adjusting care ensures thriving lavender plants.
Final Thoughts
Growing lavender in clear bottles on your windowsill is a simple, sustainable, and space-saving method for home gardeners. By selecting healthy cuttings, preparing a suitable bottle environment, and maintaining proper care, you can enjoy a continuous supply of fresh, aromatic lavender.
This method combines eco-conscious gardening, small-space efficiency, and hands-on observation. With patience and consistent attention, bottle-grown lavender will thrive indoors, providing fragrant leaves and flowers for cooking, teas, and decoration throughout the year.


