Dill is a versatile and aromatic herb prized for its feathery leaves and seeds, which enhance soups, salads, pickles, and sauces. Growing dill at home guarantees a fresh supply of this flavorful herb, and one efficient, eco-friendly way to propagate it is by using a DIY plastic bottle propagation dome. This method creates a controlled microenvironment that encourages fast root development while repurposing household plastic. It’s perfect for indoor gardeners, small-space gardeners, or anyone looking for a sustainable propagation solution.
Why Use a Plastic Bottle Dome for Dill
A propagation dome made from a plastic bottle offers several key advantages:
-
Maintains Humidity: Keeps the air around cuttings or seeds moist, preventing them from drying out.
-
Encourages Rooting: Creates a warm, stable environment that promotes faster root formation.
-
Protects Young Plants: Shields delicate cuttings from drafts, temperature fluctuations, and pests.
-
Sustainable Gardening: Reusing plastic bottles reduces household waste while serving a practical gardening purpose.
By providing a protective, humid environment, a bottle dome can increase the success rate of dill propagation, whether starting from cuttings or seeds.
Selecting and Preparing Dill Cuttings or Seeds
For propagation via cuttings, choose healthy, firm stems from a mature dill plant. Each cutting should be about 3–5 inches long and have several leaf sets. Remove the lower leaves to expose the nodes, as roots will develop from these points. Leaving a few leaves at the top helps maintain photosynthesis while roots form.
If propagating from seeds, select high-quality, fresh dill seeds. Seeds should be soaked in water for a few hours before planting to improve germination rates.
Preparing the Plastic Bottle Propagation Dome
Plastic bottles can be easily transformed into mini-greenhouses for dill:
-
Select a clear plastic bottle, ideally 500 ml to 1 liter, for transparency and convenience.
-
Cut the bottle horizontally in half, creating a bottom section for soil or water and a top section to serve as the humidity dome.
-
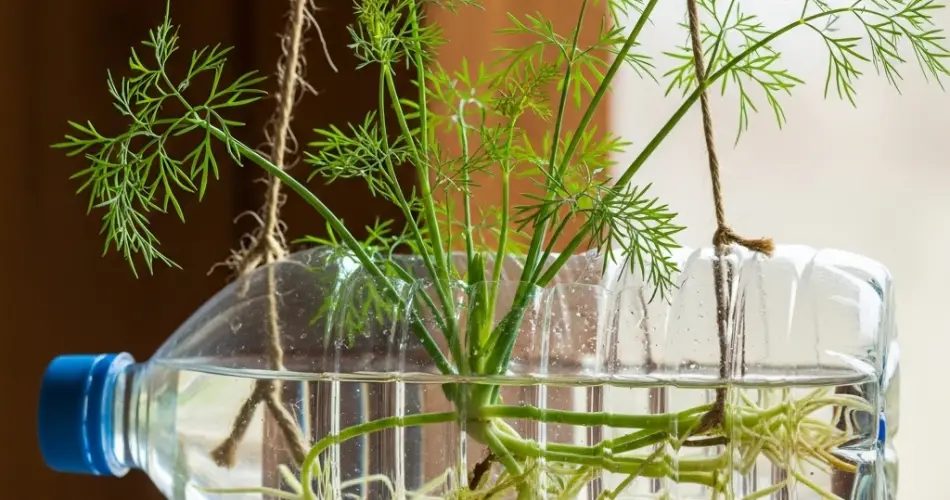
Fill the bottom section with well-draining potting mix if using seeds or soil-based cuttings, or with water for water propagation of cuttings.
-
Insert the dill cutting or plant the seed in the prepared medium.
-
Cover the cutting or seedling with the top half of the bottle to create a humid microenvironment.
This setup allows moisture to circulate around the plant while minimizing evaporation and protecting young plants from stress.
Caring for Dill Under a Bottle Dome
Place the bottle dome in a location with bright, indirect sunlight. Avoid direct afternoon sun, which can overheat the cuttings or seedlings.
Keep the soil or water lightly moist, checking every few days. For soil propagation, misting occasionally can help maintain consistent humidity. Open the dome occasionally to provide fresh air and prevent mold or fungal growth. Dill cuttings usually develop roots within 1–2 weeks, while seeds may germinate in 7–14 days depending on conditions.
Transplanting Rooted Dill
Once cuttings have developed strong roots or seedlings have grown several inches tall, they are ready to be transplanted:
-
Prepare a larger container or garden bed with well-draining soil enriched with compost.
-
Carefully remove the plant from the bottle dome, taking care not to damage the roots.
-
Plant the dill in the new location, covering the roots and firming the soil gently.
-
Water lightly and place the plant in a sunny spot, gradually acclimating it to full sun if necessary.
Proper transplanting ensures healthy growth and a continuous supply of fresh dill leaves.
Caring for Dill After Transplanting
-
Sunlight: Dill thrives in full sun but can tolerate partial shade.
-
Watering: Keep soil consistently moist, but avoid waterlogging, which can harm roots.
-
Fertilization: A balanced, diluted fertilizer every 3–4 weeks promotes strong, healthy growth.
-
Harvesting: Regularly trim outer leaves to encourage bushier growth and prevent the plant from flowering too early.
Benefits of Plastic Bottle Dill Propagation
-
Promotes faster root development and successful propagation
-
Space-efficient, ideal for indoor or small-space gardening
-
Sustainable and cost-effective by repurposing plastic bottles
-
Protects young plants from environmental stress and pests
-
Easy to monitor growth and adjust care as needed
Final Thoughts
Using a plastic bottle as a DIY propagation dome is a simple, sustainable, and highly effective way to grow dill from cuttings or seeds. By selecting healthy material, preparing bottles correctly, and maintaining proper care, gardeners can enjoy fresh, aromatic dill year-round. This method is particularly suitable for indoor gardeners, small-space enthusiasts, and eco-conscious growers who want a practical and low-cost way to expand their herb garden. With patience and consistent attention, bottle-propagated dill will develop into robust, flavorful plants ready to enhance your meals and indoor garden.


