Dill is a fragrant herb prized for its bright flavor and versatility in cooking, from pickling to salads and sauces. While store-bought dill is convenient, growing your own ensures a steady supply, superior flavor, and an opportunity to practice sustainable gardening. One practical and eco-friendly method for cultivating dill is using recycled bottles, which create a compact, controlled environment ideal for small-space gardening.
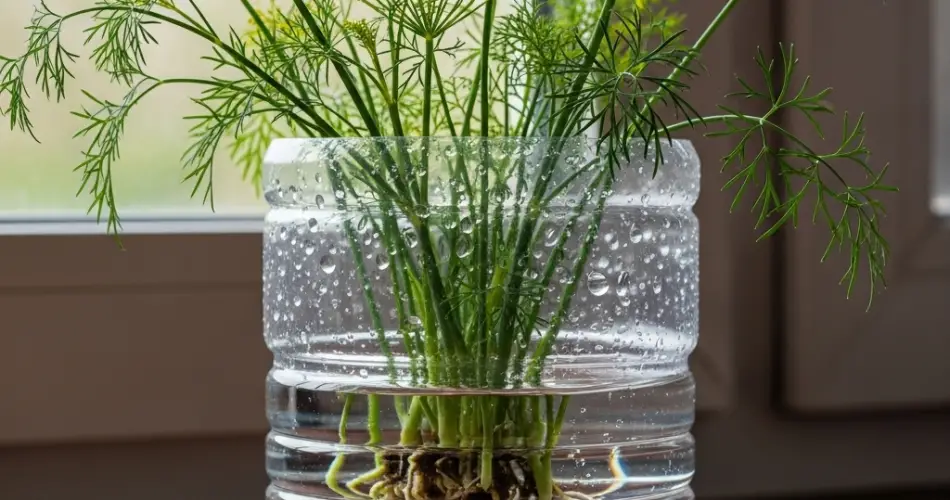
Bottle-grown dill is particularly appealing for urban gardeners, apartment dwellers, and anyone interested in sustainable practices. By reusing plastic bottles, you reduce waste while producing fresh, aromatic dill at home. This method is simple, affordable, and allows gardeners to closely observe root development, ensuring healthy plant growth.
Why Grow Dill in Bottles
Using bottles as containers for dill offers several benefits:
-
Space-efficient: Bottles fit on windowsills, balconies, or kitchen counters, making them ideal for small spaces.
-
Moisture control: Enclosed bottles maintain humidity and consistent soil moisture, promoting strong root growth.
-
Pest reduction: Elevated and enclosed containers reduce exposure to soil-borne pests and insects.
-
Sustainable: Repurposing plastic bottles provides a cost-effective and environmentally conscious gardening solution.
This method combines practicality with sustainability, allowing gardeners to enjoy fresh dill year-round without relying on store-bought produce.
Materials Needed
To grow dill in bottles, you will need the following:
-
Healthy dill seeds or small seedlings
-
Clean plastic bottles (1–2 liters work well)
-
Scissors or a sharp knife
-
Potting soil or a well-draining medium (sand, perlite, or a mix)
-
Water
-
Optional: small pebbles for drainage
Using clean materials prevents disease and ensures a higher success rate for your dill plants.
Preparing the Bottle
Proper preparation of the bottle is essential for successful dill growth:
-
Cut the bottle: Slice the top off horizontally or remove the bottom to create an open planter. The top can later act as a mini-greenhouse cover.
-
Add drainage: Place a thin layer of pebbles or small stones at the bottom to prevent waterlogging.
-
Add soil or medium: Fill the bottle with well-draining potting soil or a sand-perlite mix to provide aeration and nutrients.
-
Moisture: Lightly water the soil until damp but not saturated.
This setup maintains proper moisture and airflow while allowing dill roots to develop freely.
Planting Dill Seeds or Seedlings
Planting correctly ensures robust growth and a high yield:
-
Seeds: Sprinkle seeds evenly on the soil surface and cover lightly with soil.
-
Seedlings: Place seedlings 1–2 inches deep in the soil, spacing them to allow adequate airflow.
-
Stabilize: Firm the soil gently around seedlings or cuttings to support upright growth.
-
Humidity cover: Use the top portion of the bottle as a dome to retain humidity, removing it briefly each day to allow airflow and prevent mold.
Correct planting depth and spacing encourage strong root systems and healthy foliage.
Caring for Bottle-Grown Dill
Proper care is essential for healthy dill growth:
-
Light: Place bottles in bright, indirect sunlight. Dill prefers at least 4–6 hours of sunlight daily.
-
Temperature: Maintain moderate indoor temperatures between 60–75°F (16–24°C).
-
Watering: Keep the soil lightly moist, misting occasionally. Avoid overwatering to prevent root rot.
-
Air circulation: Remove the bottle dome briefly each day to prevent fungal growth.
With consistent care, dill seeds usually germinate within 7–14 days, and seedlings develop strong roots in about 3–4 weeks.
Harvesting Dill
Dill is ready to harvest once the plant reaches 6–8 inches in height:
-
Selective harvesting: Snip individual stems from the outer edges of the plant to encourage continued growth.
-
Regular trimming: Frequent harvesting prevents flowering and maintains tender, flavorful leaves.
-
Storage: Fresh dill can be used immediately, stored in water like cut flowers, or dried for long-term use.
Proper harvesting ensures a continuous supply of fresh dill throughout the growing season.
Common Challenges
-
Overwatering: Excess moisture can cause root rot. Keep soil lightly moist and well-drained.
-
Poor airflow: Ventilate the bottle daily to prevent mold and fungus.
-
Weak seedlings: Use healthy seeds or seedlings for the best growth results.
Monitoring and adjusting care can overcome these common challenges and produce strong, productive dill plants.
Final Thoughts
Growing dill in bottles is a simple, sustainable, and space-saving method for home gardeners. By selecting healthy seeds or seedlings, preparing a suitable bottle environment, and maintaining consistent care, you can enjoy fresh, aromatic dill year-round.
This approach combines eco-friendly gardening with practical small-space solutions, allowing you to cultivate a thriving herb garden even in limited areas. With patience and attention, bottle-grown dill can provide flavorful leaves for cooking, garnishes, and pickling, transforming your kitchen into a source of sustainable, homegrown herbs.


