If you love growing your own food but are limited by space, a vertical chili pepper garden is the perfect solution. By using recycled plastic containers, you can grow vibrant, spicy chili peppers even on the smallest balcony, wall, or patio. This method is space-efficient, eco-friendly, and ideal for urban dwellers or beginner gardeners looking to cultivate their own supply of chilies at home.
Chili peppers are compact, productive, and adaptable to container gardening. They thrive in well-drained soil and sunny conditions, making them an excellent choice for vertical gardening with plastic bottles or containers.
Why Choose Vertical Gardening?
Vertical gardening allows you to make the most of small spaces by growing upward instead of outward. When paired with plastic containers, this approach becomes both practical and sustainable.
Benefits of vertical chili gardening include:
-
Maximizes limited space
-
Encourages recycling and waste reduction
-
Enhances air circulation and sunlight exposure
-
Keeps plants off the ground, reducing pests
-
Makes watering and harvesting more accessible
This setup is especially effective on sunny balconies, fences, or exterior walls with plenty of light.
What You’ll Need
Before getting started, gather the following materials:
-
Recycled plastic bottles (1.5 to 2-liter size) or similar plastic containers
-
Sharp knife or scissors
-
Heated nail or screwdriver for drainage holes
-
Potting soil and compost
-
Chili pepper seeds or seedlings
-
Rope, wire, or hooks for mounting
-
A sunny wall, balcony, or fence
-
Watering can or spray bottle
Optional: Black paint, fabric, or foil to block sunlight from the container’s root zone (helps prevent algae growth).
Selecting Chili Pepper Varieties
Chilies come in a wide range of sizes, heat levels, and growth habits. For vertical gardening, choose compact or dwarf varieties that do well in containers. Some ideal options include:
-
Cayenne – Slim, spicy, and very productive
-
Thai Hot – Compact plant with small fiery chilies
-
Jalapeño – Mild to medium heat, container-friendly
-
Hungarian Wax – Sweet heat and prolific
-
Tabasco – Colorful and bushy, ideal for wall planters
These types are relatively easy to manage in vertical systems and produce reliably in containers.
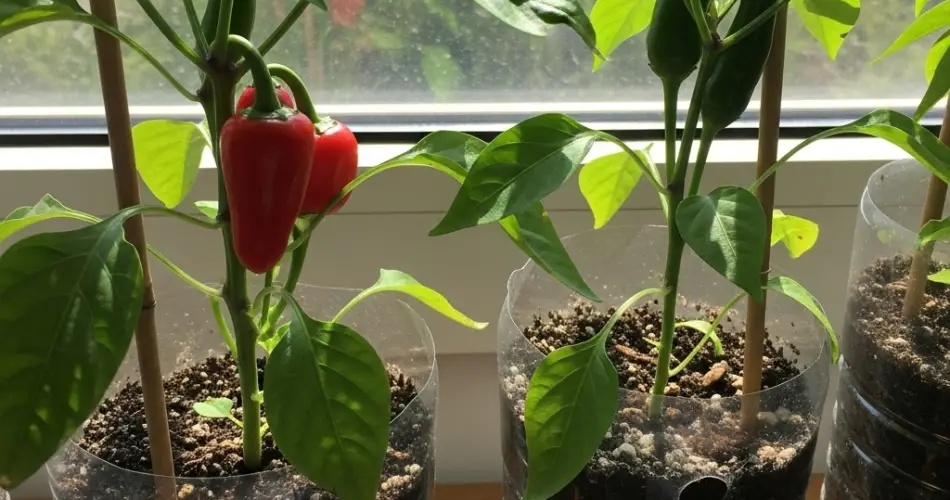
Preparing the Plastic Containers
-
Clean and Dry
Wash the containers thoroughly, remove any labels, and let them dry. -
Cut Openings
Cut a rectangular window on the side of each bottle or container, large enough to plant and water. Keep the top and bottom intact for structure. -
Add Drainage Holes
Poke several holes in the bottom and lower sides to allow water to escape. -
Light Protection (Optional)
To reduce algae and protect roots from sun exposure, wrap the container in dark material or paint the outside. -
Mount the Containers
Use hooks, ropes, or screws to mount the containers vertically on a wall or wooden frame. Leave enough space between each tier for light and airflow.
Soil and Planting
-
Prepare the Soil Mix
Use a well-draining blend of:-
60% potting mix
-
30% compost
-
10% sand or perlite
-
-
Fill the Containers
Fill each container about three-quarters full. Lightly water to moisten the soil before planting. -
Plant the Seeds or Seedlings
-
Seeds: Sow 2–3 seeds per container, ¼ inch deep. Thin to the strongest seedling once they sprout.
-
Seedlings: Plant at the same depth as in their nursery pot. Gently firm the soil around the stem.
-
Light, Water, and Maintenance
-
Sunlight: Chilies require 6–8 hours of full sun daily. South or west-facing walls are ideal.
-
Watering: Keep the soil evenly moist, but not soggy. Water when the top inch feels dry. Vertical setups may dry out faster, so check daily.
-
Fertilizing: Feed with a diluted organic fertilizer every 2–3 weeks, especially during flowering and fruiting stages.
-
Support: Some varieties may need small stakes or string for support as they grow taller and heavier with fruit.
Pollination and Pests
Most chili varieties are self-pollinating, but gently shaking the plants or brushing flowers with a small paintbrush can boost pollination—especially in wind-protected vertical gardens.
Common pests include aphids and spider mites. Treat with neem oil or insecticidal soap at the first sign of infestation. Ensure good airflow to reduce fungal issues.
Harvesting Your Chilies
Chilies are typically ready to harvest 60 to 90 days after planting, depending on the variety. Harvest once they reach their full color—green, red, yellow, or purple—and are firm to the touch. Use scissors to snip peppers cleanly from the stem to avoid damaging the plant.
Frequent harvesting encourages more fruit production.
Replanting and Rotating
After your final harvest, refresh the soil in each container with compost and rotate your crop if possible. You can grow herbs, leafy greens, or even small tomatoes in the same vertical system. Clean and inspect each container before reuse to prevent disease build-up.
Final Thoughts
Creating a vertical chili pepper garden using plastic containers is a simple, effective way to grow your own hot peppers in a small space. It’s low-cost, sustainable, and satisfying—perfect for balconies, patios, and even indoor sunlit walls.
With just a few bottles, some soil, and sunlight, you can enjoy a continuous supply of homegrown chilies right at your fingertips. Whether you’re growing for flavor, spice, or beauty, this setup brings a productive twist to modern urban gardening.


