Growing fresh cabbage at home doesn’t require a large backyard or garden plot. In fact, with a few recycled plastic bottles and some sunlight, you can grow your own healthy, leafy cabbage right on a balcony, patio, or windowsill. This do-it-yourself approach not only saves space, but it also turns plastic waste into productive planters—perfect for those seeking sustainable gardening solutions in compact urban environments.
This method is simple, budget-friendly, and rewarding. Whether you’re new to gardening or an experienced grower looking for new techniques, growing cabbage in bottles is a practical project that can yield impressive results.
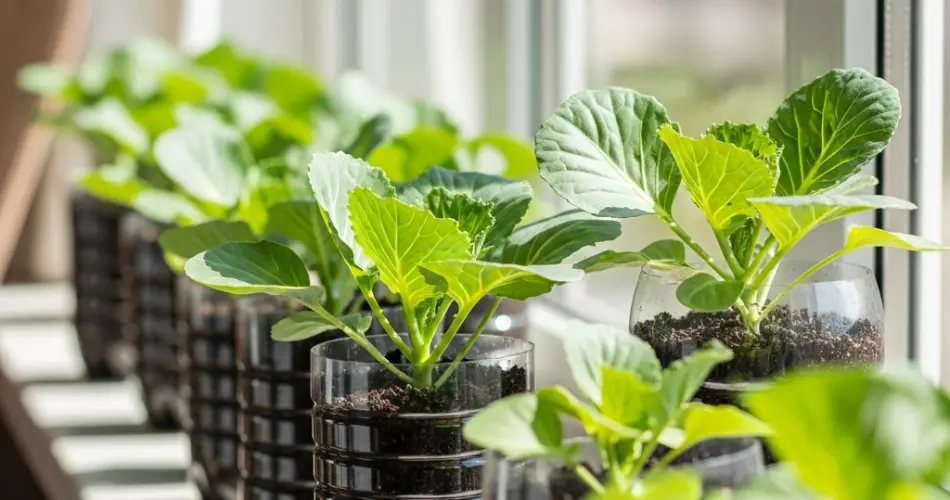
Why Use Plastic Bottles for Growing Cabbage?
Plastic bottles are incredibly versatile for container gardening. They offer several key benefits:
-
Easy to find and reuse, reducing household plastic waste
-
Compact and portable, ideal for limited spaces like balconies or window ledges
-
Customizable, with drainage, airflow, and planting windows
-
Suitable for vertical or horizontal arrangements, maximizing available sunlight
Cabbage grows well in containers, especially when given enough space for its roots and regular care. Using plastic bottles is a creative way to keep your gardening low-cost and environmentally conscious.
Materials Needed
To begin your DIY cabbage garden, you’ll need:
-
Several 5-liter plastic bottles (larger bottles give better root room)
-
Sharp scissors or utility knife
-
Heated nail or drill for drainage holes
-
Potting mix
-
Compost or aged manure
-
Cabbage seeds or seedlings (choose compact varieties)
-
Watering can or spray bottle
-
Optional: dark cloth or black paint to wrap clear bottles and block sunlight
Preparing the Bottles
-
Clean the Bottles
Wash bottles thoroughly to remove any labels, residue, or bacteria. Let them dry fully before use. -
Create a Planting Window
Cut out a rectangular section on one side of the bottle, large enough to allow access for soil and planting. -
Make Drainage Holes
Use a drill or heated metal rod to create several small holes in the bottom of the bottle to allow excess water to escape. -
Block Light if Necessary
If your bottles are clear, it’s best to paint them or wrap them with dark cloth. This helps prevent sunlight from reaching the roots, which can cause overheating or algae growth. -
Arrange the Bottles
You can place them upright on a shelf, lay them horizontally along a balcony railing, or even hang them vertically with string. Choose an arrangement that provides each plant with 4–6 hours of daily sunlight.
Choosing the Right Cabbage Variety
For bottle growing, compact and early-maturing cabbage varieties work best. These include:
-
Golden Acre
-
Pixie
-
Caraflex (a cone-shaped cabbage)
-
Mini Green
-
Red Express
These varieties form smaller heads and are more suitable for container growth compared to large, sprawling types.
Preparing the Soil
Cabbage needs well-draining, nutrient-rich soil to thrive.
Suggested mix:
-
50% all-purpose potting mix
-
30% compost or worm castings
-
20% perlite or coco coir for improved drainage and aeration
Mix thoroughly and moisten lightly before planting.
Planting Steps
-
Fill the Bottle with Soil
Fill the container up to about 2 inches below the top or planting window. -
Sow Seeds or Plant Seedlings
-
If sowing seeds: Plant 1–2 seeds about ¼ inch deep and thin to the strongest one after germination.
-
If transplanting: Dig a hole large enough for the seedling’s roots and gently press the soil around it.
-
-
Water Lightly
Water after planting to settle the soil. Maintain consistent moisture, especially during the early stages of growth. -
Position for Sunlight
Place the containers where they receive morning sunlight or filtered afternoon sun. Cabbage prefers cooler temperatures and mild sunlight.
Maintenance and Care
-
Watering: Keep soil consistently moist but never soggy. Bottle gardens dry faster, so monitor daily.
-
Fertilizing: Apply diluted compost tea or organic liquid fertilizer every two to three weeks for healthy leaf development.
-
Pest Control: Watch for cabbage worms, aphids, or whiteflies. Spray with neem oil or use floating row covers for protection.
Remove yellowing leaves as the plant matures to keep airflow around the base.
Harvesting Your Cabbage
Cabbage is typically ready for harvest within 60 to 90 days, depending on the variety. The head should feel firm and compact when gently squeezed.
To harvest:
-
Use a sharp knife to cut the cabbage at the base.
-
Leave the root system intact if you want to try for a smaller second crop from side shoots.
After harvesting, clean the container and refresh the soil if you plan to grow another round.
Reuse and Rotation
Bottles can be reused several times. Remove old plant debris and replenish the soil with compost or fresh mix. To maintain soil health, rotate crops—follow cabbage with leafy greens, herbs, or root vegetables like radishes.
Big Harvests from Small Spaces
With just a few bottles and some sunlight, anyone can grow cabbage at home. This DIY project proves that limited space doesn’t have to limit your gardening potential. Bottle gardening is a simple, sustainable way to enjoy homegrown produce—right from your balcony or windowsill.


