Growing cabbage at home is easier than you might think—even if you don’t have a traditional garden. With just a few plastic bottles and some basic materials, you can create a compact and efficient growing system right on your balcony, windowsill, or patio. Bottle gardening is a space-saving, sustainable, and budget-friendly method ideal for urban gardeners or anyone with limited space.
Cabbage is a cool-weather vegetable that adapts surprisingly well to container growing, and using plastic bottles helps repurpose waste into functional mini-planters. This method not only cuts down on cost and clutter, but it also puts fresh, healthy cabbage within arm’s reach.
Why Grow Cabbage in Bottles?
Plastic bottles are lightweight, easy to handle, and abundant. Instead of throwing them away, turning them into planters allows you to start a small-scale, eco-conscious garden almost anywhere.
Benefits include:
-
Makes use of vertical or tight spaces
-
Reduces waste by reusing plastic bottles
-
Minimizes the need for large garden beds or expensive pots
-
Provides excellent drainage and soil control
-
Makes gardening more accessible to beginners
What You’ll Need
Before you start planting, gather these supplies:
-
2-liter or 5-liter plastic bottles (1 per cabbage plant)
-
A sharp utility knife or scissors
-
Heated nail or screwdriver for creating holes
-
Good-quality potting soil
-
Compost or organic fertilizer
-
Cabbage seeds or young seedlings
-
Watering can or spray bottle
-
Sunny location (balcony, windowsill, or patio)
-
Twine or hooks (if hanging)
Choosing the Right Variety
Some cabbage varieties are better suited for small containers. Choose compact or fast-maturing types such as:
-
Golden Acre – A popular compact head variety
-
Mini Savoy – Small, textured heads
-
Pixie Cabbage – Designed for container growing
-
Red Express – Colorful and space-efficient
-
Chinese cabbage (Napa type) – Loose-leaf and excellent in small planters
These varieties grow well in limited soil depth and don’t require much horizontal space.
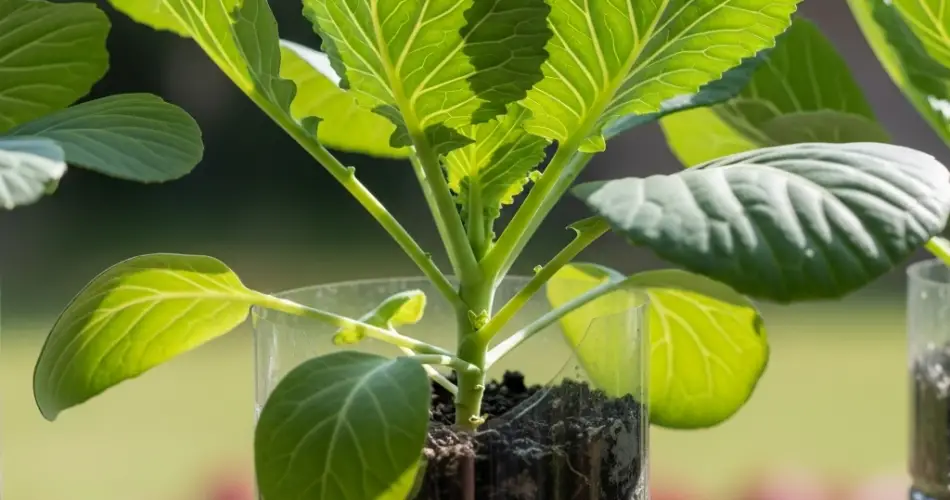
Preparing the Bottles
-
Clean the Bottles
Remove labels, rinse thoroughly, and let dry. -
Cut the Planting Opening
Cut off the top third of the bottle or make a wide rectangular window on the side. Leave the cap on to keep soil from spilling out during setup. -
Add Drainage Holes
Use a heated nail or screwdriver to poke 4–6 small holes at the bottom of the bottle for water drainage. -
Optional: Light Blocking
If using clear plastic, wrap the outside with dark cloth or paper to prevent algae and protect roots from light exposure. -
Stabilize the Planter
Place the bottle on a tray, shelf, or secure surface. If hanging, thread twine through holes punched near the top and tie firmly for balance.
Soil and Planting
-
Prepare the Soil Mix
Combine:-
60% potting mix
-
30% compost
-
10% sand or perlite for drainage
-
-
Fill the Bottle
Add soil up to 2 inches below the opening. Gently press down but don’t compact the soil too tightly. -
Plant Seeds or Seedlings
-
Seeds: Sow 2–3 seeds ½ inch deep in the center. Keep the strongest seedling once they sprout.
-
Seedlings: Dig a hole and place the young plant at the same depth it was growing before. Firm the soil around the base.
-
-
Water Carefully
Use a watering can or spray bottle to moisten the soil. Avoid overwatering to prevent root rot.
Light and Temperature
Cabbage prefers cooler weather and moderate sun. Place your bottle planter in a location that receives at least 4–6 hours of sunlight daily. East-facing balconies or shaded windowsills work well.
In hot climates, provide partial shade during peak afternoon hours. Indoors, a grow light can help supplement natural light if needed.
Ongoing Care
-
Watering: Keep soil consistently moist but not soggy. Water when the top inch of soil feels dry.
-
Fertilizing: Every 2–3 weeks, apply a balanced liquid fertilizer or compost tea to support growth.
-
Pest Control: Watch for cabbage worms and aphids. Remove them manually or use neem oil as a natural deterrent.
-
Pruning: Remove yellowing or damaged outer leaves to help the plant focus energy on forming a tight head.
Harvesting Your Cabbage
Most cabbage varieties mature in 60 to 90 days. Harvest when the head feels firm and full. Use a sharp knife to cut it at the base, leaving the lower leaves and root system intact.
Some varieties may sprout smaller secondary heads after the main one is cut. These can be harvested later as bonus crops.
Reuse and Replant
After harvest, remove any old roots and refresh the soil with compost. Replant with another cabbage seedling or rotate with herbs or leafy greens to give the soil a break. Clean the bottle before reusing it to prevent pest and disease buildup.
Final Thoughts
Bottle gardening is a smart and sustainable way to grow your own food at home. With just a few tools and some recycled materials, you can raise crisp, healthy cabbage in the smallest of spaces. Whether you’re working with a balcony, windowsill, or a sunny wall, this method puts homegrown vegetables within easy reach—no garden required.


