If you’re looking for a refreshing herb that’s easy to grow and perfect for small spaces, mint is the answer. With its invigorating aroma and fast-growing nature, mint thrives in containers and is ideal for indoor gardening. Even better, you don’t need fancy pots or a large garden—just a few plastic bottles, a sunny spot, and some basic care.
Upcycling plastic bottles into herb planters is a creative and sustainable way to grow your own mint at home. Whether you live in a small apartment, have limited garden space, or simply want to reduce plastic waste, this DIY approach allows you to grow fresh, flavorful mint almost anywhere.
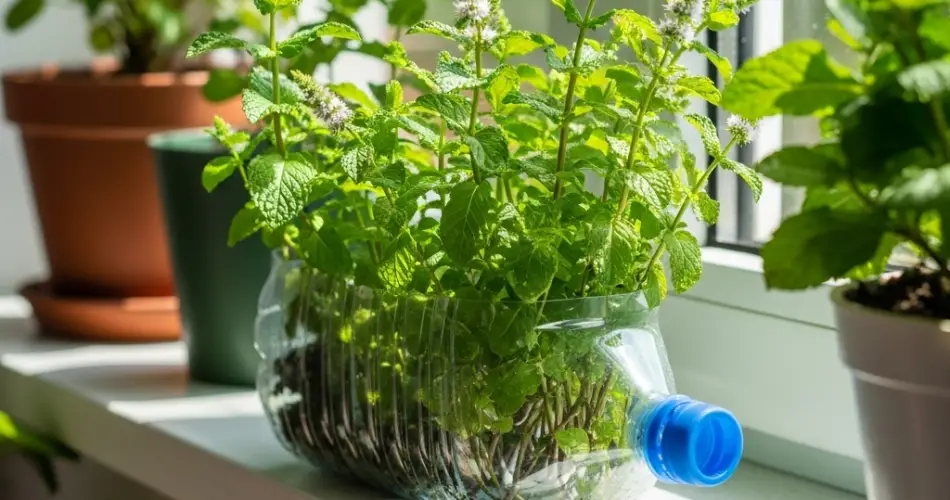
Why Use Plastic Bottles to Grow Mint?
Plastic bottles are readily available and easy to repurpose. Instead of throwing them away, transforming them into herb containers helps reduce waste and saves money. Mint is a vigorous plant with shallow roots, making it an excellent match for container gardening—including plastic bottles.
Benefits of growing mint in plastic bottles:
-
Cost-effective and eco-friendly
-
Easy to move and rearrange for light and space
-
Ideal for small spaces like windowsills, balconies, and countertops
-
Helps control mint’s spread, as it can be invasive in garden beds
-
Keeps fresh herbs within reach for teas, cooking, or garnishing
With just a few materials, you can turn ordinary plastic bottles into productive mint gardens that look great and smell even better.
What You’ll Need
To start your bottle garden, collect the following items:
-
Clean plastic bottles (1.5 to 2 liters in size)
-
Scissors or a utility knife
-
Potting soil (light and well-draining)
-
Mint cuttings or nursery-bought mint plant
-
Pebbles or mesh for drainage (optional)
-
A shallow tray to catch water
-
Watering can or spray bottle
Step 1: Prepare the Plastic Bottle Planter
There are two main ways to prepare plastic bottles for planting: vertical or horizontal. For mint, either works well, but the horizontal method allows for more surface space and airflow.
Horizontal planter method:
-
Clean the bottle and remove any labels.
-
Cut a rectangular opening on one side of the bottle, large enough for soil and plant placement. Leave the rest of the bottle intact to hold soil and retain shape.
-
Poke 4–5 small drainage holes at the bottom using a heated needle or sharp tool.
-
Place a layer of pebbles or mesh at the base to improve drainage (optional).
-
Fill the bottle with potting soil, leaving about an inch below the opening.
Step 2: Planting Mint
You can start mint from cuttings or transplant a small mint plant purchased from a nursery.
From cuttings:
-
Choose healthy stems about 4–6 inches long.
-
Remove the lower leaves and place the stems in a glass of water until roots form (about 7–10 days).
-
Once roots are visible, plant the cuttings in the prepared bottle.
From a plant:
-
Carefully remove the mint from its original container.
-
Place it in the soil, firming gently around the roots.
-
Water lightly to help the plant settle in.
Step 3: Light and Placement
Mint prefers bright, indirect sunlight, but it can also tolerate partial shade. Too much direct sunlight may scorch the leaves, especially indoors.
Ideal locations include:
-
A windowsill with filtered light
-
A balcony that receives morning sun
-
A well-lit kitchen counter
Rotate the bottle every few days so the plant grows evenly and doesn’t lean toward the light.
Step 4: Watering and Feeding
Mint loves moisture but dislikes soggy roots. Keeping the balance right is key.
Watering tips:
-
Check the top inch of soil; water when it feels dry.
-
Mist the leaves during hot weather to keep them fresh.
-
Make sure water can drain freely to prevent root rot.
Fertilizer:
-
Mint doesn’t need heavy feeding.
-
Use a diluted liquid fertilizer every 4–6 weeks during active growth.
-
Avoid overfeeding, which can lead to leggy growth and weak flavor.
Step 5: Pruning and Harvesting
Regular pruning keeps mint bushy and healthy. It also prevents the plant from flowering too early, which can affect leaf flavor.
Pruning tips:
-
Pinch off the top few inches of growth once the plant reaches 6–8 inches tall.
-
Remove any flowers as soon as they appear to keep leaves flavorful.
-
Harvest by snipping leaves and stems just above a leaf node.
Frequent harvesting encourages more growth, so don’t hesitate to use your mint regularly.
Common Issues and How to Fix Them
-
Yellowing leaves: Could be caused by overwatering or poor drainage. Ensure water flows out freely.
-
Weak stems or leggy growth: Move the plant to a brighter location and prune back to encourage bushiness.
-
Pests: Mint is usually pest-resistant, but occasional aphids or spider mites may appear. A gentle spray of water or neem oil can resolve this.
Conclusion
Growing mint in recycled plastic bottles is a simple, eco-friendly project that rewards you with fresh herbs for months. It’s perfect for small-space gardeners, beginners, or anyone looking to reduce waste and cultivate something green. With just a bit of effort and attention, your plastic bottle mint garden can become a fragrant, flavorful feature on your windowsill or balcony—truly a “mint-astic” addition to your home.


