Known for their glossy, heart-shaped leaves and vibrant, waxy blooms, anthuriums bring a burst of tropical color into indoor spaces. While they’re commonly grown in decorative ceramic or plastic pots, anthuriums also adapt beautifully to recycled plastic bottle setups. This eco-friendly method not only supports sustainability but also gives you a unique way to display your plant with minimal materials.
Growing anthuriums in recycled bottles is ideal for plant lovers who want to save space, reduce waste, and maintain a lush indoor garden. Whether placed on a bright windowsill or suspended as part of a vertical garden, a bottle-grown anthurium offers long-lasting tropical beauty with relatively low maintenance.
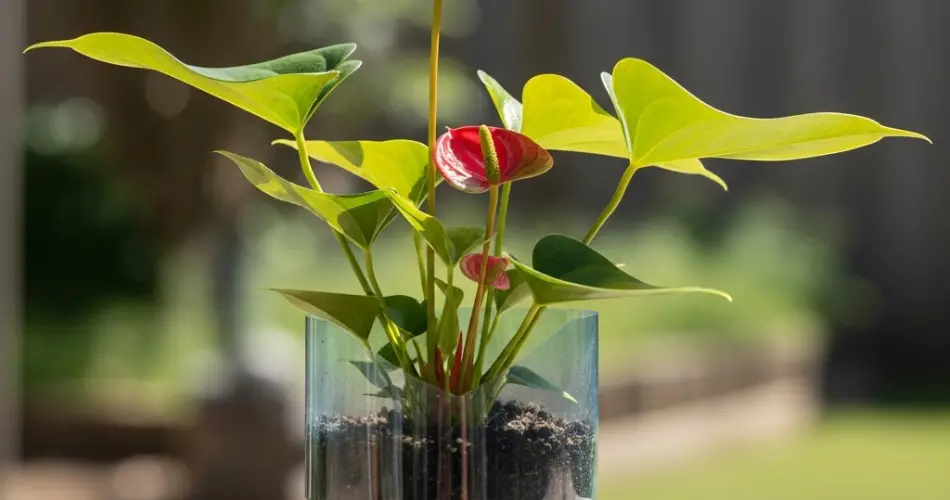
Why Grow Anthurium in a Bottle?
Anthuriums are epiphytic by nature, meaning they naturally grow on other surfaces rather than in dense soil. This makes them ideal candidates for creative containers with excellent drainage and airflow—like a modified plastic bottle.
Recycled bottles offer several advantages:
-
Sustainability: Reuse plastic waste instead of buying new planters.
-
Visibility: Transparent containers allow for easy monitoring of root health and moisture.
-
Affordability: Plastic bottles are readily available and easy to customize.
-
Space-saving: Perfect for windowsills, shelves, and vertical gardens.
With a few simple tools and the right setup, you can give your anthurium the conditions it loves—bright light, well-aerated roots, and consistent moisture—without needing traditional pots.
Materials You’ll Need
-
A healthy anthurium plant or division
-
A clean plastic bottle (1 to 1.5 liters)
-
Sharp scissors or craft knife
-
Orchid bark or chunky, well-draining soil mix
-
Activated charcoal (optional, for freshness)
-
Decorative elements (twine, paint, fabric)
-
Optional: support stick for taller plants
Preparing the Bottle Planter
Choose a bottle size based on the size of your anthurium. Straight-sided bottles work best for stability and easy cutting.
-
Cut the bottle horizontally, about one-third from the top.
-
Use the bottom two-thirds as your planting container.
-
Punch a few drainage holes at the base using a hot nail or sharp object.
-
Wrap the bottle with jute, fabric, or paint the exterior to add style and reduce light exposure to the roots.
If you’d like to create a self-watering version, leave the bottle cap in place, insert a cotton wick through it, and invert the top portion into the bottom to act as a reservoir. Fill with water and plant above.
Choosing the Right Growing Medium
Anthuriums thrive in loose, well-draining, and aerated mixes. Avoid dense potting soils that trap water and cause root rot.
Ideal mix:
-
Orchid bark (or coconut husk chips)
-
Perlite or pumice
-
A small amount of peat moss or coco coir
-
Optional: a pinch of activated charcoal to reduce odors and bacteria
Mix thoroughly and moisten slightly before planting.
Planting the Anthurium
If using a full plant, gently remove it from its current pot and shake off old soil. If dividing a large plant, ensure each section has roots and at least one growing point.
-
Fill the bottle base with your soil mix to about halfway.
-
Position the anthurium in the center with roots spread out.
-
Add more mix around the roots until the plant is securely upright.
-
Press gently and add a support stick if needed.
Water lightly to settle the mix, but avoid overwatering—especially in plastic containers that retain moisture.
Placement and Light Requirements
Anthuriums prefer bright, indirect light. A location near an east- or north-facing window is ideal. Avoid direct sun, which can burn the leaves, and low-light spots, which reduce flowering.
Keep the temperature between 18–27°C (65–80°F), and avoid cold drafts or dry air. If your home is dry, mist the leaves occasionally or place the bottle near a humidifier.
Watering and Ongoing Care
Bottle planters don’t allow excess water to evaporate as quickly as clay pots, so it’s essential to water carefully.
-
Allow the top 1–2 inches of the growing medium to dry before watering.
-
If using a self-watering system, refill the reservoir only when the top layer feels dry.
-
Mist occasionally to increase humidity, especially during dry months.
Wipe leaves regularly to remove dust, and inspect for pests such as mealybugs or spider mites.
Fertilize once a month during the growing season with a diluted orchid or aroid fertilizer for lush foliage and longer-lasting blooms.
Repotting and Propagation
Anthuriums grow slowly but benefit from occasional repotting every 1–2 years. If roots begin to crowd the container or grow above the soil line, it’s time to upgrade to a larger bottle or transfer to a different container.
To propagate, divide the plant at the roots and place new sections into separate recycled bottles using the same setup process.
A Stylish and Sustainable Way to Grow Tropicals
Using recycled bottles to grow anthuriums is an excellent blend of sustainability and creativity. It brings the beauty of the tropics indoors while minimizing your impact on the environment. With their bold flowers and easy-going nature, anthuriums in bottle planters brighten any room—and remind us that even small changes in how we grow plants can make a big difference. Whether perched on a shelf or hung in a sunny corner, these DIY bottle planters deliver both charm and eco-conscious functionality.


