Growing peas in pots is an excellent way to bring fresh, homegrown produce into your urban lifestyle. Whether you live in an apartment, a condo, or a house with limited outdoor space, peas can thrive in containers when given proper care and support. With their charming vines, delicate flowers, and sweet pods, peas add both beauty and nutrition to your garden—even if that garden is a sunny balcony or a small patio.
This guide will walk you through everything you need to know about growing peas in pots with a trellis, allowing you to enjoy a generous harvest without the need for traditional ground planting.
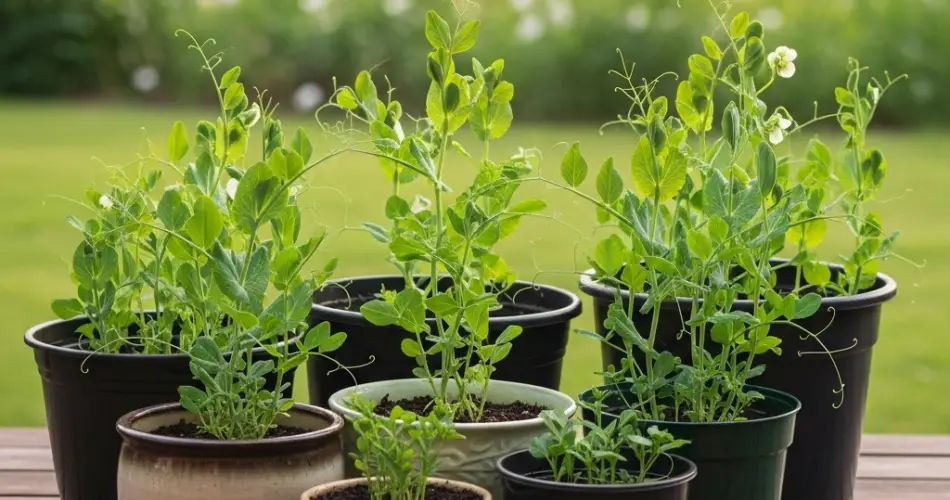
Why Grow Peas in Pots?
Peas are a cool-season crop that grows quickly and doesn’t need high-maintenance care. They’re also one of the best vegetables for vertical gardening. Growing them in pots saves space, simplifies pest control, and allows easy access for harvesting. With a trellis to support their climbing vines, peas can grow tall and productive in even the smallest areas.
Some of the main advantages of container-grown peas include:
-
Adaptability to limited space
-
Less exposure to soil-borne diseases
-
Simple harvesting process
-
Portability—you can move pots to catch better sunlight
Choosing the Right Type of Pea
There are three main types of peas you can grow in containers:
-
Shelling peas (garden peas): Harvest the peas inside and discard the pods.
-
Snow peas: Eat the flat, tender pods whole.
-
Snap peas: Eat the entire pod when the peas are plump.
All three types grow well in containers, but dwarf or bush varieties are ideal if space is very tight. For vertical growth and better yields, climbing or vining varieties like Sugar Snap or Oregon Giant are best when paired with a trellis.
Selecting the Best Container
Peas don’t require deep soil, but they do need room for roots to spread and for good airflow.
-
Depth: Minimum of 8–10 inches
-
Width: At least 12 inches across for a few plants
-
Drainage: Must have holes at the bottom to prevent waterlogging
You can use plastic pots, terracotta planters, fabric grow bags, or even repurposed containers like buckets or storage bins. Just make sure the pot is stable enough to hold a trellis or climbing structure.
Setting Up the Trellis
Pea plants climb naturally using tendrils that grip onto nearby objects. A trellis gives them vertical support and keeps the vines off the soil, reducing the risk of mold and rot.
Options for trellising peas in pots:
-
Bamboo teepee: Tie three to four bamboo stakes together at the top
-
Mesh or wire trellis: Anchor a piece of wire mesh or netting to the container
-
Wooden stakes and twine: Space vertical stakes evenly and run string horizontally between them
Install the trellis when you plant your peas to avoid damaging roots later.
Soil and Planting Tips
Peas grow best in light, well-draining soil enriched with organic matter. Use a high-quality potting mix combined with compost or aged manure. Avoid compacted or heavy garden soil.
Planting Steps:
-
Soak pea seeds overnight to speed up germination.
-
Sow seeds 1 inch deep and 2 inches apart.
-
Water gently and keep the soil consistently moist but not soggy.
-
Position the pot in a sunny location—peas need 6–8 hours of sunlight daily.
In warm climates, start peas in late winter or early spring. In cooler areas, plant once the risk of frost has passed.
Caring for Your Peas
-
Watering: Peas prefer even moisture, especially during flowering and pod development. Water when the top inch of soil feels dry.
-
Feeding: Peas are light feeders. Mix compost into the soil at planting time. If needed, apply a diluted organic liquid fertilizer once the plants begin to flower.
-
Mulching: Add a layer of mulch (like straw or shredded leaves) to retain moisture and suppress weeds.
Because peas fix their own nitrogen, they typically don’t need nitrogen-rich fertilizers. Too much nitrogen can lead to lush leaves but few pods.
Common Pests and Issues
Peas are generally low-maintenance but can still face a few problems.
Watch out for:
-
Aphids: Spray with water or neem oil.
-
Powdery mildew: Avoid overhead watering and ensure good air circulation.
-
Birds: Use netting to protect seedlings.
To reduce disease risk, clean containers between seasons and avoid planting peas in the same pot year after year.
Harvesting Your Peas
Peas are usually ready to harvest in 60–70 days, depending on the variety.
-
Snow peas: Pick when the pods are flat but fully developed.
-
Snap peas: Harvest when pods are plump and crisp.
-
Shelling peas: Wait until the pods are filled and firm, then shell the peas out.
Harvest frequently to encourage more pod production. Use two hands to pick pods—one to hold the vine, the other to gently pull.
Final Tips for Success
-
Stagger planting every 2–3 weeks to enjoy a continuous harvest.
-
Water consistently, especially during warm or windy weather.
-
Choose disease-resistant varieties for better success.
-
After harvesting, add spent plants to the compost or cut them back and plant something new in the pot.
With just a container, a trellis, and a little care, you can grow sweet, crisp peas right at home—no garden bed required. Peas are a perfect crop for urban gardeners who want to maximize their space and enjoy a delicious, nutritious harvest.


