Tomatoes are one of the most beloved crops in home gardens. They are versatile in the kitchen, grow well in a range of conditions, and can be cultivated in both small urban gardens and larger outdoor plots. However, many gardeners overlook a simple and effective way to multiply their tomato plants without buying new seeds: cloning. By using recycled plastic bottles, you can propagate tomato cuttings and produce new plants quickly, efficiently, and sustainably. This method saves money, reduces waste, and ensures a continuous supply of healthy tomato plants.
Why Clone Tomatoes Instead of Starting from Seed?
Growing tomatoes from seed is rewarding, but it requires patience, time, and specific conditions for successful germination. Cloning, on the other hand, offers several unique advantages:
-
Faster Growth – Cuttings taken from a mature tomato plant are already several weeks ahead of seedlings, meaning they establish and grow faster.
-
Genetic Consistency – Cloned plants are exact copies of the parent plant, ensuring the same flavor, yield, and growth habits.
-
Extended Harvest – By rooting cuttings mid-season, you can stagger growth and enjoy a prolonged harvest period.
-
Cost-Effective – No need to buy extra seeds; one healthy plant can produce many more.
For gardeners short on time or working with limited space, cloning tomatoes in bottles is an efficient and practical solution.
Choosing the Right Cuttings
The best cuttings come from healthy, disease-free tomato plants. Look for suckers—the small shoots that grow in the junction between the main stem and a leaf branch. These suckers make excellent cuttings because they are vigorous and adapt quickly to rooting.
Select suckers that are 10–15 cm long. Younger cuttings tend to root faster than older, woody stems. Be sure to use clean scissors or pruning shears to prevent introducing disease.
Preparing Bottles for Propagation
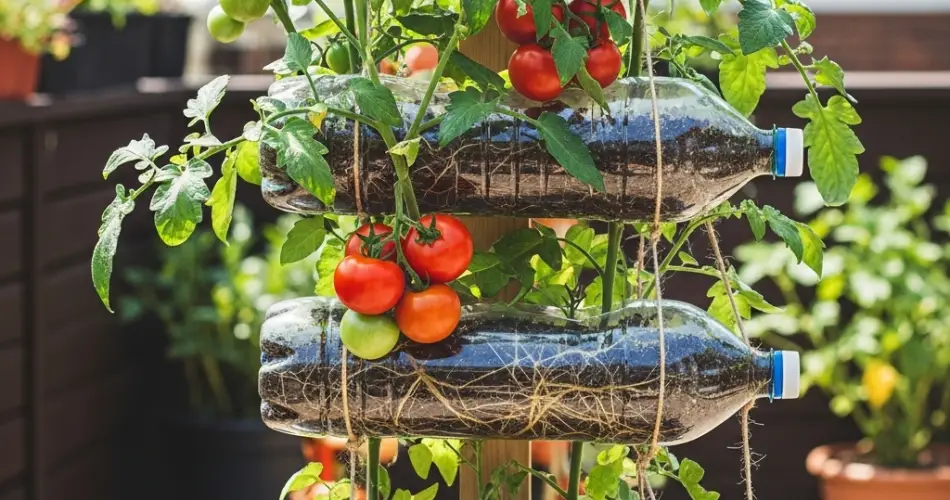
Recycled plastic bottles are perfect for cloning because they create a simple, contained environment that supports root development. Here’s how to prepare them:
-
Select bottles – A 1- or 1.5-liter clear plastic bottle works well.
-
Cut the bottle – Slice the bottle about two-thirds from the bottom, leaving the bottom portion to hold water or soil.
-
Drainage (optional) – If you plan to use soil, poke a few holes at the bottom for drainage. If you’re rooting in water, no holes are necessary.
-
Set up the medium – You can use either fresh water for hydro-style rooting or a light potting mix for soil propagation. Both methods are effective, though water allows you to watch root growth more easily.
Rooting Tomato Cuttings in Water
One of the simplest ways to clone tomatoes is by rooting cuttings directly in water.
-
Fill the bottom section of your bottle with clean water.
-
Remove the lower leaves of your tomato cutting, leaving only the top set intact.
-
Place the cutting into the bottle so that the lower stem is submerged.
-
Position the bottle in a bright but indirect light spot.
Within 7–10 days, small roots will begin forming along the submerged stem. Once the roots reach a few centimeters in length, the cutting is ready to be transplanted into soil.
Rooting Tomato Cuttings in Soil
If you prefer starting directly in soil:
-
Fill the bottle with a seed-starting mix or light potting soil.
-
Plant the cutting about halfway into the soil, removing the lower leaves to prevent rot.
-
Water lightly, ensuring the soil stays moist but not soggy.
-
Place the bottle top back on to act as a mini greenhouse, helping retain humidity.
Roots typically develop within two weeks, and the new plant will begin putting out fresh growth.
Caring for Clones During Propagation
Whether rooting in water or soil, keep these tips in mind:
-
Light – Bright, indirect light is best. Too much direct sun can overheat the bottle, while too little light slows growth.
-
Moisture – If rooting in soil, keep it evenly moist. If using water, replace it every few days to prevent stagnation.
-
Ventilation – For soil-based bottle setups, open the top occasionally to let fresh air circulate and prevent mold.
Transplanting the New Tomato Plants
When roots are strong—about 5–7 cm long—the clones are ready for transplanting. Carefully remove them from the bottle and place them into larger pots or directly into the garden. Plant them deep, burying part of the stem, as tomato plants can produce additional roots along the buried section.
Once transplanted, water thoroughly and place the new plants in partial shade for a few days to help them adjust before moving them into full sun.
Scaling Up Your Tomato Crop
Using this method, one tomato plant can generate several clones throughout the growing season. This is particularly useful if you want to expand your garden without purchasing more seeds or seedlings. It also ensures that all your plants share the same desirable qualities—whether that’s sweetness, size, or disease resistance.
Final Thoughts
Bottle cloning is a simple yet highly effective gardening hack for urban growers and backyard gardeners alike. It turns ordinary plastic bottles into tools for multiplying your tomato crop quickly and sustainably. By reusing bottles, you reduce waste while creating an efficient system to propagate plants.
Whether you want to maximize your harvest, save money, or experiment with sustainable gardening practices, cloning tomatoes in bottles is an accessible method that works almost anywhere. With just a few cuttings and some recycled containers, you can transform a single tomato plant into a thriving garden full of productive clones—all while keeping your gardening eco-friendly and innovative.


