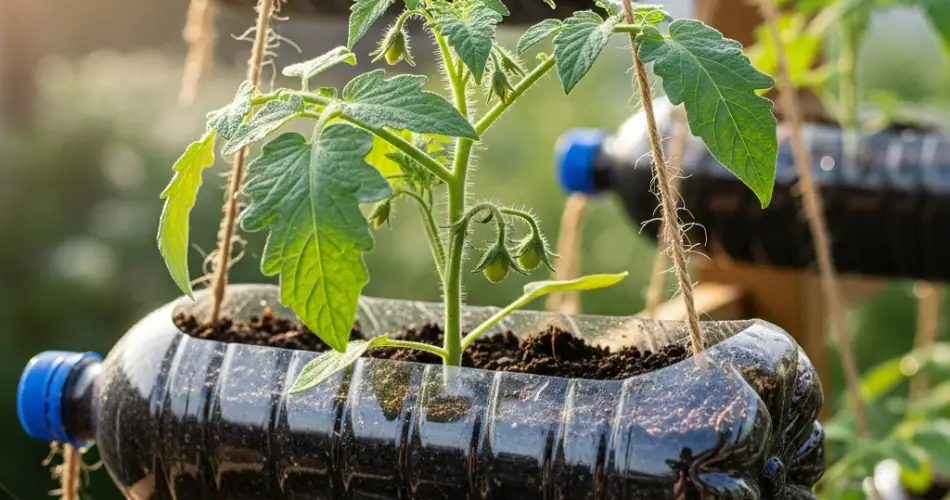
Tomatoes are among the most popular crops for home gardeners, prized for their versatility in the kitchen and rewarding harvests. While seeds can be sown directly into soil or started in trays, a simple and eco-friendly method for getting strong, healthy seedlings is to use upcycled plastic bottles. By transforming discarded bottles into mini greenhouses, you can create a nurturing environment that encourages germination, protects young plants, and sets the stage for a thriving tomato crop.
This approach not only saves money but also reduces plastic waste, making it a smart option for sustainable gardening. Whether you are a beginner or an experienced grower, bottle propagation is a practical and effective way to start tomatoes indoors.
Why Use Plastic Bottles for Tomato Propagation?
Growing tomatoes indoors with bottles has several clear advantages:
-
Humidity and warmth: The enclosed structure traps heat and moisture, mimicking greenhouse conditions ideal for germination.
-
Protection: Bottles shield delicate seedlings from sudden temperature drops, drafts, or pests.
-
Convenience: They are portable and easy to place on windowsills, countertops, or under grow lights.
-
Recycling: Upcycling bottles gives them a second life while cutting down on gardening expenses.
This method is particularly useful for gardeners in cooler climates who need to give tomatoes a head start before outdoor planting.
Materials Needed
-
Tomato seeds (any variety you prefer)
-
A clean, clear plastic bottle (1–2 liters)
-
Scissors or a sharp knife
-
Seed-starting mix or potting soil
-
Spray bottle with water
-
Sunny windowsill or grow light
Optional: A small tray or plate to catch excess water.
Preparing the Bottles
-
Clean thoroughly: Wash the bottles with warm, soapy water to remove any residue. Peel off labels if possible.
-
Cut the bottle: Slice the bottle into two parts—usually about one-third from the top. The bottom acts as the planter, and the top creates the humidity dome.
-
Add drainage holes: Use a knife or heated nail to pierce small holes at the bottom for proper water drainage.
-
Optional hinge method: Cut almost all the way around the middle but leave a small uncut section so the top can open and close like a lid.
You now have a simple mini-greenhouse that is both functional and reusable.
Planting Tomato Seeds
-
Fill the bottom section with moistened seed-starting mix, leaving a little space at the top.
-
Sow two or three seeds about ¼ inch deep, covering them lightly with soil.
-
Mist gently with a spray bottle to avoid washing the seeds away.
-
Place the top portion of the bottle over the base, leaving the cap off or slightly loosened to allow airflow.
This creates a warm, humid environment that encourages fast germination.
Caring for the Seedlings
-
Light: Place the bottles in a bright location where they get at least 6–8 hours of sunlight daily. If natural light is insufficient, use a grow light positioned 2–3 inches above the seedlings.
-
Moisture: Check the soil regularly. The bottle dome helps retain humidity, so water sparingly. A light misting every few days is usually enough.
-
Air circulation: Occasionally remove the bottle cap or lift the dome to let in fresh air, preventing fungal growth.
-
Temperature: Tomatoes prefer warm conditions. Aim for indoor temperatures between 70–80°F (21–27°C) for best results.
In about a week to ten days, seedlings should emerge with their first tiny leaves.
Thinning and Transplanting
Once seedlings develop their first true leaves, thin them to one strong plant per bottle to reduce competition. Simply snip weaker seedlings at soil level rather than pulling them out, which could disturb roots.
When the plant reaches 4–6 inches tall with several sets of leaves, it’s time to transplant. If you are moving seedlings outdoors, harden them off first by gradually exposing them to outdoor conditions. Start with one or two hours outside per day and increase exposure over a week until they are acclimated.
Benefits of Bottle Propagation
-
Healthier seedlings: The controlled environment helps produce strong stems and deep root systems.
-
Low-cost setup: There’s no need for expensive trays, pots, or covers.
-
Eco-friendly: Reduces reliance on disposable seed-starting supplies.
-
Easy monitoring: Clear sides allow you to observe root growth and soil moisture.
Common Issues and Solutions
-
Mold or fungus: Too much moisture can encourage mold. Open the dome more often to improve airflow.
-
Leggy seedlings: If plants stretch and look weak, they need more light. Move them to a sunnier spot or add grow lights.
-
Yellowing leaves: This may indicate nutrient deficiency. Apply a diluted liquid fertilizer once seedlings develop their second set of true leaves.
Conclusion
Using plastic bottles to propagate tomatoes indoors is a sustainable and effective way to ensure your plants get the best start. With little effort and minimal cost, you can create a greenhouse-like environment that nurtures seedlings from the earliest stages until they are ready for transplanting.
This method helps reduce waste, save money, and produce strong, healthy tomato plants that will reward you with a generous harvest. Whether you are short on space or simply looking for a creative, eco-friendly gardening solution, bottle propagation is a technique worth trying.


