Peas are one of the easiest and most rewarding vegetables to grow, especially in containers. Whether you have a balcony, rooftop, patio, or even just a sunny window box, peas can thrive in compact spaces with the right setup. Their crisp pods and tender vines offer not only a delicious harvest but also a touch of natural greenery to urban environments.
Container-grown peas are perfect for beginners and experienced gardeners alike. They require minimal space, offer a quick turnaround from sowing to harvest, and don’t need complex care routines. Follow this step-by-step guide to grow your own sweet and crunchy peas at home.
Why Grow Peas in Containers?
Peas are cool-season crops that adapt well to container gardening. Growing them in pots allows you to start early in spring, protect the plants from soil-borne diseases, and enjoy vertical growth even in tight quarters.
Benefits of container-grown peas:
-
Space-efficient, ideal for urban gardening
-
Fewer weeds and easier maintenance
-
Simple to manage watering and nutrients
-
Early harvests, even in limited space
-
Attractive vines that enhance small garden aesthetics
Best Pea Varieties for Containers
When choosing pea varieties for pots, consider compact or dwarf cultivars that thrive in small spaces. Popular options include:
-
Little Marvel – A dwarf bush variety, perfect for pots
-
Sugar Snap – Produces edible-pod peas with climbing vines
-
Tom Thumb – Extremely compact and ideal for window boxes
-
Oregon Sugar Pod II – Sweet, flat pods and great for vertical growing
Climbing varieties will require a trellis or support, while bush types are more self-supporting.
Materials You’ll Need
To plant peas in containers, gather the following supplies:
-
A container at least 8–12 inches deep with drainage holes
-
High-quality potting mix (not garden soil)
-
Compost or organic slow-release fertilizer
-
Pea seeds of your chosen variety
-
Trellis, bamboo stakes, or netting (for climbing types)
-
Watering can or hose with a gentle spray
-
A sunny location (at least 5–6 hours of sunlight daily)
Step-by-Step: Planting Peas in Containers
1. Choose the Right Container
Select a pot or planter that’s at least 8 inches deep and wide enough to space seeds 2–3 inches apart. Rectangular planters are great for growing rows, while round pots work well for circular arrangements. Ensure good drainage by checking for holes at the bottom.
2. Prepare the Soil
Fill your container with a light, well-draining potting mix enriched with compost. Peas prefer slightly acidic to neutral soil (pH 6.0–7.5). Avoid heavy garden soil, which can retain too much moisture and cause rot.
3. Plant the Pea Seeds
Sow seeds directly into the soil:
-
Plant seeds 1 inch deep and 2 inches apart.
-
Space rows 4–6 inches apart if planting multiple rows.
-
Water gently after sowing to settle the soil.
Pea seeds germinate quickly—usually within 7–10 days.
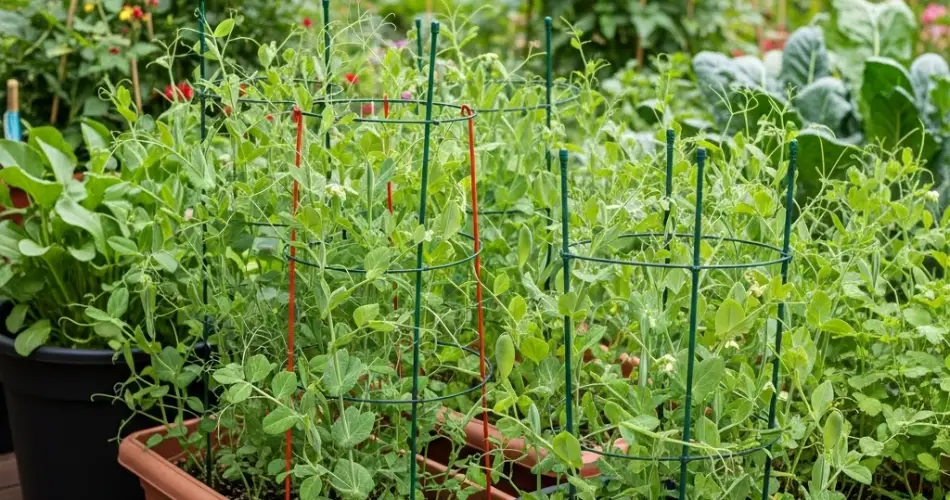
4. Provide Support
If you’re growing climbing peas, insert a small trellis, bamboo stakes, or vertical netting into the container at planting time. This helps vines climb and improves air circulation around the plants.
Bush types may not need support, but a small cage can help keep them upright and tidy.
Care and Maintenance
Sunlight:
Place the container in a sunny spot that gets at least 5–6 hours of light daily. In warmer climates, some afternoon shade can protect plants from excess heat.
Watering:
Keep the soil evenly moist, especially during flowering and pod development. Water when the top inch of soil feels dry. Avoid overwatering to prevent root rot.
Feeding:
Peas don’t need heavy fertilizing. If using compost or a balanced potting mix, additional fertilizer may not be necessary. If needed, feed with a diluted fish emulsion or compost tea once plants are a few inches tall.
Mulching:
Add a thin layer of mulch or straw to retain moisture and keep the soil cool.
Pest Control:
Watch for aphids and powdery mildew. Use neem oil or a homemade soap spray if pests appear. Avoid wetting the foliage to prevent disease.
Harvesting Peas
Peas are typically ready to harvest 50–70 days after planting, depending on the variety.
Signs it’s time to pick:
-
Shelling peas: Pods are plump, and seeds are fully formed
-
Snap peas: Pods are crisp, thick, and snap easily
-
Snow peas: Pods are flat and tender, best harvested young
Use scissors or gently twist pods off the vine. Frequent harvesting encourages more pod production.
Growing Tips for Success
-
Soak seeds overnight before planting for faster germination
-
Plant in early spring or late summer for best yields
-
Use succession planting every 2–3 weeks for a continuous harvest
-
Remove yellowing leaves to maintain airflow and prevent disease
-
After harvest, cut plants at soil level—roots return nitrogen to the soil
Final Thoughts
Growing peas in containers is a satisfying and simple way to enjoy fresh produce at home. With minimal space and effort, you can create a productive pea garden that yields sweet, crunchy pods throughout the season. Whether you’re planting dwarf varieties in window boxes or training vines up a balcony trellis, container-grown peas are a great addition to any home garden.
With this step-by-step guide, you’re ready to grow, care for, and harvest your own delicious peas—right outside your door.


