Onions are a staple in kitchens worldwide, adding flavor and depth to countless recipes. While traditionally grown in garden beds, onions adapt remarkably well to container gardening. For those living in apartments, urban areas, or homes with limited yard space, growing onions in buckets is a practical and rewarding solution. With just a few simple steps, you can enjoy fresh, homegrown onions without the need for a large garden.
This guide will walk you through everything you need to know about planting, caring for, and harvesting onions in buckets, ensuring a successful and steady supply of this essential kitchen ingredient.
Why Grow Onions in Buckets?
Growing onions in buckets offers several advantages:
-
Space-saving: A bucket fits easily on balconies, patios, or rooftops.
-
Portability: Buckets can be moved to catch more sunlight or avoid harsh weather.
-
Soil control: You can choose the ideal soil mix, free from weeds and pests.
-
Year-round potential: With the right conditions, you can stagger plantings for continuous harvests.
Buckets also make gardening accessible to beginners since they simplify planting and maintenance.
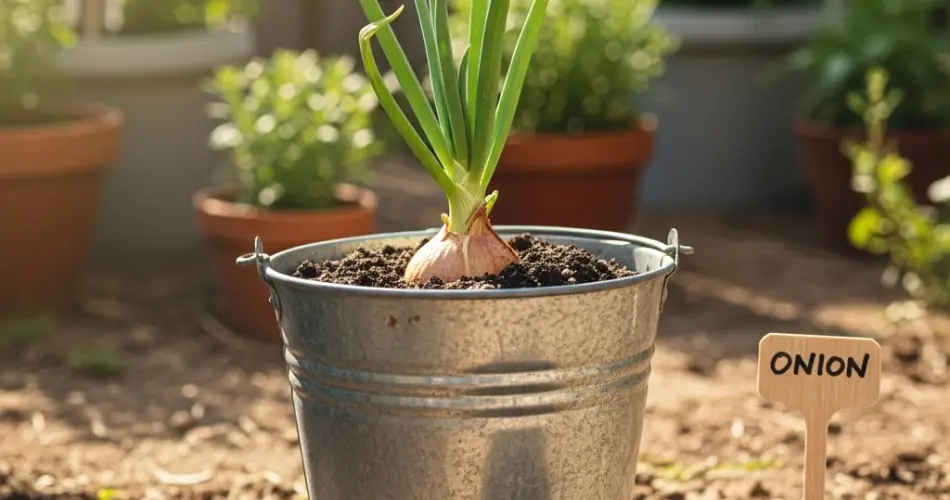
Step 1: Choosing the Right Bucket
The first step is selecting a container that allows onion roots to spread. A 5-gallon bucket works well, but if you want to grow several onions at once, a wider container may be better. Drill multiple holes in the bottom for proper drainage—standing water will quickly rot onion bulbs.
If possible, elevate the bucket slightly on bricks or a plant stand to help excess water drain freely.
Step 2: Preparing the Soil
Onions prefer loose, well-draining soil with plenty of organic matter. A good mix for bucket planting includes:
-
2 parts high-quality potting soil
-
1 part compost or aged manure
-
A small amount of sand or perlite for aeration
The soil should be fertile but not overly rich in nitrogen, as too much nitrogen encourages leafy growth at the expense of bulb development. Aim for a soil pH of 6.0–7.0 for the best results.
Step 3: Selecting Onion Types
There are three main ways to grow onions:
-
Onion sets – Small, immature bulbs that are easy to plant and grow quickly.
-
Onion transplants – Seedlings started indoors or purchased from nurseries.
-
Seeds – Slower to mature but allow for a wider variety of onion types.
For bucket gardening, onion sets are often the easiest and most reliable choice, especially for beginners.
Step 4: Planting Onions in Buckets
Once your bucket and soil are ready, it’s time to plant:
-
Fill the bucket with soil, leaving about 2–3 inches of space at the top.
-
Place onion sets or seedlings about 4 inches apart.
-
Push each set into the soil with the pointed end facing upward, about 1 inch deep.
-
Cover lightly with soil and water gently.
Depending on bucket size, you can usually plant 6–8 onion sets in a 5-gallon bucket.
Step 5: Providing Sunlight and Water
Onions need 6–8 hours of direct sunlight daily to grow strong bulbs. Place your bucket in the sunniest location possible. If growing indoors, a bright south-facing window or grow lights can substitute.
Watering should be consistent. Keep the soil evenly moist but not soggy. Check regularly by sticking your finger into the soil; if the top inch feels dry, it’s time to water. Avoid letting the bucket dry out completely, as this can stunt bulb formation.
Step 6: Fertilizing Onions
Onions are relatively light feeders but benefit from occasional feeding. Use a balanced, water-soluble fertilizer every 3–4 weeks. When bulbs begin to swell, switch to a fertilizer higher in potassium and phosphorus to encourage strong bulb growth.
Step 7: Managing Pests and Problems
Growing onions in buckets helps reduce pest issues, but they are not entirely immune. Watch for common problems like:
-
Onion maggots: Prevent by keeping soil well-drained and rotating plantings.
-
Thrips: Small insects that feed on onion leaves; neem oil or insecticidal soap works well against them.
-
Fungal issues: Ensure good airflow and avoid overwatering to prevent rot and mildew.
Buckets make it easier to move plants to drier, sunnier spots if conditions become too damp.
Step 8: Harvesting Onions
Onions are usually ready to harvest in 90–120 days, depending on the variety and whether you started from sets, transplants, or seeds.
You’ll know they are mature when:
-
The tops turn yellow and begin to fall over.
-
The bulbs are firm and have reached a good size.
To harvest, gently pull the onions from the soil. Let them cure in a warm, dry, shaded spot for 1–2 weeks. Once the skins are papery and dry, trim the tops and store in a cool, dark, well-ventilated place. Properly cured onions can last for months.
Step 9: Growing Green Onions
Another option is to harvest onions earlier as green onions (scallions). These can be harvested once the shoots are tall enough, usually within 4–6 weeks. This provides a quicker harvest and is perfect for fresh cooking.
Conclusion
Growing onions in buckets is a simple, efficient, and space-saving method for anyone wanting fresh, homegrown produce. With the right bucket, quality soil, good sunlight, and proper care, onions will thrive even in the smallest urban spaces. Whether you’re harvesting full bulbs or enjoying fresh green onions, bucket gardening puts flavorful ingredients right at your fingertips.
By following these step-by-step instructions, you can transform a plain bucket into a mini onion farm and enjoy the satisfaction of growing your own kitchen staples at home.


