Kale is one of the most nutritious and resilient leafy greens you can grow. Packed with vitamins A, C, and K, along with fiber and antioxidants, it’s considered a superfood and a must-have in any kitchen garden. The best part is that kale is easy to grow at home—even without a traditional garden. By using buckets as containers, you can cultivate a steady supply of fresh kale leaves right on your balcony, patio, or doorstep.
This step-by-step guide will walk you through everything you need to know about planting kale in buckets, from choosing the right container to harvesting your first crisp leaves.
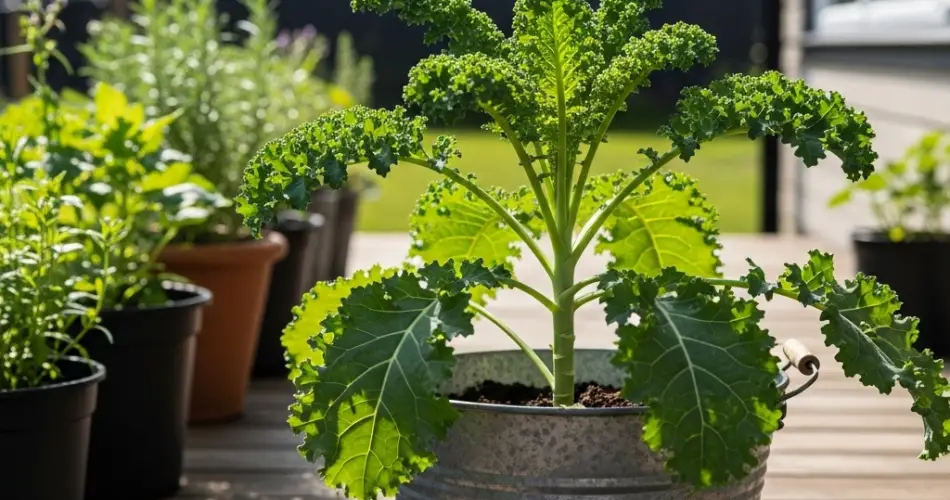
Step 1: Choose the Right Bucket
The foundation of successful bucket gardening is selecting the proper container.
-
Size: A 5-gallon bucket is ideal for kale, as it provides enough room for root development and healthy growth.
-
Drainage: Drill 5–6 holes in the bottom to prevent water from collecting at the roots, which can cause rot.
-
Material: Plastic buckets are durable and inexpensive, while fabric grow bags offer better airflow for roots.
If you plan to grow more than one plant in a container, consider using a wider tub or planter for adequate spacing.
Step 2: Prepare a Nutrient-Rich Soil Mix
Kale thrives in fertile, well-draining soil. The right mix provides both moisture retention and airflow. A reliable combination is:
-
40% high-quality potting soil
-
40% compost or aged manure for nutrition
-
20% perlite, coarse sand, or coco coir for aeration
Before planting, enrich the soil with a handful of organic fertilizer such as worm castings or bone meal. Kale is a heavy feeder, so starting with nutrient-dense soil ensures vigorous leaf production.
Step 3: Plant the Seeds or Seedlings
You can grow kale either from seeds or from young seedlings purchased at a nursery.
-
From Seeds: Sow seeds about ½ inch deep in the prepared bucket. Space them 6–8 inches apart. Once seedlings emerge in 7–10 days, thin them to allow room for growth.
-
From Seedlings: Transplant seedlings directly into the soil mix, spacing them about 8–12 inches apart. Water thoroughly to help them establish.
For continuous harvests, consider sowing seeds every 2–3 weeks in additional buckets.
Step 4: Provide Sunlight and Proper Watering
Kale enjoys cooler weather but still needs sunlight to thrive.
-
Sunlight: Place buckets where plants receive 5–7 hours of light each day. In hot regions, provide afternoon shade to protect plants from heat stress.
-
Watering: Keep soil evenly moist but not waterlogged. Water deeply whenever the top inch of soil feels dry. Adding mulch, such as straw or shredded leaves, helps retain soil moisture and maintain stable temperatures.
Consistent watering ensures tender, flavorful leaves and prevents plants from becoming tough or bitter.
Step 5: Feed Your Kale Regularly
Since kale produces leaves over an extended season, it benefits from regular feeding.
-
Fertilizer choice: Use nitrogen-rich fertilizers to encourage leafy growth. Organic options like compost tea, fish emulsion, or diluted seaweed extract are excellent.
-
Schedule: Feed every 2–3 weeks during the growing season.
-
Tip: Avoid overfeeding, which can make leaves overly soft and reduce flavor.
Balanced nutrition supports robust growth and keeps plants producing for months.
Step 6: Support Plant Health and Manage Pests
Although kale is hardy, some common pests may still appear.
-
Aphids: Spray with neem oil or rinse off with water.
-
Cabbage worms: Inspect leaves regularly and remove them by hand.
-
Flea beetles: Use lightweight row covers or sprinkle diatomaceous earth on the soil surface.
To prevent fungal diseases, ensure good air circulation and avoid splashing water on the leaves. Regularly rotate buckets to different spots on your patio for even sunlight and airflow.
Step 7: Harvest Your Kale
Kale is ready to harvest in about 50–70 days, but young leaves can be picked much earlier.
-
Cut-and-Come-Again Method: Snip outer leaves when they reach 3–4 inches long, leaving the central crown intact. This allows the plant to keep producing new leaves.
-
Whole Harvest: For larger yields, cut the entire plant at the base once it matures. This method is useful when you want to clear space for new crops.
Morning is the best time to harvest, as leaves are crisp and full of moisture.
Step 8: Extend the Growing Season
One of the greatest advantages of bucket gardening is mobility. You can move your kale plants to suit seasonal conditions.
-
Summer: Provide partial shade and choose heat-tolerant kale varieties.
-
Winter: Move buckets to sheltered areas or indoors near sunny windows. Some kale varieties tolerate frost, and cold weather can even improve flavor.
By staggering plantings and adjusting conditions, you can enjoy kale for much of the year.
Final Thoughts
Growing kale in buckets is simple, rewarding, and ideal for small spaces. With the right container, fertile soil, and consistent care, you can harvest fresh, nutritious leaves straight from your patio or balcony. Whether you prefer kale in smoothies, sautés, or salads, this step-by-step approach ensures you’ll always have a supply of homegrown greens at your fingertips.
By following these steps, you’ll not only save space but also enjoy the satisfaction of cultivating a superfood right at home—one bucket at a time.


