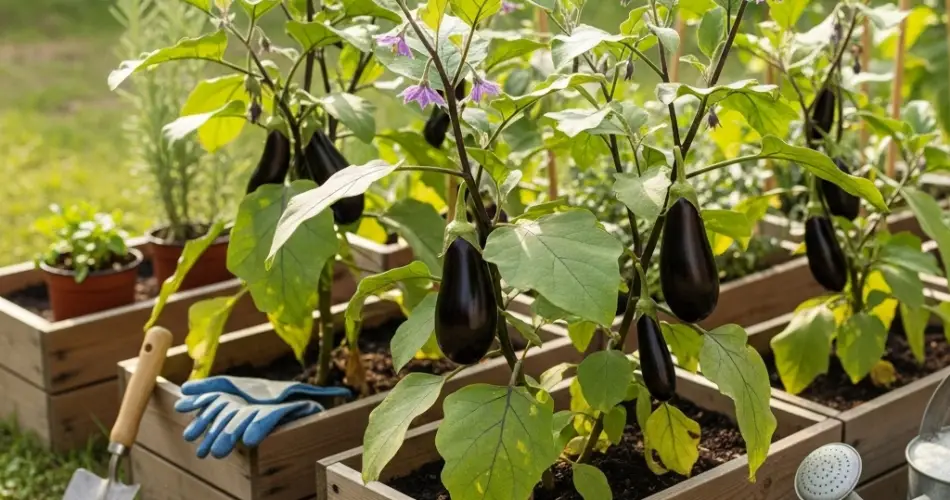
Eggplants, with their glossy purple skin and rich taste, are a versatile addition to any kitchen. From grilling and roasting to stewing and frying, they can transform a simple meal into something hearty and flavorful. If you enjoy cooking with fresh eggplants, why not grow them yourself at home? The good news is you don’t need a sprawling garden—eggplants thrive beautifully in wooden boxes. This method is perfect for anyone with limited outdoor space, whether you live in a city apartment, a small townhouse, or simply want to make use of your patio or balcony.
Growing eggplants in wooden boxes not only saves space but also gives you control over soil quality and moisture, leading to healthier plants and better harvests. Let’s walk through the step-by-step process of planting and growing eggplants successfully in wooden containers.
Step 1: Choose the Right Wooden Box
The foundation of your eggplant-growing project is the container. Select a sturdy wooden box that is:
-
Deep and wide enough: At least 16–18 inches deep and 18–24 inches across. Eggplants have strong root systems that need space.
-
Made from safe wood: Use untreated wood such as cedar, redwood, or pine to avoid harmful chemicals.
-
Well-draining: Drill several holes at the bottom of the box to prevent waterlogging.
If you’re handy, you can build your own box using repurposed wooden planks. Otherwise, wooden crates, wine boxes, or ready-made planters work well with a few modifications.
Step 2: Prepare the Soil
Eggplants thrive in fertile, loose, and well-draining soil. Create a soil mix that promotes healthy root growth:
-
50% high-quality potting soil
-
25% compost or well-rotted manure for nutrients
-
15% coconut coir or peat moss to retain moisture
-
10% sand or perlite for aeration and drainage
Before planting, enrich the soil further with an organic slow-release fertilizer or a balanced vegetable fertilizer. Eggplants are heavy feeders, so nutrient-rich soil is key for success.
Step 3: Start Seeds or Choose Seedlings
You can either start from seeds or buy young plants:
-
From Seeds:
-
Begin indoors 6–8 weeks before the last frost date.
-
Sow seeds in seed trays or small pots and keep them warm (70–85°F / 21–29°C).
-
When seedlings reach 6–8 inches tall with several true leaves, they’re ready to transplant.
-
-
From Seedlings:
-
Purchase healthy, pest-free seedlings from a nursery.
-
These save time and give you a head start, especially in short growing seasons.
-
Step 4: Transplant into Wooden Boxes
When your seedlings are ready, carefully transplant them into the wooden box:
-
Fill the box with prepared soil, leaving about two inches at the top.
-
Dig a hole slightly larger than the seedling’s root ball.
-
Place the seedling into the hole, cover the roots with soil, and press gently.
-
Water thoroughly to settle the soil.
For spacing, plant one or two eggplants per box, leaving at least 18 inches between them to allow proper airflow and growth.
Step 5: Provide Sunlight and Warmth
Eggplants love heat and sunshine. Position your wooden box in a spot that receives at least 6–8 hours of direct sunlight daily. If you live in a cooler region, you can place the box near a sunny wall or cover the plants with a plastic sheet to retain warmth.
Step 6: Watering and Mulching
Eggplants need consistent moisture to produce plump, tasty fruits, but overwatering can lead to root problems.
-
Water deeply 2–3 times a week, adjusting based on weather conditions.
-
Always water at the base to avoid wetting the foliage.
-
Add mulch (straw, dried leaves, or wood chips) around the base of the plants to retain moisture and keep the soil cool.
Step 7: Fertilizing for Strong Growth
Feed your eggplants regularly to encourage healthy leaves and abundant fruit.
-
Use a balanced liquid fertilizer every two to three weeks.
-
Once the plant begins to flower, switch to a fertilizer higher in potassium and phosphorus to promote fruiting.
-
Organic options like fish emulsion, compost tea, or bone meal also work well.
Step 8: Support the Plants
As eggplants grow and start producing fruit, the stems can become heavy. Prevent breakage by adding support:
-
Insert stakes or a small trellis into the soil at planting time.
-
Use soft plant ties or cloth strips to gently secure the stems.
This step ensures your plants remain upright and healthy as fruits develop.
Step 9: Monitor Pests and Diseases
Eggplants can attract common garden pests like aphids, flea beetles, and spider mites. To manage these:
-
Spray leaves with water to dislodge pests.
-
Use insecticidal soap or neem oil if infestations occur.
-
Ensure proper drainage and airflow to prevent fungal diseases.
Step 10: Harvest at the Right Time
Eggplants are typically ready to harvest 60–80 days after transplanting. Signs they are ready include:
-
Glossy, firm skin that bounces back when pressed.
-
Fruits that match the mature size of the variety you planted.
Cut the eggplant with a sharp knife or pruning shears, leaving a short stem attached. Regular harvesting encourages more fruit production throughout the season.
Final Thoughts
Growing eggplants in wooden boxes is a simple and effective way to enjoy fresh produce, even in small spaces. With proper soil, sunlight, and care, your plants will reward you with glossy, delicious fruits ready for your favorite recipes. This step-by-step approach ensures that even beginners can achieve success while making the most of limited gardening space.


