Cilantro, also known as coriander, is a versatile herb cherished in cuisines around the world. Its bright, citrusy flavor adds a fresh touch to everything from salads and soups to salsas and stir-fries. While cilantro grows quickly, it also has a relatively short lifespan, which makes it perfect for bottle gardening. With a little effort and a few recycled plastic bottles, you can grow your own supply of fresh cilantro, even in a small space.
This step-by-step guide walks you through creating your own cilantro garden using plastic bottles—ideal for balconies, windowsills, or patios.
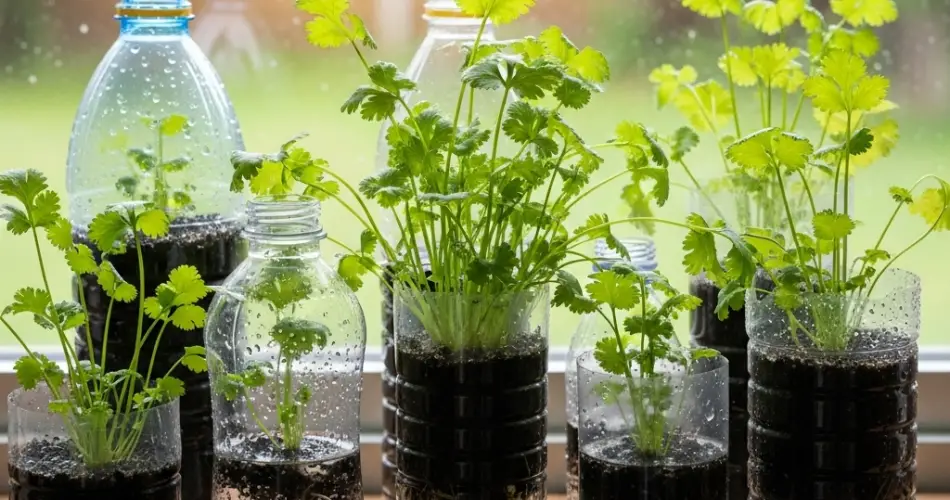
Step 1: Choose the Right Bottle
Start by selecting a clean, clear plastic bottle—1.5-liter or 2-liter soft drink bottles work well. Be sure to rinse the bottle thoroughly to remove any residue.
You can use two styles:
-
Vertical cut: Cut off the top third and use the bottom as a planting pot.
-
Horizontal cut: Lay the bottle on its side, then cut a large window on the top for planting. Keep the cap screwed on and poke small holes at the bottom for drainage.
Either method works well, but the horizontal layout gives more space for cilantro to spread out.
Step 2: Create Drainage
Proper drainage is essential to keep cilantro healthy and prevent root rot. Use a hot nail or knife to poke multiple holes in the bottom of the bottle. If using the horizontal cut, make sure water can exit from the lowest point of the bottle when it’s laid flat.
You can also place a few small pebbles or pieces of broken clay at the bottom before adding soil to enhance drainage.
Step 3: Prepare the Soil Mix
Cilantro grows best in loose, well-draining soil rich in organic matter. Prepare a mix of:
-
2 parts potting soil
-
1 part compost or worm castings
-
1 part coarse sand or perlite
This blend ensures adequate nutrition and prevents compacted soil in a confined space like a plastic bottle.
Fill the bottle with the mix, leaving about an inch of space from the top to make watering easier.
Step 4: Planting the Seeds
Cilantro seeds are actually two seeds fused together. Gently crush them with your fingers or roll them lightly between two flat surfaces to split them—this boosts germination. You can also soak the seeds in water overnight before planting.
Sprinkle the seeds evenly across the surface of the soil, then cover lightly with about ¼ inch of soil. Water gently to moisten the surface without displacing the seeds.
Cilantro usually germinates in 7 to 10 days. During this time, keep the bottle in a warm, well-lit location, avoiding direct sun until seedlings emerge.
Step 5: Provide Proper Light
Once the seedlings appear, place the bottle where it gets 4 to 6 hours of direct sunlight daily. Morning sun and afternoon shade work best, especially in warmer climates. Too much heat can cause the plant to bolt, meaning it will flower and go to seed prematurely.
If you’re growing indoors, position the bottle near a sunny windowsill. If needed, supplement with a grow light to ensure strong growth.
Step 6: Watering and Feeding
Cilantro prefers consistently moist soil but doesn’t tolerate soggy conditions. Water the plant when the top inch of soil feels dry to the touch. Be careful not to overwater, especially since bottles retain more moisture than clay pots.
Apply a diluted liquid fertilizer every 2–3 weeks to keep the plant nourished. Organic options like fish emulsion or compost tea work well and are gentle on young roots.
Step 7: Ongoing Care and Succession Planting
To prevent bolting and extend your harvest:
-
Water regularly without flooding
-
Keep the plant cool during hot weather
-
Harvest often to encourage bushier growth
Cilantro’s growing cycle is relatively short—around 3 to 4 weeks from seedling to maturity. For a continuous supply, sow new seeds in a fresh bottle every 2 weeks. This technique, known as succession planting, ensures a steady harvest.
Step 8: Harvesting Cilantro
Begin harvesting when the plant reaches 4 to 6 inches in height. Use scissors to snip the outer leaves near the base, allowing the inner stems to keep growing. Avoid pulling the plant up by the roots unless you’re done with the current crop.
If the plant begins to bolt, let it flower and set seeds. These seeds can be collected and used either in the kitchen as coriander spice or saved for future planting.
Step 9: Repurposing and Expanding
You can get creative with your cilantro bottles. Decorate them with twine, labels, or paint for a personal touch. Hang several bottles on a balcony railing or wall mount to create a vertical herb garden.
Combine cilantro with other bottle-grown herbs like mint, basil, parsley, or chives for a compact and convenient culinary garden.
Final Thoughts
With a few recycled bottles and some basic supplies, anyone can grow cilantro at home—no backyard required. This step-by-step approach makes it easy to maintain a fresh supply of this flavorful herb all year long. Whether you’re cooking tacos, curries, or soups, your bottle-grown cilantro will always be fresh, accessible, and grown with your own hands.


