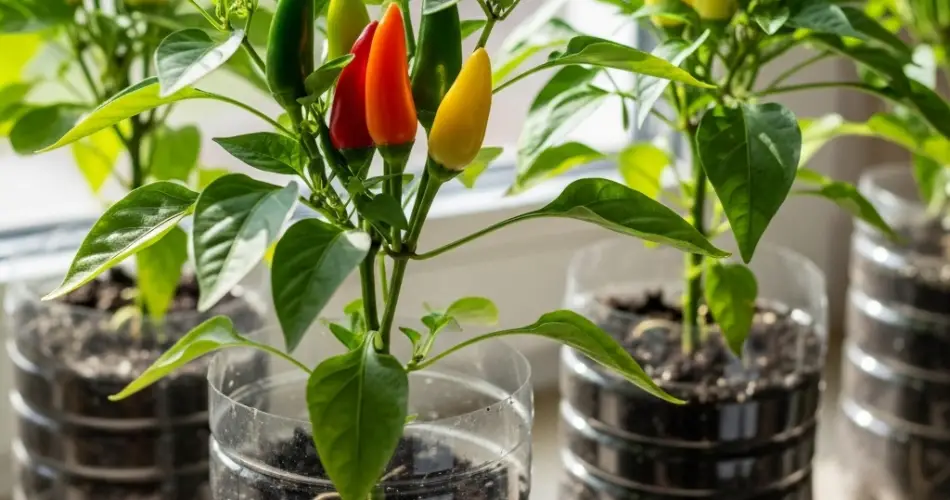
Growing chili peppers at home doesn’t require a garden bed or a large yard. With a few recycled plastic bottles, potting soil, and sunlight, you can create a productive mini chili garden right on your balcony, windowsill, or patio. This method is perfect for small spaces and offers a sustainable way to grow your own spicy harvest.
Chili peppers are compact, hardy, and thrive in containers, making them ideal candidates for bottle gardening. Whether you’re a beginner or a seasoned gardener, planting chilies in plastic bottles is simple, inexpensive, and highly rewarding.
Why Use Bottles for Growing Chili?
Plastic bottles are widely available, lightweight, and easy to repurpose. Instead of throwing them away, transform them into vertical or horizontal planters. Their size is perfect for chili plants, which don’t require deep root space.
Benefits include:
-
Reduces plastic waste through reuse
-
Saves space—great for small homes or apartments
-
Portable and easy to move to sunnier spots
-
Affordable and beginner-friendly
-
Excellent drainage control
This method works both indoors (with good light) and outdoors on balconies or patios.
Materials You’ll Need
Here’s what you need to start planting chili peppers in bottles:
-
1.5L to 2L plastic bottles (clean and dry)
-
Sharp scissors or utility knife
-
Heated nail or screwdriver for drainage holes
-
High-quality potting soil
-
Compost or organic fertilizer
-
Chili pepper seeds or seedlings
-
Watering can or spray bottle
-
Sunny location (balcony, windowsill, or garden ledge)
-
Optional: string or hooks for hanging setups
Choosing Chili Varieties for Bottles
For container gardening, compact and productive chili varieties are best. Here are some top choices:
-
Thai Chili – Very productive and compact
-
Cayenne – Long, slender fruits with medium heat
-
Jalapeño – Mild and juicy with good container performance
-
Tabasco – Small, colorful, and ornamental
-
Bird’s Eye – Small plants that produce lots of spicy fruits
These varieties adapt well to small spaces and grow well in bottles with good sun and care.
Preparing the Bottle Planter
-
Clean the Bottle
Wash thoroughly and remove any labels. Allow the bottle to dry. -
Cut the Planting Window
Option A: Cut off the top third of the bottle to plant vertically.
Option B: Lay the bottle horizontally and cut a rectangular window along one side. -
Add Drainage Holes
Use a heated nail or screwdriver to poke holes at the bottom and sides for drainage. This prevents root rot from excess water. -
Optional: Wrap the Bottle
If the plastic is clear, wrap it with cloth or dark paper to block light and avoid algae buildup inside the bottle.
Planting Chili Seeds or Seedlings
-
Prepare the Soil
Mix 60% potting soil, 30% compost, and 10% perlite or sand for good drainage and aeration. -
Fill the Bottle
Add the soil mix until it’s about 2 inches below the top edge. Gently pat it down. -
Plant the Seeds
-
Sow 2–3 chili seeds about ¼ inch deep in the center.
-
Water lightly. Once they sprout, thin to leave the strongest plant.
OR
Transplant a Seedling
-
Dig a hole big enough for the root ball.
-
Place the seedling and firm the soil around it.
-
-
Water Carefully
Use a spray bottle or gentle stream. Keep the soil moist, not soggy.
Placement and Sunlight
Chili plants love the sun. Place your bottle garden in a location that gets at least 6–8 hours of direct sunlight each day. South-facing balconies or sunny kitchen windows are ideal.
If indoors, supplement with a grow light if natural sunlight is limited.
Ongoing Care and Maintenance
-
Watering: Water when the top inch of soil is dry. Check daily during hot weather.
-
Fertilizing: After the first 3–4 weeks, feed your plant every 2–3 weeks with a diluted organic fertilizer or compost tea.
-
Pruning: Once the plant reaches about 6–8 inches tall, pinch the growing tip to encourage branching and more fruit production.
-
Support: Use a small stick or stake if the plant becomes top-heavy with fruit.
Pest Management
Chili plants grown in containers are less prone to pests, but keep an eye out for:
-
Aphids – Remove with water spray or neem oil
-
Whiteflies – Use sticky traps or insecticidal soap
-
Spider mites – Boost humidity or apply neem solution
Good airflow and clean surroundings help prevent infestations.
Harvesting Your Chilies
Most chili peppers are ready to harvest 60–90 days after planting, depending on the variety. Harvest when fruits are firm and fully colored (green, red, yellow, or purple, depending on the type).
Use scissors to snip them off gently to avoid damaging the plant. Frequent harvesting encourages new blooms and more fruit.
Reusing Your Bottles
After harvesting, you can reuse your bottles for the next crop. Remove the old plant, refresh the soil with compost, and start over with seeds or seedlings.
Bottles can also be used to grow herbs, leafy greens, or even small root vegetables—making them a long-term solution for compact home gardening.
Final Thoughts
Planting chili peppers in bottles is a practical and satisfying way to grow your own spicy harvest in tight spaces. It’s low-cost, eco-friendly, and ideal for urban dwellers or anyone wanting to dip into home gardening without a full garden setup.
With just a few simple steps, some recycled bottles, and regular care, you can enjoy a steady supply of fresh, flavorful chilies right from your balcony or windowsill.


