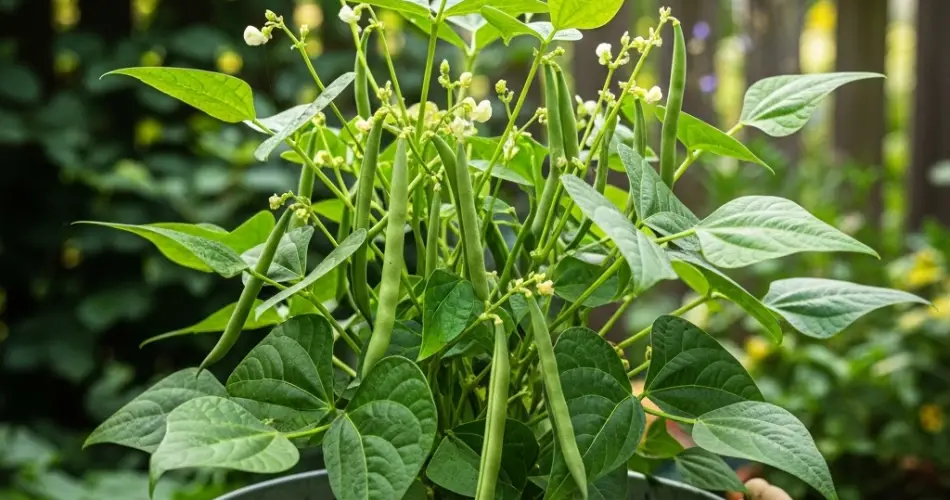
Beans are among the easiest and most rewarding vegetables to grow, especially in containers. With their ability to fix nitrogen in the soil, beans not only provide a nutritious harvest but also enrich the growing medium for future crops. Bucket gardening offers a practical way to grow beans when space is limited, making it ideal for balconies, patios, rooftops, or small backyard corners.
Whether you choose bush beans or climbing varieties, growing them in buckets ensures a steady supply of fresh, crisp pods right at your doorstep. Here’s a complete step-by-step guide to growing beans in buckets successfully.
Why Grow Beans in Buckets?
Beans adapt well to containers, and buckets make excellent planters because they are:
-
Affordable and accessible – Almost anyone can find or recycle a bucket for gardening.
-
Space-saving – Perfect for small spaces, allowing you to grow vertically or compactly.
-
Portable – Buckets can be moved to follow the sun or sheltered during storms.
-
Productive – With proper care, a single bucket can yield multiple harvests of beans.
This method is especially useful for urban gardeners or those without access to traditional garden beds.
Choosing the Right Bucket and Beans
Bucket Selection
A standard 5-gallon bucket works best for beans. Ensure the following:
-
Depth: At least 12 inches to support root development.
-
Drainage: Drill 6–8 small holes in the bottom to prevent waterlogging.
-
Material: Food-grade plastic buckets are ideal, but clay or metal containers with proper drainage also work.
Best Bean Varieties for Buckets
-
Bush beans: Compact, do not require staking, and mature quickly. Great for beginners.
-
Pole beans: Tall and vining, they require trellises or supports but offer higher yields.
Choose based on your available space and preference for harvest style.
Preparing the Soil Mix
Beans prefer light, well-drained soil with good fertility. For bucket gardening, avoid heavy garden soil that compacts easily. Instead, prepare a balanced mix:
-
40% potting soil
-
40% compost or well-rotted manure
-
20% perlite or coarse sand for drainage
Beans don’t need heavy fertilization, as they fix their own nitrogen, but they benefit from nutrient-rich soil at the start.
Planting Beans in Buckets
-
Fill the bucket with your prepared soil mix, leaving about two inches of space from the rim.
-
Sow the seeds directly—beans do not transplant well, so avoid starting them indoors.
-
Plant depth: Place seeds about 1–1.5 inches deep.
-
Spacing: For bush beans, sow 5–6 seeds evenly spaced per bucket. For pole beans, sow 3–4 seeds near the center to allow room for support structures.
-
Water lightly to settle the soil without over-saturating.
Germination usually occurs within 7–10 days under warm conditions.
Providing Support for Pole Beans
If you’re growing pole beans, set up supports right after planting to avoid disturbing the roots later. Options include:
-
A bamboo teepee placed in the bucket.
-
A vertical trellis attached to the bucket or nearby wall.
-
Sturdy stakes arranged in the center of the container.
Bush beans generally do not need supports, though they may benefit from a small stake if they get top-heavy.
Sunlight and Watering Needs
Beans love warmth and sunlight.
-
Sunlight: Position buckets in a location with at least 6–8 hours of direct sunlight daily.
-
Watering: Keep the soil consistently moist but not soggy. Buckets dry out faster than ground soil, so check daily. Water deeply when the top inch feels dry.
Avoid wetting the foliage excessively, as this can encourage fungal diseases.
Fertilization
Because beans produce their own nitrogen, avoid heavy nitrogen fertilizers, which promote leafy growth at the expense of pods. Instead:
-
Use a balanced organic fertilizer or compost tea every 3–4 weeks.
-
If growth seems slow, apply a light dose of phosphorus- and potassium-rich fertilizer to encourage flowering and fruiting.
Harvesting Beans
Beans mature quickly, and regular harvesting encourages more production.
-
Bush beans: Ready for picking in about 50–60 days. Harvest pods when they are firm but not bulging with seeds.
-
Pole beans: Start producing later, but continue yielding for weeks if picked regularly.
Harvest by gently pinching or cutting pods to avoid damaging the plant. Continuous harvesting can double or even triple your yield.
Common Problems and Solutions
-
Yellow leaves: Often due to overwatering or poor drainage—improve airflow and reduce watering.
-
Aphids or spider mites: Rinse with water or spray with a natural insecticidal soap.
-
Powdery mildew: Avoid overhead watering and ensure good spacing for airflow.
Beans are generally hardy, but preventive care keeps them healthy.
Extending the Harvest
To enjoy beans for a longer period, try succession planting. Sow new seeds in fresh buckets every 2–3 weeks during the growing season. This ensures a staggered harvest and prevents the crop from maturing all at once.
Final Thoughts
Bucket gardening makes bean cultivation accessible to anyone, no matter the space limitations. With just a bucket, good soil, and plenty of sunlight, you can enjoy multiple harvests of fresh beans right from your balcony, patio, or rooftop.
Beans not only provide a nutritious addition to meals but also improve the soil, making them a sustainable choice for container gardeners. Whether you choose bush beans for simplicity or pole beans for vertical abundance, this step-by-step method guarantees success in your small-space garden.


