Green beans are one of the most rewarding vegetables to grow, even in limited spaces. With their crisp pods, delicious flavor, and versatility in cooking, they make an excellent choice for home gardeners. The good news is that you don’t need a large garden to enjoy fresh beans. By using simple containers like buckets, you can grow thriving bean plants right on your balcony, patio, or even a sunny windowsill.
This guide will walk you through the process of growing green beans in buckets, from choosing the right containers to harvesting your first batch of homegrown pods.
Why Grow Green Beans in Buckets?
Bucket gardening has become a popular option for city dwellers and anyone with limited outdoor space. For green beans, it offers several benefits:
-
Space-saving: Buckets fit neatly into small corners and can be arranged vertically.
-
Portability: Easily move buckets to catch sunlight or avoid heavy rain.
-
Soil control: You decide the soil quality, reducing pests and diseases.
-
Accessibility: Great for beginner gardeners or those with limited mobility.
Beans are also excellent for container gardening because they don’t require overly rich soil and can adapt well to confined root space.
Step 1: Choosing the Right Bucket
The first step is selecting a container. A 5-gallon bucket is ideal for green beans. Make sure the bucket has drainage holes drilled at the bottom to prevent waterlogging. Without proper drainage, roots may rot and plants can fail to thrive.
If you plan on growing climbing beans, consider adding a trellis or stake system directly into the bucket for support. Bush bean varieties, on the other hand, require less vertical support and fit comfortably in smaller spaces.
Step 2: Preparing the Soil
Green beans prefer loose, well-draining soil that is moderately fertile. Unlike heavy feeders such as tomatoes, beans don’t need overly rich soil since they fix nitrogen naturally from the air.
A good soil mix for bucket planting is:
-
2 parts potting soil
-
1 part compost
-
A small amount of perlite or coarse sand for drainage
Avoid soil mixes that are too dense, as compacted soil restricts root growth.
Step 3: Choosing the Right Variety
There are two main types of green beans to choose from:
-
Bush beans: Compact, low-growing plants that don’t need much support. They mature quickly and are ideal for buckets.
-
Pole beans: Climbing varieties that grow tall and produce beans for a longer season. They require trellises, poles, or netting for support.
For beginners, bush beans are usually easier to manage in buckets. However, pole beans are great if you want a steady harvest over several weeks.
Step 4: Planting the Seeds
Green beans grow best when directly sown into the soil rather than transplanted. Here’s how to plant them:
-
Fill the bucket with soil, leaving 2–3 inches at the top.
-
Plant seeds about 1 inch deep.
-
Space seeds 3–4 inches apart. In a 5-gallon bucket, you can plant about 6–8 seeds.
-
Cover lightly with soil and water gently.
Seeds usually sprout within 7–10 days if kept warm and moist.
Step 5: Providing Sunlight and Water
Beans are sun-loving plants that require at least 6–8 hours of direct sunlight daily. Place the bucket in the sunniest location available.
Watering is crucial, especially since containers dry out faster than garden beds. Keep the soil evenly moist but not soggy. Check daily during hot weather, as buckets can heat up quickly and cause soil to dry out faster.
Step 6: Supporting the Plants
If you’re growing pole beans, set up supports as soon as seedlings appear. Options include bamboo poles tied into a teepee, wire cages, or netting fixed to the bucket. The plants will naturally climb and wrap around the support as they grow.
Bush beans generally don’t need support, but a small cage can help keep plants upright and prevent pods from touching the soil.
Step 7: Fertilizing and Maintenance
Beans don’t require heavy fertilization. In fact, too much nitrogen will produce excessive leaves at the expense of pods. A balanced liquid fertilizer once a month is enough.
Other maintenance tips include:
-
Mulching: Add a thin layer of mulch to help retain soil moisture.
-
Thinning: If seedlings sprout too close together, thin them to prevent overcrowding.
-
Pest control: Watch for aphids or spider mites. Neem oil or insecticidal soap can be used if needed.
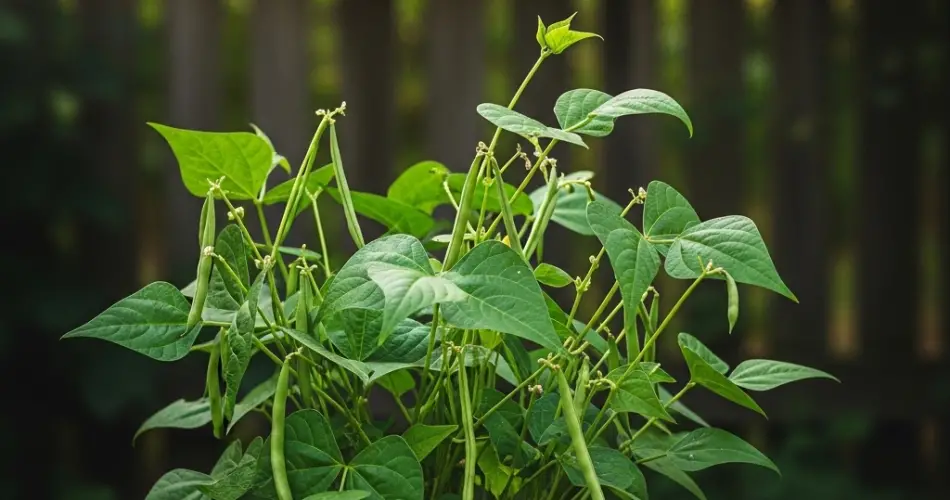
Step 8: Harvesting Green Beans
Green beans are usually ready to harvest in 50–60 days, depending on the variety. Pick pods when they are firm, crisp, and about the thickness of a pencil. Don’t wait too long, or they may become tough and stringy.
Regular harvesting encourages the plant to produce more pods, extending your yield. For pole beans, you can continue harvesting over several weeks, while bush beans often produce in a single flush.
Step 9: Storing and Enjoying Your Beans
Freshly harvested beans taste best when eaten immediately, but they can also be stored in the refrigerator for up to a week. If you grow a large batch, blanch and freeze beans to enjoy them later.
Conclusion
Growing green beans in buckets is a simple and highly rewarding gardening project. With minimal space, a bit of soil, and proper care, you can enjoy a steady supply of crisp, homegrown beans right at home. Whether you choose bush or pole varieties, this bucket gardening method ensures you can harvest fresh beans even in the smallest of spaces.
If you’re looking for a beginner-friendly crop that grows quickly and provides delicious results, green beans are an excellent choice for your container garden.


