Anthuriums, with their glossy leaves and vibrant, heart-shaped blooms, add an elegant touch to any indoor setting. Often referred to as “flamingo flowers,” these tropical plants are surprisingly easy to grow at home, even in limited space. If you’re looking for a way to bring color and sophistication into a small apartment or urban home, consider using recycled plastic bottles to grow Anthuriums. It’s a sustainable, low-cost, and space-saving method perfect for modern lifestyles.
Upcycling plastic bottles into planters not only helps reduce household waste but also allows you to create beautiful vertical or tabletop gardens without the need for traditional pots. This guide will walk you through everything you need to start growing Anthuriums in bottle planters, making the most of any space—windowsills, balconies, or even your kitchen counter.
Why Choose Anthuriums for Bottle Gardening?
Anthuriums are ideal for indoor gardening because they thrive in indirect light and warm temperatures. Their compact root systems adapt well to smaller containers, making them a perfect match for bottle gardening. The plant’s striking blooms last for weeks, and with proper care, they can flower year-round indoors.
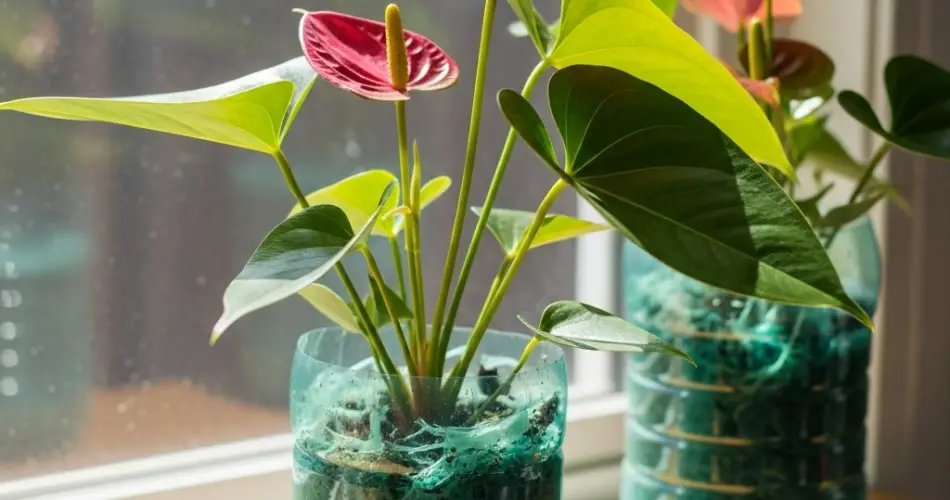
Plastic bottles are lightweight, easy to modify, and often transparent—letting you monitor root development and moisture levels. They also make it possible to create vertical gardens, hanging displays, or a neat row of tabletop planters.
Materials Needed
-
1 or 2-liter plastic bottles
-
Scissors or craft knife
-
Well-draining potting mix (orchid mix or peat-based indoor plant soil works well)
-
Small Anthurium plant or division
-
Pebbles or small rocks (for drainage)
-
Optional: activated charcoal (for odor control)
-
Decorative materials like string, paint, or fabric (if desired)
Step-by-Step Instructions
1. Cut and Prepare the Bottle
Start by washing and drying your plastic bottle thoroughly. Cut the bottle in half or at about one-third of the way down from the top. You can use the bottom part as a planter, or invert the top section into the base to make a self-watering container. For either option, be sure to poke drainage holes in the bottom using a heated skewer, nail, or knife.
If you’re planning to hang the planter, poke two holes near the top of the container and thread a string or wire through them to create a hanging loop.
2. Add a Drainage Layer
To prevent waterlogging, place a thin layer of pebbles or small rocks at the bottom of your planter. Anthuriums prefer well-drained soil and are sensitive to root rot. If available, add a small amount of activated charcoal above the stones to help filter excess moisture and reduce any odor.
3. Prepare the Soil
Anthuriums prefer loose, well-aerated soil with excellent drainage. Use a potting mix formulated for orchids or a blend of peat moss, pine bark, and perlite. Avoid using heavy garden soil, which can retain too much moisture.
Fill the bottle container about two-thirds full with your soil mix.
4. Transplant the Anthurium
Gently remove your Anthurium from its nursery pot and loosen the roots if they are tightly bound. Place the plant in the center of the bottle planter, and fill in the remaining space with soil. Press down lightly around the base to secure it.
Water the soil thoroughly, allowing excess water to drain from the bottom. Anthuriums like evenly moist soil but not soggy conditions.
Care Tips for Bottle-Grown Anthuriums
Light: Place your bottle planter in a spot with bright, indirect light. Avoid direct sunlight, which can scorch the leaves. North or east-facing windows work well.
Watering: Water when the top inch of soil feels dry. Because bottles retain moisture longer than ceramic pots, always check before watering again. In self-watering setups, make sure the water reservoir isn’t overfilled.
Humidity: Anthuriums are tropical plants and love humidity. Mist the leaves regularly or place a small dish of water nearby to raise humidity around the plant.
Fertilizing: Feed your Anthurium once a month during the growing season (spring and summer) using a diluted balanced liquid fertilizer. Reduce feeding in fall and winter when growth slows down.
Pruning and Maintenance: Remove any yellowing or damaged leaves to keep your plant looking tidy. Wipe leaves with a damp cloth to remove dust and help them breathe better.
Decorating with Bottle Planters
Bottle planters can be customized to match your home’s decor. Wrap the exterior with jute rope for a rustic look, paint the bottles with bold colors, or cover them with patterned fabric for a chic touch. Arrange multiple bottle planters on a shelf or hang them by a sunny window to create a vertical garden of Anthuriums.
You can also experiment with mounting bottles on walls or wooden boards to make eye-catching green art installations in small spaces.
Final Thoughts
Growing Anthuriums in plastic bottles is a clever, stylish, and eco-friendly way to enjoy tropical blooms indoors. This method not only recycles common waste items but also gives apartment dwellers and small-space gardeners a way to enjoy beautiful houseplants without needing much room. With the right care, your Anthurium bottle garden will thrive—offering continuous beauty and a breath of fresh air right in your home.


