Spider plants (Chlorophytum comosum) are among the easiest and most rewarding houseplants to grow, especially for beginners or those with limited space. Known for their graceful, arching green leaves with white stripes and small plantlets that dangle like spiders, these plants thrive in a variety of indoor conditions. Even better, spider plants are excellent air purifiers, making them a popular choice for indoor environments.
If you’re looking to grow spider plants on a budget or in small spaces, using recycled plastic bottles as planters is a smart, eco-friendly solution. This guide will walk you through how to create simple, low-maintenance bottle planters that help spider plants flourish while also cutting down on plastic waste.
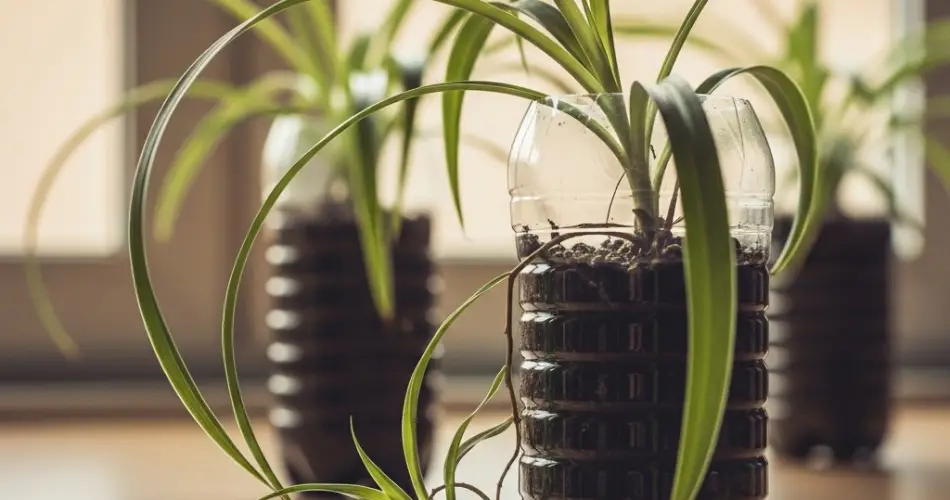
Why Spider Plants are Perfect for Bottle Gardening
Spider plants are well-suited for bottle planters because they have shallow root systems and don’t need large containers to thrive. They are also adaptable to a wide range of indoor environments, including bathrooms, kitchens, offices, and shaded corners of your home.
Using bottles as planters allows for:
-
Creative container options
-
Inexpensive indoor gardening
-
Recycling plastic bottles into useful planters
-
Easy propagation from spiderettes (baby plants)
These compact planters are great for windowsills, hanging displays, or vertical garden walls.
Choosing the Right Bottle
Start with any clean plastic bottle — a 1- to 2-liter soda or water bottle works well for a single spider plant. If you’d like a hanging version, opt for a bottle with a screw cap and sturdy structure.
Bottle prep steps:
-
Cut the bottle around one-third from the top. The lower part will be your planter.
-
Make drainage holes at the base using a heated pin or sharp knife.
-
Add stones or gravel for additional drainage if desired.
-
Wrap the bottle with jute, fabric, or paint it for a decorative touch and to block light from the roots.
You can also invert the top portion to create a self-watering system or make slits for hanging on a wall or window frame.
Best Soil for Spider Plants
Spider plants prefer loose, well-draining potting mix. While they aren’t too picky, a balanced mix will help maintain root health and support strong foliage growth.
Use the following soil mix:
-
2 parts regular potting soil
-
1 part perlite or coarse sand
-
1 part coconut coir or compost
Avoid heavy soils that retain too much water, as spider plants are prone to root rot if overwatered.
Planting Spiderettes in Bottles
Spider plants produce small plantlets on long stalks, which can easily be rooted in soil or water. These are perfect for starting in bottle planters.
To plant a spiderette:
-
Choose a healthy baby spider plant with small roots or visible nubs.
-
Cut it from the mother plant using sterilized scissors.
-
Let it air dry for a few hours before planting.
-
Fill your prepared bottle with soil and gently press the spiderette into the surface.
-
Water lightly and place in a well-lit area, avoiding direct midday sunlight.
Roots typically develop within 1–2 weeks. If propagating in water first, transfer the plant to soil once roots are 1–2 inches long.
Ideal Conditions for Spider Plants
Spider plants are incredibly forgiving, but they flourish in bright, indirect light. They can also tolerate lower light levels, making them ideal for indoor spots that don’t get direct sunlight.
Light: Bright, indirect is best. Avoid strong sun, which can scorch leaves.
Temperature: Between 60–75°F (16–24°C)
Humidity: Tolerates normal indoor humidity but appreciates occasional misting
Air Circulation: Good airflow helps prevent pests and fungus
Rotate the bottle planter occasionally for even growth and leaf spread.
Watering and Fertilizing
Spider plants are low maintenance but require some attention to moisture levels. Overwatering is a common mistake, especially in containers without proper drainage.
Watering tips:
-
Water when the top inch of soil feels dry.
-
Reduce watering during the cooler months.
-
Don’t allow water to sit in the bottom of the bottle planter.
Fertilizer needs:
-
Feed with a diluted liquid houseplant fertilizer once a month during the growing season (spring through summer).
-
Skip feeding in winter when growth slows.
Styling and Placement Ideas
Bottle planters can be styled to suit your décor. Try the following ideas:
-
Hanging planters: Use twine to hang the bottles near a window.
-
Windowsill row: Line several bottles with different plant varieties.
-
Wall mount: Secure bottles horizontally on a wooden board or rack.
-
Desk décor: Keep a small bottle planter next to your workspace for a touch of green.
You can even mix and match bottle sizes and colors for a vibrant mini indoor garden.
Long-Term Care and Repotting
Spider plants in bottle planters will eventually need more space, especially if they outgrow the small container or become root-bound.
Repotting steps:
-
Gently remove the plant from the bottle.
-
Trim any brown or damaged roots and rinse the base.
-
Transfer to a slightly larger container with fresh soil.
-
Water and return to its usual location.
Regular grooming—trimming brown leaf tips and removing spent spiderettes—keeps your plant looking lush and tidy.
Conclusion
Creating easy-care bottle planters for spider plants is a smart and sustainable way to bring greenery into your home. With just a few materials and a little care, these air-purifying plants will brighten your indoor space while helping to improve air quality. Whether you’re decorating a small apartment or simply looking for a fun DIY project, spider plants in recycled bottles offer both beauty and environmental benefits.


