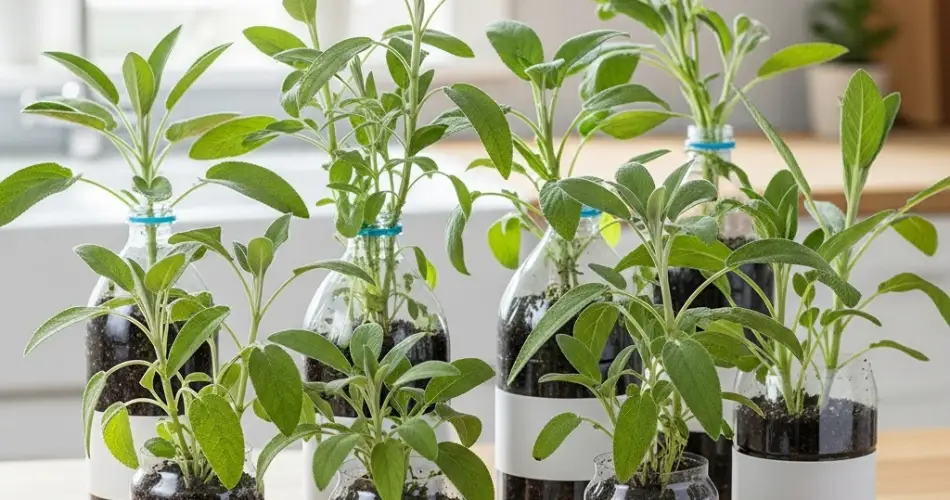
Sage is a versatile and fragrant herb that’s easy to grow and adds depth to a variety of dishes. While traditionally grown in garden beds or large pots, sage also thrives in compact environments—especially when given the right conditions. With just a few plastic bottles and some basic supplies, you can create a sustainable bottle garden that produces fresh sage right from your windowsill, balcony, or kitchen counter.
This guide will walk you through growing sage in small spaces using upcycled plastic bottles. It’s a practical and eco-friendly solution for urban gardeners, beginners, or anyone interested in keeping a fresh herb supply without needing a yard.
Why Grow Sage in Bottles?
Sage is a hardy, low-maintenance herb with shallow roots, making it ideal for container growing. By using recycled plastic bottles, you not only reduce plastic waste but also create lightweight, movable planters that can be hung or placed wherever you have a bit of sunlight.
Bottle gardening is perfect for people with limited space and offers a convenient way to bring greenery and fresh flavor into your daily life.
What You’ll Need:
-
1.5- or 2-liter plastic bottles (clean and label-free)
-
Sage seeds or small sage seedlings
-
Lightweight potting mix (with good drainage)
-
Scissors or utility knife
-
Nail or heated skewer (for drainage holes)
-
Small pebbles or gravel (optional)
-
String, twine, or wire (if hanging bottles)
-
Spray bottle or small watering can
-
Sunny windowsill, balcony, or porch
Step 1: Prepare the Bottles
Begin by washing your plastic bottles and removing any labels. Using scissors or a sharp utility knife, cut a rectangular opening on one side of the bottle to create the planting space. Leave about an inch of plastic at the bottom to hold soil.
Poke 3–4 small holes at the bottom of the bottle to ensure proper drainage. If you plan to hang your bottle, make two small holes near the top and run string or wire through them to create a hanging loop.
Step 2: Add Soil and Prepare for Planting
Sage prefers light, well-draining soil. Use a potting mix blended with perlite, sand, or coco coir to increase airflow and drainage. Optionally, add a thin layer of small stones or gravel to the bottom of the bottle to improve drainage.
Fill the bottle about two-thirds full with your soil mix, but don’t pack it too tightly—roots need space to grow and breathe.
Step 3: Planting Sage
You can grow sage from seed, cuttings, or seedlings.
From seed:
Plant 3–4 seeds about 1 cm deep in the soil and gently cover them. Mist with water to moisten the surface. Seeds will typically germinate in 1–2 weeks.
From cuttings or seedlings:
If you’re using a seedling or rooted cutting, make a small hole in the soil and place the plant inside. Cover the roots and press the soil gently around the base. Water lightly.
Place the bottle planter in a spot that gets at least 5–6 hours of sunlight daily. Sage loves full sun and will grow best when given plenty of light.
Step 4: Watering and Light Requirements
Sage is drought-tolerant and prefers slightly dry conditions over soggy soil. Water only when the top inch of soil feels dry to the touch. Use a spray bottle for young plants and a small watering can as they mature.
Ensure your bottle has adequate drainage, and avoid letting water collect at the bottom. Too much moisture can cause root rot or fungal problems.
Step 5: General Care and Maintenance
Sage doesn’t require heavy feeding. A light dose of organic liquid fertilizer once a month is enough. If leaves appear pale or the plant looks weak, a compost tea or diluted seaweed solution can provide a gentle nutrient boost.
To keep the plant bushy and healthy, pinch back the growing tips regularly. This will encourage side branching and prevent the plant from getting leggy.
Remove any flowers that begin to form, as flowering can reduce the intensity of flavor in the leaves.
Step 6: Harvesting Your Sage
Sage can be harvested once the plant has at least 4–6 inches of growth. Use scissors to snip leaves or cut sprigs just above a leaf node. Always leave a few sets of leaves on the plant so it can continue growing.
For cooking, you can use the fresh leaves or dry them for storage. To dry, simply tie sprigs together and hang them upside down in a warm, dry place until the leaves crumble easily.
Creative Ideas for Your Sage Bottle Garden
-
Hang several bottle planters along a sunny wall or balcony railing.
-
Use decorative string, labels, or paint to customize your bottles.
-
Combine sage with other Mediterranean herbs like rosemary or thyme in a vertical bottle rack.
-
Place your bottles in a tiered shelf or crate for a compact, layered herb garden.
Conclusion
Growing sage in a bottle garden is a simple and sustainable way to cultivate your own herbs, even in the smallest of spaces. With just a few plastic bottles and a sunny corner, you can enjoy fresh, homegrown sage right at your fingertips. Whether you’re seasoning roasted vegetables, making tea, or adding flavor to sauces, your compact sage garden will provide beauty, aroma, and culinary value all year round.


