Sage (Salvia officinalis) is a hardy, aromatic herb used for culinary, medicinal, and ornamental purposes. It’s a favorite in the garden for its silvery leaves and earthy fragrance, and it grows well in containers—making it ideal for balconies, small gardens, or indoor spaces. If you want to multiply your sage plants without buying more seeds or seedlings, propagation through cuttings in plastic bottles is a simple, sustainable, and cost-effective method.
Using upcycled plastic bottles as containers allows you to recycle household waste while creating a mini-propagation station that works even in limited spaces. With just a few tools and a healthy mother plant, you can root sage cuttings and transplant them into your herb garden or kitchen windowsill.
Why Propagate Sage from Cuttings?
Sage is relatively easy to propagate from stem cuttings. This method ensures the new plant will be genetically identical to the parent, preserving the desirable qualities of taste, aroma, and resilience. Propagation from cuttings is faster than growing from seeds, which can be slow and less reliable in terms of germination.
Rooting sage in water or directly in soil housed in plastic bottles provides an ideal environment with consistent humidity and warmth—both important for successful rooting.
What You’ll Need
To propagate sage in bottles, gather the following materials:
-
A healthy sage plant (for cuttings)
-
1.5–2-liter plastic bottles
-
Sharp scissors or garden shears
-
Potting mix (light and well-draining)
-
Optional: rooting hormone (natural or commercial)
-
Spray bottle or watering can
-
Water
-
Small stones or charcoal (for drainage)
-
A bright but indirect sunlight location
Step 1: Prepare the Plastic Bottles
-
Clean the Bottles
Wash and rinse the bottles thoroughly to remove any residue. Remove labels for a cleaner appearance and better light access. -
Cut the Bottles
Cut each bottle horizontally at about one-third from the top. Use the bottom part for planting. You can set aside the top portion to use later as a humidity dome or discard it. -
Make Drainage Holes
Use a hot nail, needle, or sharp tool to poke 4–6 small holes in the bottom of the bottle for drainage. -
Add Drainage Layer
Place a few small pebbles or a layer of charcoal at the bottom of the container to help with water flow and root aeration. -
Fill with Soil
Add well-draining potting soil. A mix containing compost, sand, or perlite is best to prevent water retention that can rot the cuttings.
Step 2: Take and Prepare the Cuttings
-
Choose Healthy Stems
Select healthy, non-flowering stems from the parent sage plant. The ideal cutting is about 4–6 inches long and taken from soft, green growth—not woody branches. -
Cut and Trim
Use clean, sharp scissors to snip the cutting just below a leaf node (where leaves join the stem). Remove the lower leaves, leaving only a few at the top to reduce moisture loss. -
(Optional) Dip in Rooting Hormone
Dip the cut end into water, then into rooting hormone powder or gel. This step can speed up root development but is not strictly necessary.
Step 3: Plant the Cuttings
-
Create a small hole in the center of the soil using a stick or your finger.
-
Insert the sage cutting into the hole, burying it about 1.5–2 inches deep.
-
Gently firm the soil around the cutting to keep it upright.
-
Mist the soil lightly to moisten it without soaking.
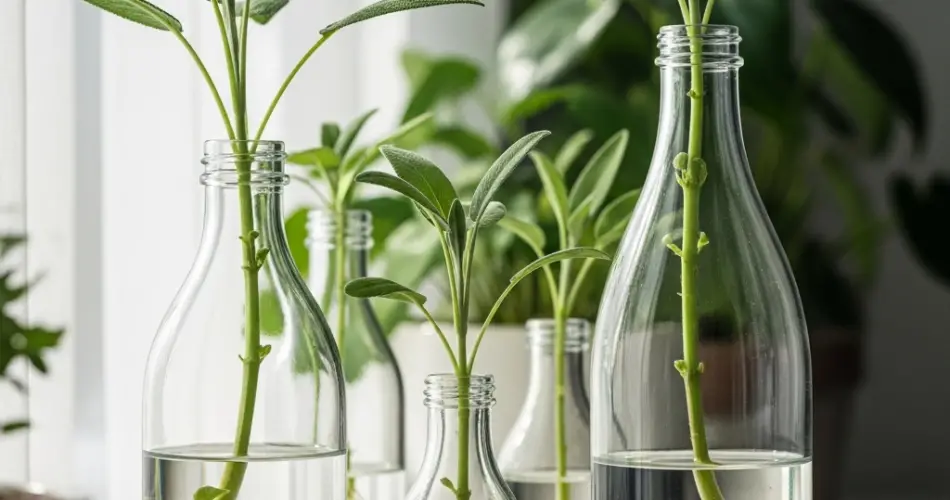
If you prefer to root the cuttings in water first:
-
Place the cutting in a clear glass or bottle with 1–2 inches of water.
-
Change the water every 2–3 days.
-
After 10–14 days, roots should develop. Once the roots are about 1–2 inches long, transplant the cutting into soil.
Step 4: Provide the Right Environment
-
Light:
Place the bottle in a bright spot with indirect sunlight. Direct sun can be too harsh on fresh cuttings and may dry them out. -
Humidity:
If you’re rooting directly in soil, cover the cutting with the top half of the bottle (like a greenhouse dome) to maintain humidity. Remove the cover daily for an hour to let in fresh air. -
Watering:
Keep the soil moist but not wet. Mist lightly every day or two as needed. -
Air Circulation:
Good airflow is important to prevent mold or fungus. Don’t crowd your bottle planters.
Step 5: Transplanting Rooted Cuttings
After 3–4 weeks, gently tug the cutting to test for resistance. If it resists, roots have formed. At this stage:
-
Remove the plastic cover permanently if you used one.
-
Begin acclimating the plant to more sunlight gradually.
-
Once the cutting is strong and growing new leaves, transplant it into a larger pot or permanent container.
Final Thoughts
Propagating sage in bottles from cuttings is an easy and sustainable way to expand your herb garden. With just a few materials and some patience, you can root new sage plants and enjoy their aroma, flavor, and ornamental appeal indoors or out.
This method is perfect for gardeners with limited space, zero-waste goals, or a desire to multiply their favorite herbs without extra cost. Try it once, and you’ll likely have a continuous supply of sage—grown straight from your own kitchen cuttings and bottled containers.


