The rubber plant (Ficus elastica) is a striking houseplant admired for its large, glossy leaves and bold, upright growth. It’s a favorite among indoor gardeners due to its dramatic appearance and easy-care nature. While these plants are typically propagated in soil, rooting rubber plant cuttings in water is a simple and satisfying method—especially when using recycled plastic bottles. This technique lets you watch the rooting process in real time, offering both a practical and eco-friendly way to multiply your plant collection.
With patience and a few basic materials, you can successfully root rubber plant cuttings in bottled water and enjoy new growth in a matter of weeks.
Why Water Propagation Works for Rubber Plants
Rubber plants are woody evergreens, and although they root more slowly than softer-stemmed plants, they can still be propagated effectively in water. Using clear plastic bottles as propagation vessels offers several advantages:
-
You can monitor root development easily.
-
Bottles are lightweight, readily available, and reduce plastic waste.
-
The method is beginner-friendly and requires minimal materials.
Water propagation can be especially useful for growing new plants from healthy trimmings or rejuvenating leggy specimens.
What You’ll Need
-
A healthy rubber plant branch (4–8 inches long) with at least one leaf
-
A clear plastic bottle (1–1.5 liters)
-
Sharp, clean pruning shears or scissors
-
Room-temperature water (filtered or dechlorinated preferred)
-
A clean cloth or paper towel
-
Optional: rooting hormone, decorative wraps for the bottle
Preparing the Cutting
Begin by selecting a healthy stem from your rubber plant. Look for a semi-woody branch with at least one leaf and a visible node (the small bump on the stem where a leaf emerges). This node is where new roots will develop.
Steps:
-
Using clean scissors or pruning shears, cut the branch just below a node.
-
Remove the lower leaves, leaving only the topmost one or two. This reduces water loss and prevents leaves from rotting in water.
-
Allow the cutting to sit for 30–60 minutes. This helps the white sap (latex) dry and reduces the chance of bacterial infection.
-
(Optional) Dip the cut end in rooting hormone to encourage faster root development.
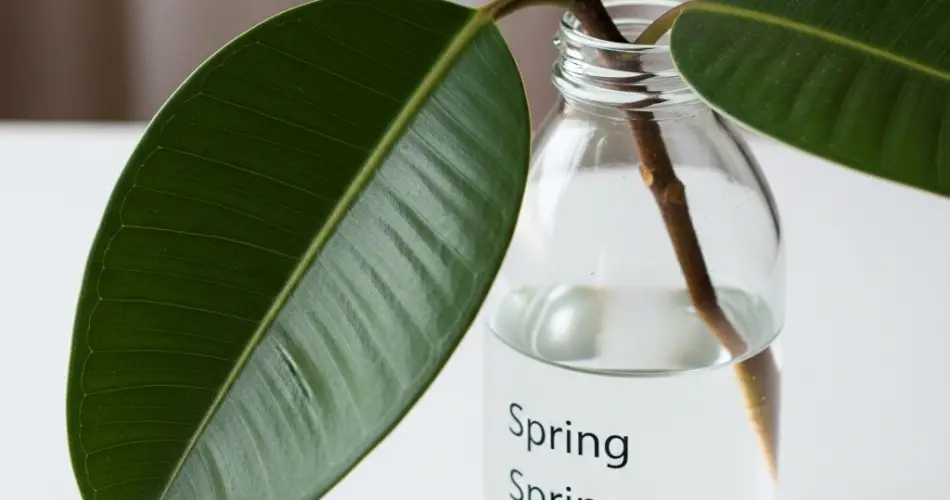
Setting Up the Bottle
Take your plastic bottle and cut off the top third. The bottom portion will serve as your water container.
-
Fill the bottle halfway with room-temperature water. Avoid overfilling—it’s best to submerge just the node area.
-
Place the cutting in the bottle, ensuring the node is under water and no leaves are touching the water.
-
If the bottle’s mouth is narrow, you can use it without cutting—just insert the cutting carefully.
To keep the setup looking neat, wrap the bottle in twine, fabric, or paper to block excess light and reduce algae growth. However, leave one side clear if you want to watch the roots grow.
Placement and Lighting
Place the bottle in a warm spot with bright, indirect light. Rubber plants need consistent warmth (18–27°C or 65–80°F) to root well. Avoid placing the bottle in direct sun, as heat can build up and damage the cutting.
Do not move the cutting frequently. Stability helps promote rooting, and too much disturbance can delay growth.
Maintenance During Rooting
-
Change the water every 5–7 days to keep it fresh and oxygenated.
-
Wipe the container if algae or debris forms.
-
Watch for rot: If the stem darkens or softens, remove the cutting, trim above the rot, and start again.
Roots typically begin forming after 4–6 weeks, although it can take longer depending on the season and environment. Be patient—rubber plant cuttings root slowly, but steadily.
Once the roots reach about 2–3 inches in length, the cutting is ready to move to soil.
Transplanting to Soil
After the cutting has developed healthy roots, it can be planted in a pot with well-draining soil. Choose a small container with drainage holes and use a potting mix designed for indoor plants—preferably with added perlite or coco coir for better aeration.
-
Gently remove the cutting from the water and rinse the roots.
-
Fill the pot with soil and plant the cutting so the base is just below the soil surface.
-
Water lightly and place the pot back in bright, indirect light.
-
Allow the soil to dry partially before watering again.
During the transition, the cutting may slow down temporarily as it adjusts to the new medium.
Styling and Display
Rubber plant cuttings rooted in bottles can be quite decorative. Consider using:
-
Multiple cuttings in a row of bottles for a modern display
-
Painted or wrapped bottles for a customized look
-
Hanging bottle planters for a vertical accent
Even before transplanting to soil, the cuttings can serve as live décor in kitchens, offices, or windowsills.
A Simple, Sustainable Way to Propagate
Rooting rubber plant branches in bottled water is a rewarding way to expand your indoor plant collection while reducing waste. This method combines simplicity with sustainability, requiring little more than a healthy plant, a plastic bottle, and time. Whether you’re starting new plants or sharing cuttings with friends, water propagation offers a hands-on, beautiful way to bring more greenery into your home.


