Mint (Mentha spp.) is one of the easiest and most rewarding herbs to grow at home. Known for its vigorous growth and refreshing aroma, mint is ideal for teas, desserts, salads, and even natural air freshening. However, its aggressive spreading habit makes it a perfect candidate for container gardening—and wall gardens using recycled plastic bottles are a smart and space-saving way to enjoy fresh mint without it overtaking your garden.
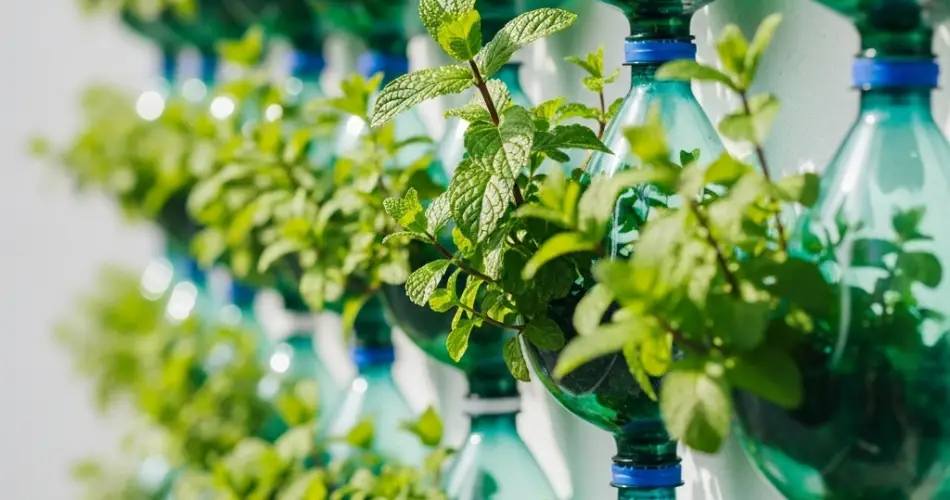
Repurposing plastic bottles for vertical gardening not only gives new life to everyday waste but also transforms your wall or fence into a green, fragrant herb haven. Here’s how to grow a lush, aromatic mint patch using nothing more than a few bottles, soil, and a sunny wall.
Why Grow Mint in Plastic Bottle Wall Gardens?
Mint is notorious for spreading rapidly through underground runners. When planted in open soil, it often invades nearby garden beds. Containerizing mint keeps it confined, and a vertical bottle garden offers these added benefits:
-
Eco-friendly: Reuses plastic bottles that would otherwise end up in landfills.
-
Space-saving: Ideal for balconies, patios, and small urban spaces.
-
Organized growth: Controls mint’s aggressive roots while still producing plenty of leaves.
-
Accessibility: Fresh mint is always within arm’s reach.
With the right setup, mint will thrive in its bottle homes and reward you with a constant supply of leaves.
Choosing the Right Mint Variety
There are many varieties of mint available, and most will grow well in containers. Some popular options include:
-
Spearmint (Mentha spicata): Mild and sweet—ideal for teas, sauces, and salads.
-
Peppermint (Mentha × piperita): Stronger flavor with a cooling effect—great for desserts and beverages.
-
Chocolate Mint: A unique variety with a subtle cocoa scent.
-
Apple Mint: Mildly fruity and soft-leaved, ideal for fresh garnishes.
Choose the variety that best suits your culinary needs and scent preferences.
Supplies You’ll Need
Before planting, gather the following:
-
Clean, empty plastic bottles (1.5L to 2L recommended)
-
Scissors or a sharp knife
-
Potting mix and compost
-
Mint cuttings or small nursery plants
-
String, twine, or wire for hanging
-
A drill or heated nail for making holes
-
A wall, fence, or wooden pallet to hang the bottles
Make sure bottles are thoroughly cleaned and labels removed before use.
How to Prepare the Bottles
-
Cut the opening: Lay the bottle horizontally and cut a rectangular opening on the side—about 4 inches wide and 6 inches long. This is where the plant will grow.
-
Create drainage holes: Poke several small holes in the bottom of the bottle to allow excess water to escape.
-
Make hanging holes: Near the bottle’s neck and base (on opposite sides), punch holes to thread string or wire through for vertical hanging.
-
Optional water reservoir: Leave the cap on and poke a small hole in it to allow slow drainage, especially useful for dry climates.
Assembling the Wall Garden
Mount the bottles vertically on a wall, fence, or pallet using nails, hooks, or wire. Space each bottle enough apart so the mint has room to grow and cascade down.
Choose a location that receives partial to full sunlight, ideally 4–6 hours per day. Mint tolerates partial shade, which makes it flexible for many wall placements.
Soil and Planting Instructions
Mint thrives in moist, nutrient-rich soil. Use a mix of:
-
2 parts potting soil
-
1 part compost
-
1 part coco coir or perlite for better moisture retention and aeration
Fill the bottles with the soil mix, leaving an inch at the top. Plant mint seedlings or rooted cuttings directly in the soil and firm them in gently.
If using cuttings, make sure the stems are at least 4–6 inches long, and remove the bottom leaves before planting. They’ll quickly establish roots in the soil.
Watering and Care
Mint likes consistently moist soil but doesn’t do well in soggy conditions. Check the bottles daily, especially in hot weather, and water when the top inch feels dry.
Watering tips:
-
Use a spouted watering can or squeeze bottle for targeted watering.
-
Make sure water drains freely through the bottom.
-
Avoid letting the roots sit in pooled water.
Mint doesn’t need heavy feeding. Apply diluted liquid fertilizer or compost tea every 4–6 weeks for healthy, leafy growth.
Trimming and Harvesting
To keep your wall garden neat and your mint productive:
-
Begin harvesting when the plant is about 6 inches tall.
-
Pinch or snip stems just above a pair of leaves.
-
Regularly trim the tops to encourage bushier growth and prevent legginess.
-
Remove flower buds if you want to prolong leaf production.
You can harvest mint throughout the season. To store, dry the leaves or freeze them in ice cubes for teas and drinks later on.
Troubleshooting Tips
-
Yellow leaves: Usually a sign of overwatering or poor drainage.
-
Leggy growth: Caused by low light—move the wall garden to a sunnier location.
-
Pests: Aphids and spider mites can appear—rinse with water or use neem oil spray if necessary.
-
Wilting: Check for underwatering or root-bound plants—mint roots can get dense quickly and may need thinning.
Final Thoughts
Mint’s fresh scent, culinary versatility, and vigorous growth make it a top choice for container and vertical gardening. Using recycled plastic bottles adds an eco-conscious twist to your herb garden while maximizing your growing space. With a simple setup and regular care, you can turn a bare wall into a lush, aromatic mint garden that refreshes both your meals and your living space.


