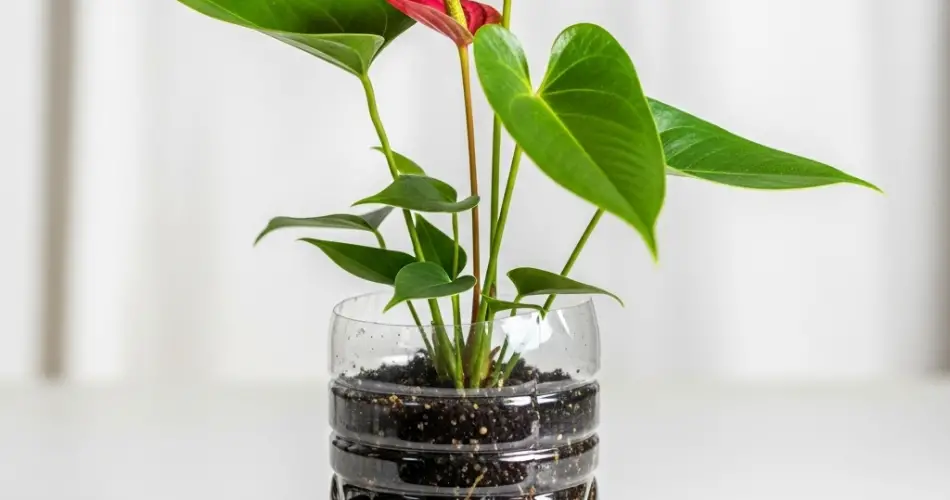
Anthuriums, also known as “flamingo flowers” or “laceleaf,” are prized for their glossy foliage and vivid, long-lasting blooms. These elegant tropical plants can be propagated not only in soil but also in water—offering a clean, decorative, and surprisingly simple way to expand your indoor garden. One of the most effective and sustainable methods for water propagation is to reuse plastic bottles as rooting containers.
Whether you’re new to plant propagation or looking for a creative indoor gardening project, growing anthurium in bottled water is easy and rewarding. With the right steps and a little patience, you’ll see roots begin to form, and soon, you’ll have a brand-new plant to enjoy or share.
Why Choose Water Propagation for Anthuriums?
Water propagation is a convenient method for growing new plants from cuttings. It eliminates the need for soil, allows you to clearly monitor root development, and provides a modern aesthetic for indoor plant displays. Reusing plastic bottles for this process makes the practice even more sustainable.
Advantages of using bottled water propagation for anthuriums:
-
Offers a clean, soil-free propagation environment
-
Ideal for observing root development
-
Recycles plastic bottles into useful plant containers
-
Requires minimal space and supplies
-
Enhances indoor décor with a fresh, minimalist style
What You’ll Need
To get started, gather the following materials:
-
A healthy, mature anthurium plant
-
A sharp, sterilized knife or scissors
-
A clean plastic bottle (500 ml to 1 liter is ideal)
-
Filtered or distilled water
-
Optional: activated charcoal (to keep water fresh)
-
A warm, bright location with indirect light
Step-by-Step: How to Propagate Anthurium in Bottled Water
1. Select a Healthy Stem Cutting
The first step is to choose the right cutting. Look for a healthy stem with at least one visible node (the area where roots and leaves grow) and preferably one or two leaves. Avoid cutting from a flowering stalk—new roots form more readily on leafy stems.
Using a clean, sharp tool, make a diagonal cut just below a node. Remove any lower leaves that would sit in water to prevent rot.
2. Prepare the Plastic Bottle
Choose a clear plastic bottle that allows light in but isn’t too tall for your cutting. Cut off the top third of the bottle to create a short, wide container. Rinse it thoroughly to remove any residue.
For a cleaner look, wrap the bottle in twine or decorate it with natural materials, or simply leave it transparent to showcase root growth.
3. Fill with Clean Water
Fill the bottle halfway with filtered or distilled water. Avoid tap water if it contains chlorine or fluoride, as these chemicals may harm delicate root tissues. To prevent bacterial buildup, you can add a small piece of activated charcoal to the bottom of the bottle.
Insert the stem cutting into the bottle so that the node is submerged in water, but no leaves are touching the water’s surface.
4. Provide Ideal Growing Conditions
Place the bottle in a location with bright, indirect sunlight. Avoid direct sun, which can overheat the water or scorch the leaves. Anthuriums prefer warmth and humidity, so a room with temperatures between 20°C to 26°C (68°F to 78°F) is ideal.
You should start to see root development in 2 to 4 weeks, depending on environmental conditions.
5. Maintain the Water and Monitor Growth
Change the water every 5 to 7 days to prevent stagnation and the buildup of algae or bacteria. Rinse the cutting gently if it appears slimy or if the water becomes cloudy.
Once the roots grow to about 2 to 3 inches long, you can either:
-
Transfer the cutting to a pot with soil for long-term growth
-
Continue growing it in water, refreshing the water regularly and feeding it lightly with a diluted liquid fertilizer every 4 to 6 weeks
Tips for Success
-
Don’t overcrowd the bottle. Propagate one or two cuttings per bottle to ensure good airflow and reduce the risk of rot.
-
Avoid leaf contact with water. Submerged leaves decay quickly and can harm the cutting.
-
Use a small container. Too much water can lead to oxygen deprivation for the roots.
-
Watch for root health. Healthy roots are white or pale yellow and firm. Mushy or brown roots should be trimmed away.
Decorative Ideas for Bottle Propagation
Once your anthurium cutting is established, turn your propagation setup into part of your home décor:
-
Use a hanging bottle display by adding string or macramé
-
Place the bottle in a wooden holder or on a windowsill for a modern, botanical touch
-
Group several propagation bottles together for a mini indoor greenhouse effect
This approach not only brings greenery into your space but also highlights the beauty of the propagation process itself.
Conclusion
Propagating anthuriums in bottled water is a simple, sustainable, and visually appealing way to multiply your plants. With just a recycled bottle, clean water, and a healthy cutting, you can create a thriving new plant without soil or fancy tools. Whether you grow your anthurium long-term in water or eventually transfer it to soil, this method offers an accessible way to explore plant propagation and enjoy the beauty of tropical greenery indoors.


