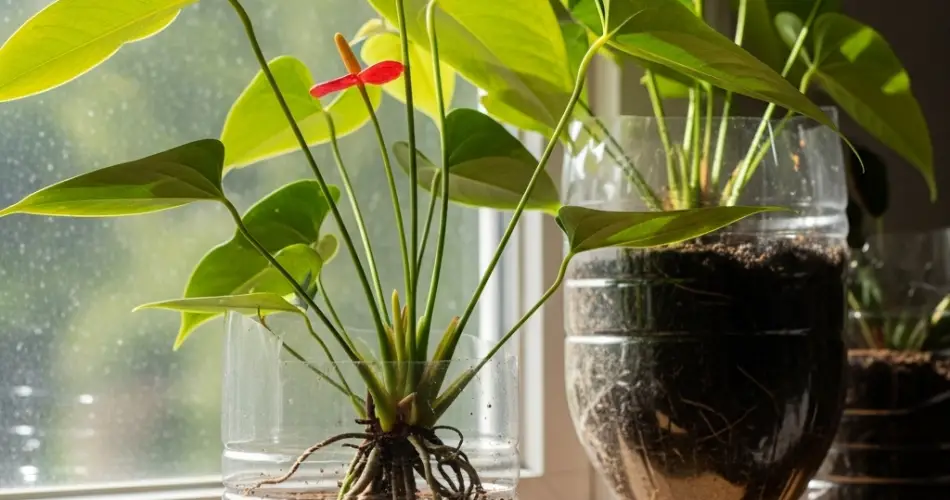
Anthuriums are prized for their heart-shaped leaves and vivid, waxy flowers that bring an instant splash of color and elegance to any room. These tropical plants are often seen in decorative pots and floral arrangements, but they can also thrive in more creative, space-saving setups—like a bottle garden. Creating an anthurium bottle garden is not only a sustainable way to reuse plastic containers but also a stylish way to bring greenery into small indoor spaces.
This DIY approach is ideal for plant lovers looking to enhance their home decor with a minimal footprint. By using recycled bottles, you can propagate or maintain anthuriums in a compact, visually appealing container while also contributing to environmental sustainability.
Why Choose Anthuriums for Bottle Gardening?
Anthuriums, also known as flamingo flowers or laceleaf, are ideal candidates for bottle gardening for several reasons:
-
Compact root system: Their roots don’t require deep containers, making bottles a suitable size.
-
Humidity-loving: Bottles help retain moisture and mimic the humid environments these plants love.
-
Bright, bold appearance: Their glossy leaves and vibrant spathes make them perfect for display.
-
Slow-growing: Their steady growth suits confined spaces like bottle gardens.
-
Adaptable: They adjust well to indirect light and moderate indoor conditions.
Whether you’re looking to propagate a smaller plant or create a long-term decorative piece, anthuriums can thrive in a bottle with the right care.
Materials You’ll Need
Before you begin your DIY project, gather the following:
-
A clear or tinted plastic bottle (1–2 liters)
-
A healthy anthurium plant or division
-
A sharp knife or scissors
-
Orchid or aroid potting mix (or a blend of peat, perlite, bark, and coco coir)
-
Small pebbles or gravel (optional)
-
Activated charcoal (optional, helps with odor and mold prevention)
-
Water
-
Decorative elements (optional: ribbon, paint, twine)
Preparing the Bottle Planter
-
Cut the Bottle
Cut the bottle horizontally about one-third from the top. You’ll use the bottom section as the pot. You can save the top for use as a humidity dome or discard it. -
Create Drainage
Using a heated needle or scissors, poke several holes at the base for drainage. Anthuriums dislike sitting in soggy soil, so good drainage is essential. -
Layer the Base (optional)
Add a layer of small stones or pebbles to improve drainage. A thin layer of activated charcoal above the stones can help maintain freshness and absorb excess moisture. -
Add Potting Mix
Fill the container with well-draining soil, about two-thirds full. Anthuriums prefer a loose, aerated mix. An orchid blend or a mix of peat moss, bark, and perlite is ideal.
Preparing the Anthurium for Planting
If you’re using a division of a mature plant:
-
Gently remove the anthurium from its pot and shake off excess soil.
-
Separate a healthy section with roots and at least one or two leaves.
-
Trim any dead roots or damaged leaves.
If planting from a nursery pot, simply loosen the roots slightly before transferring.
Planting the Anthurium
-
Dig a small hole in the center of the soil.
-
Insert the root ball or division gently into the hole.
-
Fill in around the plant with extra soil, pressing lightly to secure it.
-
Water lightly—just enough to moisten the soil without flooding it.
Place the bottle garden in a spot with bright, indirect light. Avoid direct sunlight, which can overheat the plant and cause leaf burn, especially in a clear container.
Care Tips for Your Anthurium Bottle Garden
-
Light: Bright but indirect sunlight is best. East-facing windows work well.
-
Watering: Water when the top inch of soil feels dry. Be careful not to overwater; clear containers help you monitor soil moisture.
-
Humidity: Anthuriums love humidity. You can mist the plant occasionally or cover it loosely with the cut-off bottle top to create a mini greenhouse effect. Make sure to remove the dome regularly to allow air exchange.
-
Feeding: Fertilize monthly during the growing season with a diluted orchid or houseplant fertilizer.
-
Cleaning: Wipe leaves occasionally with a damp cloth to remove dust and keep the foliage glossy.
Decorating Your Bottle Garden
Your anthurium bottle garden can be both functional and decorative. Try the following:
-
Paint the outside with soft, pastel tones or bold patterns.
-
Wrap the bottle with natural jute or twine for a rustic look.
-
Place the bottle inside a small woven basket or ceramic cover pot.
-
Add small stones, colored sand, or moss on the soil surface for a finished appearance.
This DIY setup can serve as a lovely centerpiece, windowsill accent, or office desk decoration.
When to Transplant
Over time, your anthurium may outgrow the bottle. Signs it’s time to transplant include:
-
Roots crowding or emerging from the drainage holes
-
Slower growth due to compacted soil
-
Plant becoming too top-heavy
When this happens, gently remove the plant and transfer it to a slightly larger container with fresh soil.
Final Thoughts
Creating an anthurium bottle garden is a rewarding way to blend sustainability with beauty. This compact planting solution allows you to grow a vibrant tropical plant in a recycled container, bringing both elegance and environmental mindfulness into your home.
Whether you’re a seasoned gardener or just getting started, this simple project offers a beautiful, low-maintenance way to enjoy one of nature’s most elegant plants—right from the comfort of your living space.


