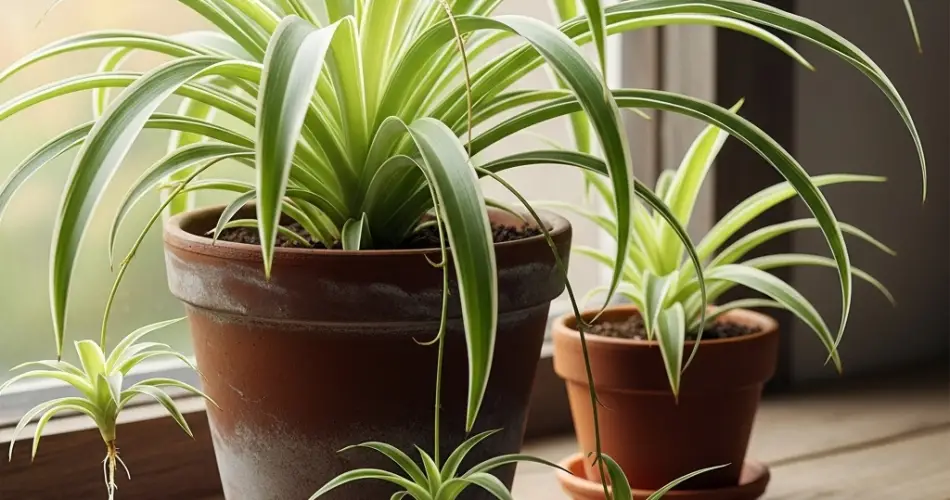
Spider plants (Chlorophytum comosum) are among the easiest and most rewarding houseplants for beginners and experienced gardeners alike. Known for their arching, ribbon-like leaves and charming “babies” or plantlets, spider plants thrive in a variety of indoor settings. With the right potting techniques and container setup, you can encourage vigorous growth, healthy roots, and a lush, leafy display.
If you want your spider plant to flourish indoors, starting with proper potting is essential. Here’s everything you need to know to ensure successful indoor growth.
Why Pot Choice Matters
The container you use directly affects how well your spider plant grows. A poorly draining pot or one that’s too large or small can cause problems like water retention, root rot, or stunted growth. Spider plants enjoy a snug environment—one that gently restricts their roots without crowding them too much.
Spider plants also tend to produce offshoots as they mature. A good container will provide stability for the main plant while supporting the weight of dangling babies.
Choosing the Best Pot
When choosing a pot, drainage is the most important factor. Spider plants are sensitive to overwatering, and their roots dislike being soggy. Always select a pot with one or more drainage holes at the bottom to allow excess water to escape.
Terracotta pots are excellent for spider plants, especially if you’re prone to overwatering. These breathable pots allow moisture to evaporate quickly. However, plastic and ceramic pots also work well if you monitor moisture levels carefully.
As for size, spider plants prefer to be slightly root-bound. A pot that is too large may retain excess moisture and delay growth. For young spider plants, start with a pot that is 4 to 6 inches wide. For mature plants, an 8 to 10-inch pot is typically sufficient.
Best Potting Mix for Spider Plants
A well-draining, lightweight potting mix is key to healthy roots. Avoid heavy, dense soils that retain water and suffocate roots.
You can use a high-quality indoor potting mix or make your own blend using:
-
2 parts regular potting soil
-
1 part perlite or pumice
-
Optional: 1 part coco coir or peat moss for added moisture retention (without waterlogging)
This mix keeps roots aerated while maintaining enough moisture to support consistent growth.
How to Pot or Repot a Spider Plant
Whether you’re starting with a nursery plant or dividing an overgrown one, the potting process is simple:
-
Prep the Pot: Add a layer of soil to the bottom of the container.
-
Remove the Plant: Gently lift the plant from its current pot. If the roots are tightly wound, tease them apart slightly.
-
Position the Plant: Place the root ball in the center of the pot so the crown of the plant sits just below the rim.
-
Add Soil: Fill in the sides with your prepared mix, pressing gently to eliminate air pockets.
-
Water Lightly: After potting, water thoroughly until you see water drain from the bottom. Allow the soil to dry slightly before watering again.
Spider plants may need repotting every 1 to 2 years. When the roots begin circling the inside of the container or growing out of the drainage holes, it’s time to size up.
Light and Placement
Spider plants love bright, indirect light. A spot near a north or east-facing window is ideal. Direct sun, especially during midday, can scorch their leaves. If your space doesn’t get much natural light, spider plants can still grow under fluorescent lights, making them great for offices or low-light corners.
Rotate the pot every few weeks to ensure even growth and keep the foliage from leaning too heavily to one side.
Watering Routine
Spider plants prefer their soil to dry out slightly between waterings. A good rule of thumb is to water when the top inch of soil feels dry. Overwatering is the most common mistake and can lead to root rot or brown leaf tips.
In the warmer months, this might mean watering once a week. In winter, water less frequently. Always empty any excess water from saucers or decorative outer pots.
Feeding and Leaf Maintenance
During spring and summer, feed your spider plant once a month with a balanced, water-soluble houseplant fertilizer. Too much fertilizer can cause leaf tip browning, so avoid overfeeding.
To keep the plant looking its best, remove yellowing or dried leaves regularly. Dust the leaves gently with a damp cloth to keep them clean and allow better light absorption.
Propagating Spider Plant Babies
One of the most enjoyable parts of growing spider plants is watching them produce plantlets. These offshoots can be left attached for visual interest or removed and rooted in water or soil.
To propagate:
-
Snip off the baby plant just below the node.
-
Place it in a cup of water or plant it directly in moist soil.
-
Keep it in a warm, bright location, and roots will form within a few weeks.
Conclusion
Potting your spider plant correctly sets the stage for lush, healthy indoor growth. A breathable pot with good drainage, light but well-aerated soil, and a moderate watering routine will keep your plant thriving year-round. With minimal effort, spider plants can brighten any room, adding texture and natural beauty to your living space.


