Think you can’t grow carrots without a backyard? Think again. Carrots are surprisingly well-suited for container gardening, making them a fantastic choice for urban gardeners who want to enjoy fresh, homegrown produce. With the right pot, soil, and variety, you can successfully grow sweet, crunchy carrots even in a small apartment balcony, patio, or sunny windowsill.
Whether you’re limited on space or just want a simple way to start growing your own vegetables, this guide will walk you through how to grow carrots in pots from seed to harvest.
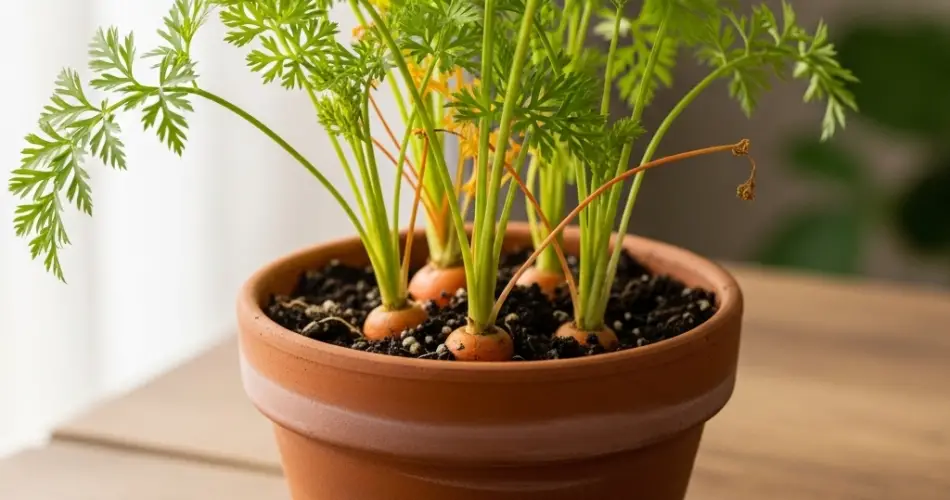
Why Grow Carrots in Pots?
Carrots are a root crop, and while they traditionally grow in garden beds, they adapt well to containers when given the right conditions. Growing them in pots gives you control over the soil, reduces pest issues, and makes harvesting easier.
Benefits of container-grown carrots include:
-
Ideal for balconies, rooftops, and windowsills
-
Reduced risk of soil-borne pests and diseases
-
Easier to control soil type and texture
-
Cleaner, straighter roots if grown in deep, loose soil
-
No need to bend down to harvest
Choosing the Right Carrot Variety
Not all carrot types are ideal for pots. Look for short or round-rooted varieties that don’t require very deep soil. Some longer varieties can still be grown successfully if you have deep enough containers.
Recommended varieties for container gardening:
-
Parisian – Small, round roots perfect for shallow containers
-
Thumbelina – Golf-ball sized, sweet and crisp
-
Nantes – Cylindrical and blunt-ended, grows well in loose soil
-
Chantenay – Broad and short, suitable for medium-depth pots
-
Atlas – Round, globe-shaped carrots for tighter spaces
Choosing the right variety ensures you get well-formed carrots even in confined spaces.
What You’ll Need
To grow carrots in pots, gather the following supplies:
-
A deep container (at least 10–12 inches deep) with drainage holes
-
Loose, well-draining potting mix
-
Compost or aged manure
-
Carrot seeds
-
Watering can or spray bottle
-
Sunny location (6–8 hours of direct sunlight daily)
You can use fabric grow bags, plastic tubs, terracotta pots, or even deep repurposed buckets—just make sure the container has good drainage.
Preparing the Container
-
Fill with Soil Mix
Combine potting mix with compost in a 70:30 ratio. Carrots need light, fluffy soil for their roots to develop properly. Avoid using clay-heavy or compacted soils. -
Moisten the Soil
Lightly water the mix before planting. The soil should be moist but not soaked. -
Level the Surface
Smooth the top of the soil to create an even planting bed.
Sowing Carrot Seeds
-
Direct Sow Only
Carrots do not transplant well, so always plant seeds directly in the container. -
Spacing
Sow seeds about ¼ inch deep and 1 inch apart. For rows, leave 2 inches between rows. -
Cover and Water
Gently cover seeds with a thin layer of soil. Mist the surface with water to avoid displacing the seeds. -
Thin Seedlings Later
Once seedlings are 2 inches tall, thin them out to 2–3 inches apart to give each plant room to grow.
Light and Temperature
Carrots need 6–8 hours of direct sunlight each day. Place the container in the sunniest spot available. Carrots grow best in cooler conditions, ideally between 60–75°F (15–24°C). In hot climates, provide some afternoon shade or plant in early spring and late fall.
Watering and Maintenance
-
Watering: Keep soil consistently moist, especially while seeds are germinating. Avoid letting the soil dry out, but don’t overwater.
-
Feeding: Mix compost into the soil before planting. If needed, use a low-nitrogen organic fertilizer every few weeks to support root growth.
-
Mulching: Add a thin layer of mulch to retain moisture and regulate soil temperature.
Common Problems to Avoid
-
Forked or misshapen roots: Caused by rocky or compacted soil. Use a fine-textured mix and remove any debris.
-
Crowding: Thin seedlings properly to avoid deformed carrots.
-
Pests: Aphids and root maggots can affect carrots. Cover with fine mesh netting if needed and maintain healthy soil.
Harvesting Carrots
Most carrots are ready to harvest 60 to 80 days after planting, depending on the variety. Check the shoulders (the tops of the roots peeking above the soil). When they’re about 1 inch in diameter, it’s time to pull.
To harvest, gently pull one carrot to check its size. If ready, loosen the surrounding soil with your hands or a fork and gently pull out the rest.
Don’t wait too long—overgrown carrots can become woody and lose their sweetness.
After the Harvest
After harvesting, you can replant a new round of carrots or rotate with another crop like lettuce, spinach, or radishes. Refresh the soil with compost before replanting. In cooler climates, carrots can be planted in early spring and again in late summer for a fall harvest.
Final Thoughts
Growing carrots in pots is a rewarding and accessible way to enjoy homegrown vegetables—even in a city apartment or small balcony. With the right container, soil, and care, you can harvest crisp, flavorful carrots right outside your door.
Whether you’re a beginner gardener or a seasoned green thumb working with limited space, pot-grown carrots are a simple and satisfying crop to grow throughout the year.


