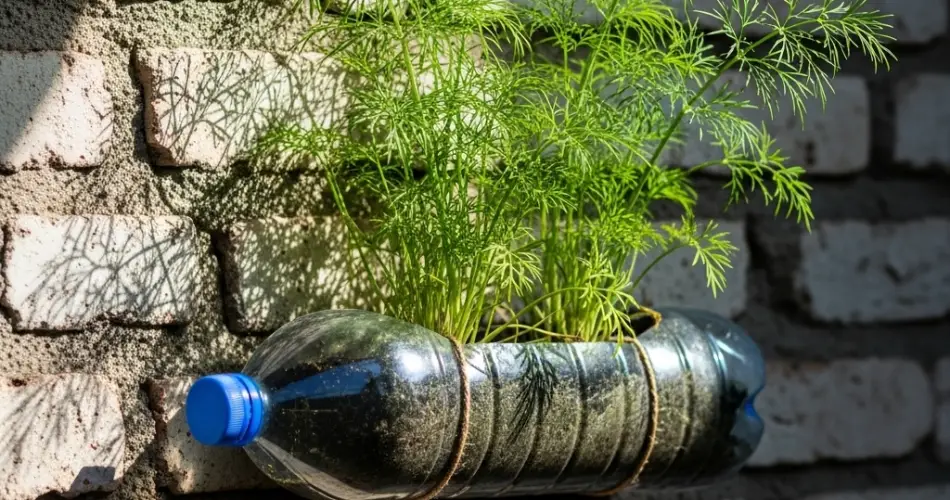
Dill is a flavorful and aromatic herb that enhances soups, pickles, salads, and seafood dishes. While it’s typically grown in traditional garden beds, you don’t need a large yard to enjoy fresh dill at home. With a little creativity, you can grow it vertically on your wall using recycled plastic bottles. This approach not only saves space but also helps reduce waste while providing a fresh supply of herbs right at your fingertips.
Why Choose Wall-Grown Dill?
A vertical herb garden offers several benefits:
-
Space efficiency – Ideal for small apartments, balconies, or patios where ground space is limited.
-
Convenient harvesting – Fresh dill can be picked right from the wall when you’re cooking.
-
Sustainability – Repurposing plastic bottles keeps them out of landfills and reduces plastic waste.
-
Aesthetic value – The lush green fronds create a vibrant, living wall.
-
Better plant health – Elevated plants often receive better air circulation, reducing the risk of mold or pests.
Best Dill Varieties for Vertical Gardens
For growing in compact spaces, choose dill varieties that adapt well to containers and produce good yields:
-
Fernleaf Dill – A dwarf variety perfect for tight spaces.
-
Bouquet Dill – Early-maturing and great for both leaves and seeds.
-
Dukat Dill – Known for its sweeter flavor and lush foliage.
These options remain manageable in smaller containers while still producing flavorful leaves and seeds.
Materials You Will Need
-
6–10 plastic bottles (1.5 to 2 liters each)
-
Sharp scissors or a utility knife
-
Drill or heated nail for drainage holes
-
Potting soil mixed with compost
-
Dill seeds or seedlings
-
Cable ties, rope, or metal hooks for mounting
-
A wooden pallet, wire mesh, or sturdy wall for support
-
Non-toxic paint (optional, for decoration)
Step 1: Preparing the Bottles
-
Clean thoroughly – Remove labels and wash bottles to prevent any residue from harming the plants.
-
Cut openings – Depending on your design, either cut off the top third of the bottle for upright planting or cut a wide rectangle along one side for horizontal planting.
-
Drainage holes – Drill or poke 4–6 small holes at the base of each bottle to allow excess water to escape.
-
Decorate (optional) – Use non-toxic paint to color the bottles, which can improve appearance and protect them from UV damage.
Step 2: Mounting Your Vertical Garden
There are two main methods for setting up your wall garden:
-
Direct wall mounting – Attach bottles to a sunny wall or fence using cable ties, hooks, or screws. Arrange them in a staggered pattern so that water doesn’t drip directly onto the plant below.
-
Freestanding frame – Secure bottles to a wooden pallet or wire mesh frame. This method is portable and allows you to move the garden to follow sunlight if needed.
Step 3: Preparing the Soil
Dill prefers loose, well-draining soil with moderate fertility. A good mix is:
-
2 parts quality potting mix
-
1 part compost for nutrients
-
1 part sand or perlite for drainage
Avoid overly rich soil, as this can cause dill to grow excessively tall and flop over.
Step 4: Planting the Dill
From seeds:
-
Fill bottles with soil, leaving about 3 cm of space at the top.
-
Sprinkle 3–5 seeds per container and cover lightly with soil.
-
Water gently to settle the seeds.
From seedlings:
-
Dig a small hole in the soil large enough to fit the roots.
-
Place the seedling inside, cover with soil, and water well.
Step 5: Care and Maintenance
-
Sunlight – Dill needs at least 6 hours of direct sunlight daily. Place your vertical garden in a sunny position, such as a south-facing wall.
-
Watering – Keep the soil evenly moist but never soggy. Check frequently, as containers dry out faster than garden beds.
-
Thinning – If seedlings are too crowded, thin them to about 15–20 cm apart to promote healthy growth.
-
Fertilizing – Apply a diluted liquid fertilizer every 4–6 weeks for steady growth.
-
Support – Tall dill plants may need light staking to keep them upright.
Step 6: Harvesting
Dill leaves can be harvested about 6–8 weeks after planting. Use clean scissors to snip leaves from the top, encouraging more side growth.
If you want dill seeds for pickling or replanting, allow some plants to flower and form seed heads. Once the seeds turn brown, cut the heads and place them in a paper bag to dry.
Step 7: Continuous Supply
Dill is an annual, so it completes its life cycle in one season. To keep a constant supply, sow seeds every 3–4 weeks during the growing season. This staggered planting ensures you’ll always have young plants producing fresh leaves.
Final Thoughts
Growing dill on a wall with plastic bottle planters is a practical, eco-friendly way to enjoy fresh herbs without taking up much space. By reusing bottles, you’re helping the environment while creating a productive and attractive vertical garden. With proper care, your wall-grown dill will reward you with fragrant, flavorful leaves for months, and you’ll never have to rely solely on store-bought herbs again.


