Don’t have a garden? No problem. Kale is a hardy, nutrient-rich leafy green that thrives in containers, making it an excellent choice for apartment dwellers, balcony gardeners, and anyone with limited outdoor space. With a few pots, quality soil, and a sunny spot, you can grow your own fresh, flavorful kale without ever digging into a garden bed.
Whether you’re new to growing vegetables or looking to maximize a small space, this guide will show you how to grow kale in pots successfully—from planting to harvest.
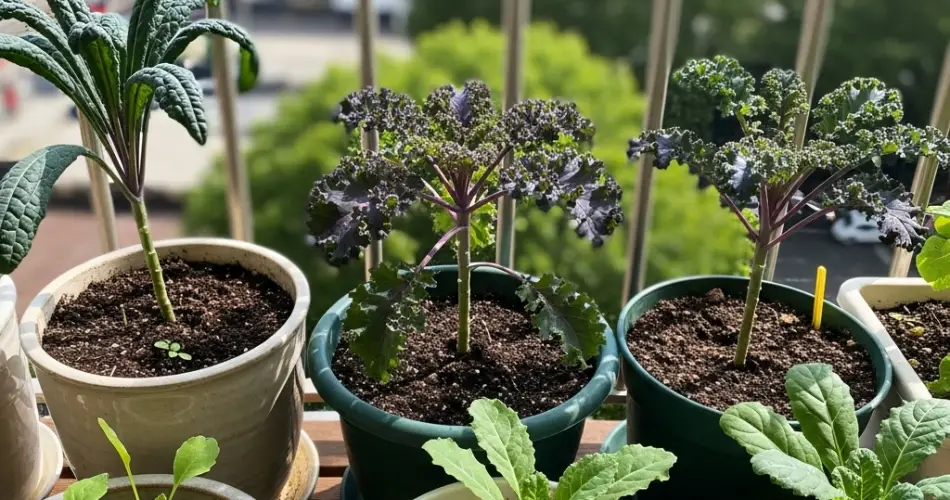
Why Kale is Perfect for Container Gardening
Kale is a cool-season crop that adapts well to pot gardening. It’s fast-growing, tolerant of a range of conditions, and offers repeated harvests. Growing kale in pots gives you better control over soil quality, sun exposure, watering, and pests—making it ideal for beginner gardeners.
Advantages of growing kale in containers:
-
Great for small spaces like patios, balconies, and windowsills
-
Easy to move pots to adjust light or avoid harsh weather
-
Less weeding and fewer soil-borne pests
-
Cleaner leaves and easier harvesting
-
Can be grown in both spring and fall
Choosing the Right Container
Kale needs a container with enough depth for healthy root growth and width to support its leafy top.
Container requirements:
-
Depth: At least 12 inches
-
Width: One kale plant per 12-inch diameter pot, or multiple in a larger container
-
Material: Plastic, clay, ceramic, wood, or fabric grow bags
-
Drainage: Make sure the container has drainage holes to prevent soggy roots
If you’re planting more than one kale plant, choose a rectangular planter or a large round pot and space the plants 12–18 inches apart.
Soil and Potting Mix
Kale grows best in rich, well-draining soil. Since it’s in a container, you have full control over the mix, which gives your plants a strong start.
Recommended mix:
-
High-quality organic potting soil
-
Mixed with compost or aged manure for nutrients
-
Add perlite or coconut coir to improve aeration and drainage
Before planting, moisten the soil slightly and fill the container to within an inch of the rim.
Kale Varieties for Pots
Several kale varieties are especially suited for container growing. Compact or dwarf types are easier to manage in tight spaces.
Great options include:
-
Dwarf Blue Curled: Compact and curly-leaved, perfect for pots
-
Lacinato (Dinosaur Kale): Long, flat leaves with a tender texture
-
Red Russian: Beautiful with purple stems and slightly frilled leaves
-
Siberian Kale: Cold-hardy and mild in flavor
Choose a variety based on your taste and available space. Dwarf types are ideal if you’re growing in smaller pots.
Planting Kale in Pots
You can grow kale from seeds or transplants. If starting from seed, sow directly into the container.
From seeds:
-
Sow seeds ¼–½ inch deep
-
Space them 2–3 inches apart, thinning to 12 inches as they grow
-
Water gently after sowing
From seedlings:
-
Transplant carefully into pre-moistened soil
-
Space each plant about 12–18 inches apart
-
Water well after planting
It’s helpful to label your pots if you’re growing more than one variety.
Light and Water Requirements
Kale thrives in full sun but can also grow in partial shade, especially in warmer climates.
Sunlight:
-
Aim for 6 hours of sunlight per day
-
Morning sun with afternoon shade is ideal in hot weather
-
Indoors, place pots near a south-facing window or use grow lights
Watering:
-
Keep the soil consistently moist, but not soggy
-
Water deeply when the top inch of soil feels dry
-
Avoid wetting the leaves to reduce risk of disease
Fertilizing and Care
Kale is a leafy green that benefits from regular feeding, especially in containers where nutrients can wash away quickly.
Fertilizing tips:
-
Mix compost into the soil before planting
-
Feed with a balanced or nitrogen-rich organic fertilizer every 2–3 weeks
-
Liquid seaweed or fish emulsion works well for leafy growth
Regularly check for pests like aphids or cabbage worms. Use natural pest control methods like neem oil or hand-picking.
Harvesting Kale
Kale is ready to harvest in about 50–60 days from planting. You can pick baby leaves sooner, as early as 30 days.
How to harvest:
-
Snip the outer leaves first with scissors, leaving the inner ones to keep growing
-
Continue harvesting regularly to encourage new growth
-
The plant will produce for months if cared for properly
You can also harvest the entire plant if needed, but cut-and-come-again harvesting extends the life of your kale crop.
Final Thoughts
You don’t need a backyard to grow your own kale. With the right pot, quality soil, and a bit of care, kale can thrive in containers on your balcony, patio, or kitchen windowsill. Container gardening offers flexibility, convenience, and the joy of fresh greens at your fingertips.
Whether you’re adding kale to smoothies, stir-fries, or soups, growing it yourself means you’ll always have fresh, healthy leaves on hand—no garden required.


