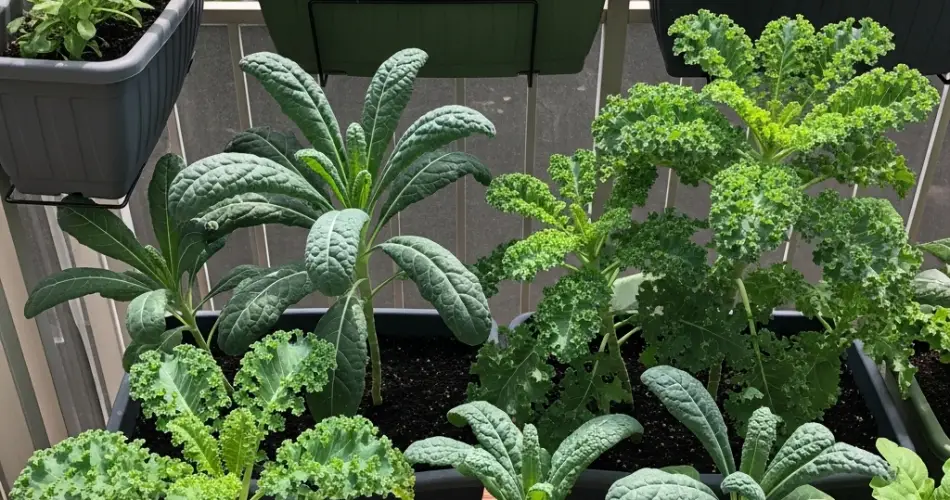
Kale is a robust, leafy green packed with nutrients, and one of the easiest vegetables to grow at home. Even if you don’t have a backyard, you can successfully grow lush, flavorful kale in containers—on a balcony, patio, or even a sunny windowsill. Its shallow root system and adaptability make kale ideal for container gardening, offering a reliable crop with little effort.
Whether you’re new to gardening or looking to maximize a small space, this guide will show you how to grow kale in any container and enjoy a steady supply of fresh greens throughout the season.
Why Grow Kale in Containers?
Kale is known for its cold tolerance, fast growth, and ability to thrive in less-than-ideal conditions. When grown in containers, kale benefits from better soil control, fewer pests, and flexibility in placement.
Here’s why kale and containers are a perfect match:
-
Requires little space and soil depth
-
Can be moved to avoid harsh weather or capture better sunlight
-
Reduces weed competition and soil-borne pests
-
Ideal for balconies, patios, decks, and windowsills
-
Offers multiple harvests from a single planting
Choosing the Right Container
You don’t need fancy pots to grow kale. Almost any container will work as long as it meets a few basic requirements:
-
Depth: At least 12 inches deep to support healthy root growth
-
Width: Wider containers allow more plants and airflow
-
Drainage: Must have holes at the bottom to prevent waterlogging
Repurposed buckets, plastic tubs, grow bags, or ceramic planters all work well. Just ensure they have drainage and are food-safe if you’re reusing materials.
Best Kale Varieties for Containers
Some kale varieties perform especially well in containers due to their compact growth and strong flavor. Consider these options:
-
Dwarf Blue Curled Kale: Small, hardy, and ideal for tight spaces
-
Lacinato Kale (Dinosaur Kale): Long, narrow leaves with a deep green color
-
Red Russian Kale: Tender leaves with colorful stems—great for baby greens
-
Scarlet Kale: A beautiful ornamental variety with red-purple leaves
What You’ll Need
Before planting, gather the following supplies:
-
Container with good drainage
-
Lightweight, nutrient-rich potting mix (avoid garden soil)
-
Organic compost or slow-release fertilizer
-
Kale seeds or seedlings
-
A sunny location (6 hours of sunlight preferred)
-
Watering can or hose with a gentle spray setting
How to Plant Kale in Containers
1. Fill the Container with Soil
Use a high-quality potting mix that’s well-draining and loose. Mix in compost or organic fertilizer to enrich the soil. Kale prefers slightly acidic to neutral pH levels (6.0–7.0).
2. Plant the Seeds or Seedlings
-
Seeds: Sow about ½ inch deep, spaced 2 inches apart. Thin them to 6–8 inches as they grow.
-
Seedlings: Gently transplant into the soil, spacing each 8–12 inches apart. Press the soil firmly around each base.
3. Water Thoroughly
Water after planting to settle the soil. Keep it consistently moist but not soggy. Proper moisture is key to tender, flavorful leaves.
4. Place in the Right Spot
Choose a sunny area with 4–6 hours of sunlight per day. Kale tolerates light shade, especially in hot climates, but too little sun can lead to spindly growth.
Care and Maintenance
Kale is a low-maintenance crop, but regular attention will ensure optimal growth and repeated harvests.
-
Watering: Water deeply when the top inch of soil feels dry. Avoid letting the soil completely dry out.
-
Feeding: Apply a balanced liquid fertilizer every 2–3 weeks or side-dress with compost.
-
Mulching: A light layer of mulch (like straw or shredded leaves) helps retain moisture and deter weeds.
-
Thinning: If you started from seed, thin crowded plants early to allow good airflow and strong development.
Harvesting Kale
Kale is ready to harvest in 30 to 45 days, depending on variety and growing conditions. You don’t need to wait for the entire plant to mature.
To harvest:
-
Pick outer leaves when they’re about the size of your hand.
-
Leave the inner leaves intact so the plant continues to produce.
-
Cut leaves at the base using scissors or garden snips.
With regular harvesting, each plant can produce for several months. Cooler temperatures enhance the flavor, making fall-grown kale especially sweet.
Troubleshooting Common Issues
Yellowing leaves: Could be overwatering or nutrient deficiency. Adjust watering and fertilize as needed.
Leggy growth: Usually caused by insufficient sunlight. Move your container to a sunnier spot.
Pest problems: Watch for aphids, cabbage worms, and flea beetles. Use neem oil spray or pick pests off by hand.
Bolting (flowering early): Triggered by heat. Grow kale during cooler months or provide afternoon shade in hot regions.
Final Tips for Success
-
Stagger plantings every few weeks for a steady harvest
-
Rotate containers or replace soil between seasons to avoid nutrient depletion
-
Grow kale with other cool-weather crops like lettuce or spinach in the same container
Conclusion
Kale is one of the most rewarding leafy greens you can grow in a container. It’s low-maintenance, highly nutritious, and forgiving for new gardeners. Whether you’re placing pots on a balcony, lining a patio, or tucking a planter box onto a windowsill, kale will reward you with crisp, flavorful leaves throughout the season.
Start with one container—or a few—and turn any space into a vibrant, edible garden. Your next kale salad could be just steps away from your kitchen.


