Kale has gained popularity in recent years as a superfood loaded with nutrients, and it’s easy to see why. Rich in vitamins A, C, and K, calcium, fiber, and antioxidants, kale is a versatile green that works in salads, soups, smoothies, and stir-fries. The best part? You don’t need a backyard to grow it. Kale thrives in containers, making it a perfect crop for balconies, patios, decks, or even sunny windowsills.
Whether you’re a seasoned gardener or just getting started, container gardening offers a flexible, space-saving way to enjoy fresh kale at home. This guide walks you through how to grow kale in containers step-by-step—from selecting pots and soil to harvesting your greens.
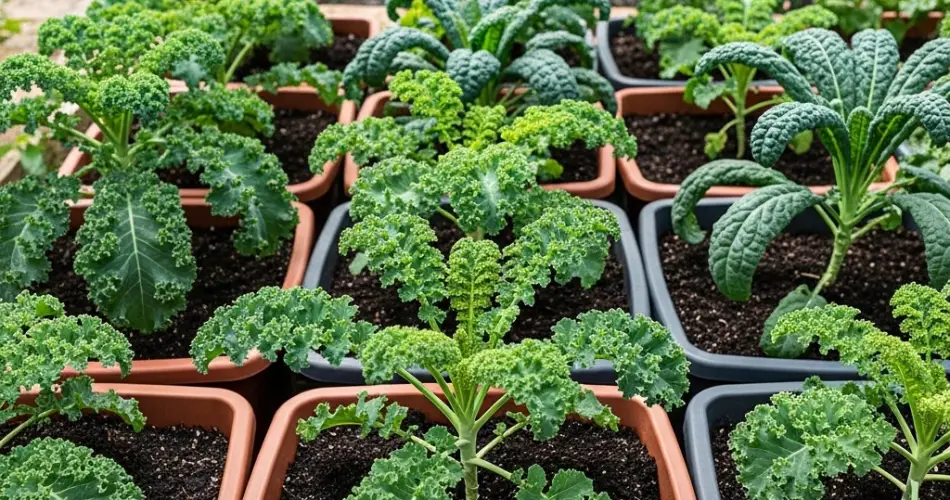
Why Kale is Great for Containers
Kale is a cool-weather crop that adapts well to pot gardening. It’s relatively low-maintenance, pest-resistant, and can be harvested multiple times from the same plant. Container gardening also gives you better control over growing conditions, including soil quality, moisture levels, and sun exposure.
Benefits of container gardening for kale:
-
Ideal for small spaces
-
Easier pest and disease management
-
Portable: move pots to optimal sun/shade locations
-
Less weeding than garden beds
-
Great for urban and apartment dwellers
Choosing the Right Container
Kale needs room for roots to grow and for the plant to develop healthy leaves. Choose a container that provides both depth and width.
Container requirements:
-
Minimum depth: 12 inches
-
Diameter: At least 12 inches per kale plant
-
Material: Plastic, terracotta, fabric grow bags, or wooden boxes
-
Drainage holes: Essential to prevent root rot
If you’re planting multiple kale plants in one large container, space them about 12–18 inches apart to ensure good airflow and room to grow.
Selecting the Best Soil
Kale prefers nutrient-rich, well-draining soil. Since containers can dry out quickly, using the right mix helps retain moisture while keeping roots aerated.
Ideal potting mix:
-
Quality organic potting soil
-
Compost or aged manure for added nutrients
-
Perlite or coconut coir for improved drainage and structure
Before planting, fill the container with the mix and lightly pat it down, leaving about an inch below the rim to make watering easier.
Picking the Right Kale Varieties
There are several types of kale suitable for container gardening. Choose a variety based on your taste preference and available space.
Popular container-friendly kale varieties:
-
Dwarf Blue Curled: Compact and curly-leaved, ideal for pots
-
Lacinato (Dinosaur Kale): Long, dark green leaves with a mild flavor
-
Red Russian: Attractive with purple stems and tender, flat leaves
-
Siberian Kale: Cold-hardy and mild tasting
For containers, dwarf and compact varieties are often the easiest to manage.
Planting Kale in Containers
You can grow kale from seeds or young seedlings. If starting from seed, sow directly into the container for best results.
From seeds:
-
Sow seeds ¼ to ½ inch deep
-
Space 4–5 inches apart initially
-
Thin seedlings to 12 inches apart once they’re a few inches tall
From seedlings:
-
Dig holes spaced 12–18 inches apart
-
Plant at the same depth as they were in the nursery pots
-
Press soil gently around each plant and water thoroughly
Watering and Sunlight Needs
Kale prefers moist soil and full to partial sunlight. Containers dry out faster than garden beds, so regular watering is key.
Watering tips:
-
Keep soil consistently moist but not soggy
-
Water at the base to avoid wetting leaves, which can cause disease
-
In hot or windy weather, water more frequently
Light requirements:
-
6 hours of direct sunlight daily is ideal
-
In hotter climates, partial afternoon shade helps prevent stress
-
Indoors, place pots near a south-facing window or use grow lights
Feeding and Maintenance
Kale is a leafy green, so it needs nitrogen-rich nutrition to stay productive.
Fertilizing tips:
-
Mix compost into the soil before planting
-
Use a balanced or nitrogen-heavy liquid fertilizer every 2–3 weeks
-
Stop fertilizing a few weeks before final harvest for better flavor
Regularly remove yellowing or damaged leaves and check for pests like aphids or cabbage worms. Hand-pick pests or use neem oil sprays as needed.
Harvesting Kale
You can begin harvesting kale once the leaves are about the size of your hand, usually 50–60 days after planting. Harvesting the right way encourages continued growth.
Harvesting tips:
-
Use scissors to cut outer leaves first, leaving the center intact
-
Regular harvesting encourages more leaf production
-
You can harvest leaves individually or take the whole plant if needed
The more often you harvest, the more the plant will produce. In cool weather, kale leaves become even sweeter and more flavorful.
Final Thoughts
Growing kale in containers is a satisfying and sustainable way to enjoy fresh, nutritious greens without needing a traditional garden. With a few basic supplies, a sunny spot, and regular care, you can harvest delicious kale leaves for months. Whether you’re adding them to salads, sautéing them, or blending them into smoothies, homegrown kale brings flavor, health, and joy to your table.
Container gardening makes it possible to grow your own food wherever you live. Start with kale—and you may soon find yourself expanding your leafy green collection.


