Kale has earned its place as a nutrient-rich superfood, and with its resilience and adaptability, it’s also one of the easiest leafy greens to grow at home—even without a traditional garden. If you’re short on space but want to enjoy fresh, homegrown produce, container gardening is the perfect solution. A balcony, porch, or sunny windowsill is all you need to bring kale from seed to salad bowl.
With a bit of planning and minimal effort, you can grow lush, productive kale plants that keep producing for months. This guide will walk you through everything from choosing the right container to harvesting flavorful leaves right outside your kitchen.
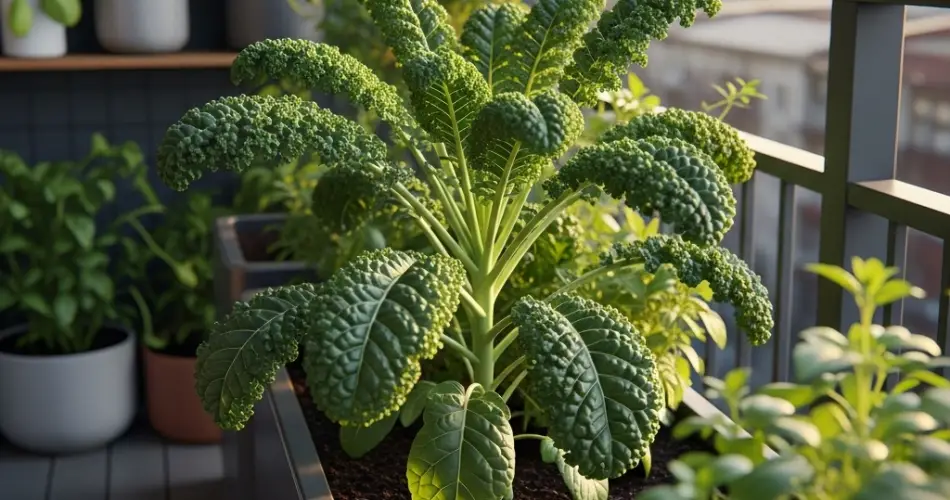
Why Kale Thrives in Containers
Kale is a hardy, cold-tolerant plant that doesn’t mind cooler temperatures or compact spaces. It has a moderate root system that adapts well to pots, raised planters, and recycled containers. Whether you’re growing curly kale, lacinato (dinosaur) kale, or red Russian varieties, each one can flourish in a small container garden.
Advantages of growing kale in containers:
-
Requires minimal space and tools
-
Easy to move to protect from harsh weather
-
Reduces weed and pest pressure
-
Encourages continuous harvesting
-
Perfect for beginners and busy gardeners
Choosing the Right Kale Variety
Several types of kale perform exceptionally well in containers. Choosing the right one depends on your taste preference and available space.
Popular varieties for containers:
-
Dwarf Blue Curled Kale – Compact, curly, and cold-hardy
-
Lacinato Kale – Also known as dinosaur kale; tall and slender leaves
-
Red Russian Kale – Tender leaves with colorful red-purple stems
-
Scarlet Kale – Beautiful ornamental variety with edible leaves
Materials You’ll Need
Before planting, gather these basic supplies:
-
A container that’s at least 12 inches deep and wide
-
High-quality potting mix with compost or organic matter
-
Kale seeds or seedlings
-
A sunny spot (receives at least 6 hours of sunlight daily)
-
A watering can or hose with gentle spray
-
Organic fertilizer (optional but beneficial)
Step-by-Step: How to Grow Kale in Containers
1. Select a Container
Choose a pot or planter with a minimum depth of 12 inches. Kale plants need room to stretch their roots and grow sturdy leaves. Be sure your container has good drainage holes to avoid waterlogged soil.
2. Prepare the Soil
Fill the container with loose, nutrient-rich potting mix. You can mix in compost or well-rotted manure to boost fertility. Avoid heavy garden soil, which may compact and restrict root growth.
3. Sow Seeds or Transplant Seedlings
If starting from seed, sow them ¼ to ½ inch deep, spaced about 6 inches apart. Water lightly and keep the soil moist. Germination usually takes 5–10 days.
If using seedlings, transplant them gently and firm the soil around the base. Space each plant about 8–12 inches apart.
4. Place in a Sunny Location
Kale thrives in full sun but tolerates partial shade, especially in warmer climates. A south- or west-facing balcony, patio, or bright window is ideal.
Caring for Container Kale
Once your kale plants are established, they’ll need regular but simple care to keep producing healthy leaves.
-
Watering: Keep the soil evenly moist but not soggy. Kale needs consistent water to prevent bitterness and bolting. Water when the top inch of soil feels dry.
-
Feeding: Every 2–3 weeks, apply a diluted organic fertilizer or compost tea. This helps support leaf growth and plant vitality.
-
Thinning: If plants are overcrowded, thin them early on to give each plant room to grow. You can eat the thinnings in a salad.
-
Mulching: Adding a thin layer of mulch (straw or dried leaves) can help retain moisture and regulate soil temperature.
Harvesting Kale
Kale is a “cut-and-come-again” crop, meaning you can harvest outer leaves while the plant continues to grow.
To harvest:
-
Wait until leaves are about the size of your hand (around 30–45 days after planting).
-
Use scissors or garden shears to snip the lower leaves, starting from the bottom and moving upward.
-
Leave at least 4–5 inner leaves intact to keep the plant productive.
-
Harvest regularly to encourage new growth and prevent the plant from going to seed.
With good care, a kale plant can produce for several months—even through light frosts, which actually improve the flavor.
Common Problems and Simple Fixes
Pale or yellowing leaves? May indicate nitrogen deficiency. Add compost or a nitrogen-rich fertilizer.
Wilting despite watering? Check for poor drainage or root rot—ensure your container drains well.
Pests like aphids or cabbage worms? Use neem oil spray or hand-pick pests. Keep plants spaced and well-ventilated.
Final Thoughts
Growing kale in containers is a satisfying and practical way to enjoy fresh, nutrient-packed greens even if you’re short on space. From a small balcony to a sunny kitchen window, kale’s adaptability and productivity make it a top choice for container gardening.
With just a little attention, you can turn any corner of your home into a vibrant, edible green space—and bring the harvest straight from the balcony to your kitchen table.


