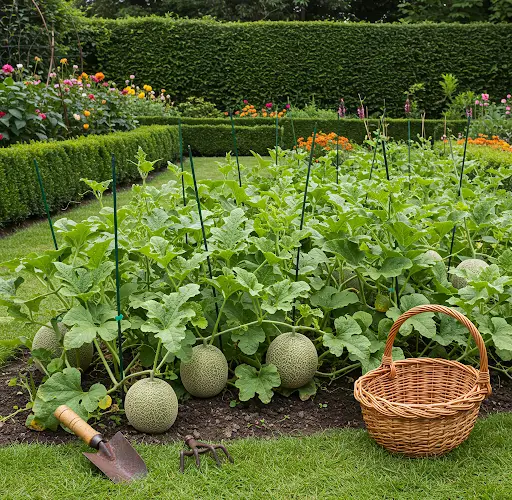
It’s a Pity I Didn’t Know This Method of Growing Melons Sooner—The Fruit Is Sweeter Than Expected!
Growing melons can be a deeply rewarding experience, especially when they turn out sweeter and juicier than expected. Many gardeners struggle with achieving the perfect balance of sweetness and texture in their melons, often unaware that a few simple techniques can make all the difference. Had I known about this method earlier, I could have enjoyed even more delicious, homegrown melons over the years. In this article, I will share the best techniques for growing incredibly sweet melons using an innovative and easy-to-follow approach.
Why Some Melons Aren’t Sweet Enough?
Many factors influence the sweetness of melons, and understanding them is key to improving your harvest:
- Variety Selection – Some melon varieties naturally have higher sugar content than others.
- Sunlight Exposure – Melons require full sun for proper sugar development.
- Soil Quality – Nutrient-rich, well-draining soil contributes to healthy fruit.
- Watering Practices – Excessive watering near harvest time can dilute sweetness.
- Pollination – Incomplete pollination leads to poorly developed fruit.
- Ripening Time – Harvesting too early results in bland melons.
If these factors aren’t balanced correctly, melons may turn out less sweet than expected. However, with the right approach, you can dramatically improve the taste of your harvest.
The Secret Method for Growing the Sweetest Melons
After years of trial and error, I discovered a simple yet highly effective technique that transformed my melon-growing results. The method involves optimizing soil conditions, strategic watering, and controlled fertilization to maximize sugar production in the fruit.
Step 1: Choosing the Right Melon Variety
Not all melons are equally sweet. Some of the best varieties for high sugar content include:
- Sugar Baby Watermelon – Small but incredibly sweet and juicy.
- Hale’s Best Cantaloupe – Known for its rich aroma and sugary taste.
- Honey Rock Melon – Exceptionally sweet and dense flesh.
- Crimson Sweet Watermelon – Classic variety with excellent sweetness.
- Galia Melon – A cross between cantaloupe and honeydew with a rich flavor.
Selecting the right variety is the first step toward ensuring a naturally sweeter harvest.
Step 2: Preparing Nutrient-Rich Soil
Melons thrive in soil that is well-draining, loose, and rich in organic matter. To prepare the perfect soil:
- Mix in compost or well-rotted manure to boost fertility.
- Add bone meal or rock phosphate to strengthen root growth.
- Use sandy loam soil for optimal drainage and aeration.
- Maintain a pH level of 6.0 to 6.8 for the best nutrient absorption.
To further enhance sweetness, add wood ash or potassium-rich fertilizers, as potassium helps increase sugar concentration in melons.
Step 3: Proper Watering Techniques
Watering is crucial, but it must be done strategically:
- Water deeply but infrequently to encourage strong root systems.
- Reduce watering once fruits begin to develop—this concentrates the sugars.
- Avoid overwatering near harvest time to prevent dilution of sweetness.
- Use drip irrigation or a soaker hose to keep leaves dry and prevent disease.
The key is to provide enough moisture early on and then cut back once the fruit starts ripening.
Step 4: Sunlight and Temperature Optimization
Melons require at least 8-10 hours of direct sunlight daily to develop their full sweetness potential. To ensure they receive adequate warmth:
- Plant in a sunny location with minimal shade.
- Use black plastic mulch to retain soil warmth and suppress weeds.
- If growing in cooler climates, use row covers to protect against temperature fluctuations.
Melons ripen best in warm temperatures above 75°F (24°C), so timing your planting season correctly is essential.
Step 5: Natural Fertilization for Maximum Sweetness
Fertilizing correctly can make a significant difference in the sugar content of melons. The best organic fertilizers for sweet melons include:
- Banana Peel Tea – Rich in potassium to enhance fruit sweetness.
- Epsom Salt Solution – Provides magnesium, essential for photosynthesis.
- Fish Emulsion – A natural nitrogen source for strong vines and leaves.
- Compost Tea – Nourishes the plants with micronutrients.
Apply high-potassium fertilizer when the melons begin forming, but reduce nitrogen-heavy feeds at this stage to prevent excessive vine growth at the expense of fruit development.
Step 6: Pollination Enhancement
Proper pollination ensures better fruit set and development. If your melon plants have many flowers but few fruits, the issue could be poor pollination. To improve this:
- Plant pollinator-friendly flowers nearby to attract bees.
- Hand-pollinate using a soft brush to transfer pollen between flowers.
- Avoid using chemical pesticides that may deter pollinators.
More effective pollination results in well-formed, flavorful melons.
Step 7: Knowing When to Harvest for Peak Sweetness
Harvest timing is critical for the sweetest melons. Signs that your melons are fully ripe include:
- A fragrant, sweet aroma near the stem.
- A slight softness when gently pressed.
- A dry, brown tendril on the vine near the fruit.
- A yellowish or cream-colored underside where the melon rests on the ground.
Never harvest melons too early, as they do not continue to sweeten after picking.
Final Thoughts
After learning and applying this method, I was amazed at how much sweeter and juicier my melons became. The simple adjustments in soil preparation, watering, fertilization, pollination, and harvesting made all the difference. If you’re growing melons at home, I highly recommend trying these techniques to get the best possible results.
By following these steps, you’ll not only enjoy sweeter, homegrown melons but also have the satisfaction of knowing you’ve perfected the art of melon cultivation. Don’t wait—start implementing these techniques today, and prepare to be surprised by the incredible flavor of your homegrown melons!


