Sage is a versatile and aromatic herb that has been prized for centuries in cooking, herbal remedies, and even ornamental gardens. For urban gardeners or anyone with limited outdoor space, growing multiple sage plants efficiently can be a challenge. A simple and effective solution is to use plastic bottles to propagate sage cuttings. This method is not only cost-effective but also space-saving and eco-friendly, allowing gardeners to create a small-scale nursery right on a balcony, windowsill, or patio.
Using plastic bottles to multiply sage plants is ideal for beginners and experienced gardeners alike. With proper care, you can turn a single sage plant into a thriving collection, ensuring a continuous supply of fresh leaves for cooking and other uses.
Why Multiply Sage Using Cuttings
Growing sage from seeds can be slow and unpredictable, often taking several weeks to germinate. Propagating from cuttings, on the other hand, has several advantages:
-
Faster Growth: Cuttings develop roots more quickly than seeds, reaching a size suitable for planting in soil in just a few weeks.
-
Genetic Consistency: Plants grown from cuttings retain the same flavor, aroma, and characteristics as the parent plant.
-
Space Efficiency: Bottles allow multiple cuttings to grow in a compact area, ideal for small-space gardening.
-
Cost-Effective: Reusing plastic bottles reduces waste and eliminates the need for purchasing additional pots.
Materials You’ll Need
Creating a mini propagation system using plastic bottles is simple and requires only a few common items:
-
Clean, transparent plastic bottles (1–2 liters)
-
Scissors or a sharp utility knife
-
Healthy sage stems with leaves
-
Water
-
Small stakes or toothpicks for support (optional)
-
Potting soil for transplanting
Optional: Labels to track cutting dates and plant progress.
Preparing the Bottles
-
Clean Thoroughly: Rinse the bottles to remove any residue or contaminants. Remove labels to maximize light penetration.
-
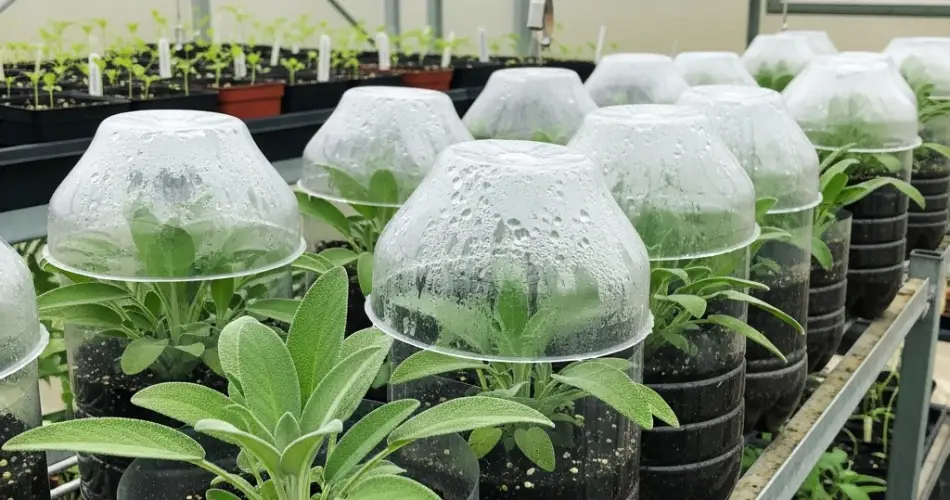
Cut the Bottle: Using scissors or a utility knife, cut the bottle horizontally into two parts. The bottom half will hold water for root development, while the top half can act as a protective dome or be removed once roots are established.
-
Prepare for Propagation: Fill the bottom half of the bottle with clean water, enough to submerge the ends of the sage cuttings but not the leaves.
This setup provides a mini greenhouse effect, maintaining humidity and warmth around the cuttings to encourage rooting.
Selecting and Preparing Sage Cuttings
Choose healthy, non-flowering sage stems that are approximately 4–6 inches long. Remove any leaves that would be submerged in water to prevent rot, leaving only the top portion of leaves above the waterline.
Place the cuttings in the bottle with the cut ends submerged. Position the bottle in a bright, warm spot but avoid direct harsh sunlight, which can scorch the tender leaves. Indirect sunlight for 4–6 hours a day is ideal.
Encouraging Root Development
Sage cuttings typically begin forming roots within 10–14 days. To ensure healthy development:
-
Change Water Regularly: Replace the water every 2–3 days to keep it clean and oxygenated.
-
Monitor Temperature: Keep the bottle in a location with moderate temperatures (18–24°C / 65–75°F).
-
Optional Fertilizer: A diluted liquid fertilizer can be added once roots begin to form, supporting vigorous growth.
Roots should reach 2–3 inches in length before transplanting into soil.
Transplanting Sage Cuttings
Once the roots are well-developed, transfer the cuttings into small pots filled with well-draining potting soil. A mix of potting soil and perlite or sand works well to provide aeration while retaining enough moisture.
Water lightly to help the plant settle but avoid overwatering, as sage is prone to root rot if soil remains soggy. Place the newly transplanted sage in a bright location with indirect sunlight for a few days to help it acclimate.
Care for Established Sage Plants
After transplanting, care for your sage plants as you would for mature specimens:
-
Sunlight: Sage thrives in full sun, ideally 6–8 hours daily.
-
Watering: Water moderately, allowing the top inch of soil to dry out between waterings.
-
Pruning: Regularly pinch back the tips to encourage bushier growth and prevent flowering, which can reduce leaf quality.
-
Fertilization: Light feeding with organic fertilizer every few weeks supports healthy growth without over-stimulating the plant.
Benefits of Using Plastic Bottles
-
Sustainable: Reusing bottles helps reduce plastic waste.
-
Compact: Perfect for small-space urban gardening.
-
Cost-Effective: Eliminates the need to buy additional propagation containers.
-
Educational: Watching roots develop inside a transparent bottle is visually rewarding and educational.
Final Thoughts
Using plastic bottles to propagate sage is an easy, practical, and environmentally friendly way to multiply your herb plants. This method allows gardeners to produce multiple healthy plants from a single parent, ensuring a continuous supply of fresh sage for cooking, teas, or herbal remedies.
With a little patience, proper care, and attention to light and water, your DIY sage bottle propagation system can transform a single plant into a flourishing collection, even in the smallest urban spaces. By repurposing everyday materials, you not only grow herbs efficiently but also contribute to a sustainable gardening practice.


