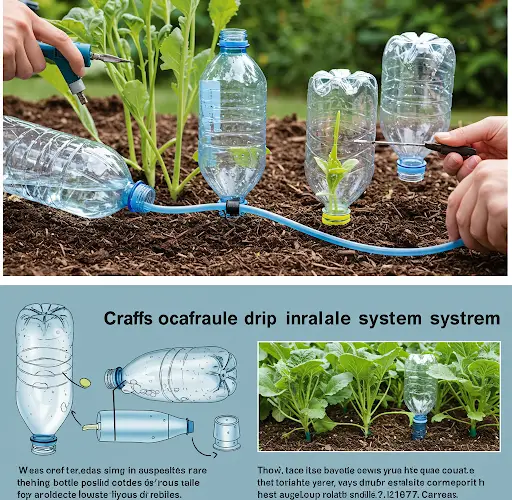
How to Make Drip Irrigation with Cheap Plastic Bottles — Simple, Fast, and Easy to Do
Keeping plants healthy and well-watered doesn’t have to be expensive or complicated. With a few cheap plastic bottles and a little creativity, you can build a simple drip irrigation system that provides consistent moisture to your garden. It’s fast, easy, cost-effective, and an excellent way to reuse plastic while conserving water.
Here’s a complete step-by-step guide to making your own drip irrigation system at home.
Why Use Plastic Bottles for Drip Irrigation?
Plastic bottles are perfect for homemade drip irrigation because they are widely available, lightweight, and easy to work with. Using them for watering your plants reduces plastic waste and provides an affordable solution for maintaining soil moisture.
A drip irrigation system delivers water slowly and steadily to plant roots, which encourages deep root growth, improves plant health, and reduces the risk of overwatering or underwatering.
This method is ideal for vegetable gardens, flower beds, potted plants, balconies, and even small trees.
Materials You’ll Need
-
Plastic bottles (1L, 2L, or larger depending on plant size)
-
A small nail, sharp needle, or pin
-
A lighter or candle (optional for heating the needle)
-
Scissors or a knife
-
String or garden wire (optional for hanging the bottles)
-
Water
Step-by-Step Instructions
1. Choose the Right Bottles
Pick plastic bottles according to the needs of your plants. Smaller plants can use 1-liter bottles, while larger plants and trees may require 2-liter or 5-liter bottles for more water capacity.
Ensure the bottles are clean and have no leaks.
2. Clean the Bottles
Wash the bottles thoroughly to remove any residue, chemicals, or oils. A clean bottle ensures that no harmful substances enter the soil and damage your plants.
Removing the label can make it easier to see the water level inside the bottle.
3. Create Small Holes
Use a nail, needle, or pin to make one or two small holes in the bottle cap.
Tip: Heating the needle slightly with a lighter or candle makes it easier to pierce the plastic and create clean holes.
Start with tiny holes to ensure a slow and steady drip. If needed, you can always enlarge the holes later to increase the water flow.
If you prefer, you can make holes near the bottom or sides of the bottle, depending on your setup.
4. Fill the Bottle with Water
Fill the prepared plastic bottle with clean water. You can also add a weak liquid fertilizer to nourish the plants slowly over time.
Secure the cap tightly to prevent leaks except through the small holes you created.
5. Install the Bottle in the Soil
You have a few options for installing the bottle:
-
Upside-Down Installation:
Turn the bottle upside down and bury the neck of the bottle a few inches deep in the soil near the plant’s base. Make sure the holes in the cap are facing downward and the bottle is stable. -
Standing Installation:
If you placed holes near the bottom of the bottle, you can bury the bottle standing up with the cap facing upward, making it easier to refill without removing it. -
Hanging Installation:
For potted plants or hanging baskets, you can hang the bottle upside down above the plant using string or garden wire, allowing the water to drip onto the soil.
6. Monitor and Adjust the Flow
After installation, observe the drip rate. Ideally, you want one drip every few seconds.
If the water drains too quickly, the hole may be too large. Replace the cap or adjust by sealing part of the hole.
If the water drips too slowly, carefully enlarge the holes a little.
Check the soil moisture every few days to make sure your plants are getting enough water without becoming waterlogged.
Tips for Best Results
-
Pre-Wet the Soil:
Water the soil thoroughly before setting up the drip system to ensure slower absorption and better moisture retention. -
Use Mulch:
Mulching around the plants helps conserve moisture, keeping the soil cooler and reducing water evaporation. -
Stabilize the Bottles:
Use rocks, soil, or small stakes to keep the bottles upright and prevent tipping. -
Customize for Each Plant:
Different plants have different water needs. Adjust the number of bottles, hole size, and bottle size according to what each plant requires. -
Refill as Needed:
Check the water levels regularly, especially during hot weather, and refill the bottles as necessary.
Advantages of Using Plastic Bottle Drip Irrigation
-
Low Cost:
Made from cheap or recycled materials already available at home. -
Water Efficient:
Delivers water directly to the roots with minimal waste. -
Easy to Set Up:
No special skills or complicated tools needed. -
Environmentally Friendly:
Reduces plastic waste and helps save water resources. -
Healthier Plants:
Maintains consistent soil moisture, leading to stronger, healthier plants and better yields.
Final Thoughts
Making a simple drip irrigation system using cheap plastic bottles is a fast, easy, and eco-friendly way to keep your garden thriving. Whether you’re growing flowers, vegetables, herbs, or fruit trees, this method ensures your plants get the steady hydration they need to grow strong and productive — all without daily watering efforts.
Give this technique a try and enjoy healthier plants while saving time, money, and water!


