Pumpkins aren’t just for sprawling fields or large gardens—you can grow them successfully in containers right at home. With the right variety, soil mix, and growing method, container-grown pumpkins can thrive on patios, balconies, and small garden spaces. This easy planting guide walks you through the entire process of growing pumpkins in containers from seed to harvest.
1. Choosing the Right Pumpkin Variety
Pumpkins come in all sizes—from giant carving types to small, sweet varieties. When growing in containers, it’s best to choose compact or bush types, which are more manageable in limited space.
Ideal container-friendly varieties include:
-
Jack Be Little: Miniature ornamental pumpkins perfect for small spaces.
-
Sugar Pie: A sweet variety ideal for pies and baking.
-
Bush Baby: A dwarf hybrid producing small, flavorful fruits.
-
Baby Boo: White ornamental mini pumpkins.
Avoid large varieties like Atlantic Giant or Big Max, as they require significant space and root depth.
2. Selecting the Right Container
Pumpkins have deep root systems and need ample space to thrive. Choose containers that are:
-
At least 20–25 gallons in volume
-
18–24 inches deep
-
Equipped with good drainage holes
Larger is always better for pumpkins. If using fabric grow bags or plastic tubs, reinforce the sides so they hold their shape under heavy growth.
3. Preparing the Soil Mix
Pumpkins are heavy feeders and grow best in fertile, well-draining soil rich in organic matter.
Soil mix recipe:
-
2 parts high-quality potting mix
-
1 part compost or aged manure
-
1 part perlite or coconut coir for aeration
Add a slow-release organic fertilizer at planting time, and ensure the soil pH is slightly acidic to neutral (6.0–7.0).
4. Starting from Seed
Pumpkin seeds germinate quickly in warm soil. You can sow them directly into the container or start them indoors if your growing season is short.
How to sow seeds:
-
Sow 2–3 seeds 1 inch deep in the center of the container.
-
Water gently and keep the soil consistently moist (not soggy).
-
Place the container in full sun or under a grow light.
-
Once seedlings emerge, thin to the strongest plant.
Seeds usually germinate within 5–10 days, especially when soil temperatures stay between 70–90°F (21–32°C).
5. Positioning and Support
Place containers in a spot that gets 6–8 hours of sunlight daily. Pumpkins love warmth and full sun.
As vines develop, they may trail over the sides. While bush varieties stay compact, vining types may need support or direction:
-
Trellis: For small pumpkins, train vines upward using a strong trellis and support the fruit with slings.
-
Ground trailing: Let vines trail along the ground around the container if space allows.
Rotate containers occasionally to ensure even sun exposure if only one side receives direct light.
6. Watering and Feeding
Pumpkins are thirsty and nutrient-hungry plants.
-
Watering: Keep soil evenly moist—about 1–2 inches of water per week. Water deeply at the base, avoiding wetting the leaves to prevent mildew.
-
Feeding: Apply a balanced liquid fertilizer (like 10-10-10) every 2–3 weeks. Once flowers appear, switch to a low-nitrogen, high-potassium formula to promote fruiting.
Mulching with straw or shredded leaves around the base can help retain moisture and regulate temperature.
7. Pollination and Flowering
Pumpkins produce separate male and female flowers. Bees and other pollinators usually take care of pollination, but in containers, you may need to lend a hand.
To hand-pollinate:
-
Identify male flowers (thin stem) and female flowers (with a tiny fruit at the base).
-
Use a soft brush or cotton swab to transfer pollen from male to female flowers in the morning when blooms are open.
Successful pollination leads to rapid fruit development.
8. Common Problems and Tips
Powdery mildew is a common issue in container-grown pumpkins due to limited airflow. Prevent it by spacing plants well and watering at the soil level.
Pests like squash bugs, aphids, and vine borers can be deterred by:
-
Inspecting leaves regularly
-
Spraying with neem oil
-
Using insect netting early in the season
Container-grown pumpkins are less prone to soil-borne diseases but still benefit from crop rotation and clean tools.
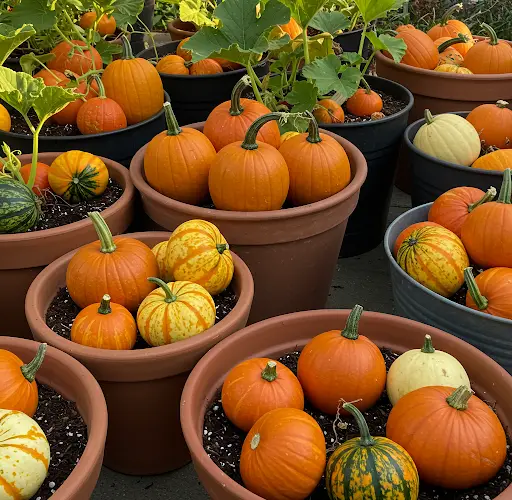
9. Harvesting Pumpkins
Pumpkins are ready to harvest when:
-
The rind is hard and cannot be punctured with a fingernail
-
The skin has turned deep orange (or the variety’s mature color)
-
The stem has hardened and begun to dry
Cut the fruit with a few inches of stem attached using pruning shears or a sharp knife. Allow the pumpkins to cure in a warm, dry place for 7–10 days if you plan to store them.
Final Tips for Growing Success
-
Always use a container large enough to support vigorous growth.
-
Fertilize regularly to fuel fruit development.
-
Provide consistent water, especially during flowering and fruiting.
-
Choose compact varieties for the best container results.
With a little planning and care, you can enjoy homegrown pumpkins right from your porch or patio. Whether you’re growing mini pumpkins for decoration or sweet types for baking, container pumpkin gardening is a fun and rewarding project for all skill levels.


