Cabbage is a cool-season crop that grows surprisingly well in containers and grow bags. Whether you’re working with a small balcony or a limited garden area, growing cabbage from seed is an excellent way to enjoy fresh, healthy produce right at home. Both red and green cabbage varieties can thrive in pots with the proper care—from seed to harvest.
Here’s an easy-to-follow guide to growing cabbage in containers or grow bags, ideal for beginners and experienced gardeners alike.
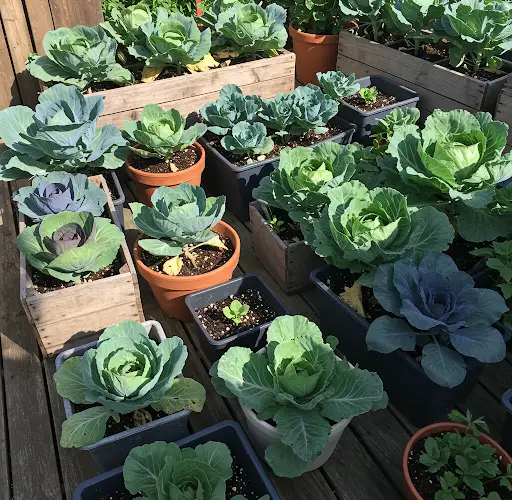
Why Grow Cabbage in Containers or Grow Bags?
Container gardening gives you full control over soil quality, sunlight exposure, watering, and spacing. It also minimizes issues with soil-borne diseases and pests. Cabbage, with its shallow roots and compact growth habit, is perfectly suited for growing in containers and grow bags—especially red and green varieties.
Best Cabbage Varieties for Containers
When selecting seeds, look for compact or small-head cabbage varieties that do well in confined spaces. Some great options include:
-
Golden Acre (green)
-
Ruby Perfection (red)
-
Copenhagen Market
-
Red Express
-
Mini Cabbage or Baby Cabbage types
These varieties mature faster and are more adaptable to container conditions.
Step-by-Step Guide to Growing Cabbage in Containers or Grow Bags
1. Starting Seeds Indoors
Start cabbage seeds indoors 6–8 weeks before the last expected frost date if you’re in a temperate region. If you’re in a tropical or subtropical area, grow cabbage during the cooler months.
-
Use seed trays or small pots filled with a light, well-draining seed-starting mix.
-
Sow seeds about ¼ inch deep and lightly cover with soil.
-
Water gently and keep the trays in a bright, warm place (65–75°F or 18–24°C).
-
Seeds usually germinate within 5–10 days.
Once seedlings develop 2–3 true leaves, they can be transplanted into larger containers.
2. Choosing the Right Container or Grow Bag
Cabbage needs room to form its large leafy heads. Choose containers that are:
-
At least 12–14 inches deep and wide
-
Capable of holding 10–15 liters (3–5 gallons) of soil
-
Equipped with good drainage holes
Grow bags (fabric or plastic) are a great option—they’re lightweight, breathable, and provide excellent root aeration.
3. Soil Preparation
Use high-quality potting mix rich in organic matter. A good mix should be:
-
Loamy and well-draining
-
Rich in compost or aged manure
-
pH range: 6.0 to 6.8
You can enhance the soil by mixing in a slow-release organic fertilizer at planting time.
4. Transplanting Seedlings
Once your cabbage seedlings are 4–6 inches tall and have at least 3–4 true leaves, transplant them carefully:
-
Fill the container with potting mix, leaving about 2 inches from the top.
-
Space plants at least 12–16 inches apart—if the container is large, you can plant more than one.
-
Dig a small hole, place the seedling, and firm the soil around it.
-
Water immediately after transplanting.
Place containers in an area that receives at least 5–6 hours of sunlight daily. More sun encourages tighter, firmer heads.
5. Watering and Feeding
Cabbage prefers consistently moist soil but not soggy conditions.
-
Water when the top inch of soil feels dry.
-
Ensure the container drains excess water to prevent root rot.
-
Use a balanced liquid fertilizer (e.g., 10-10-10 or 5-5-5) every 2–3 weeks until heads begin to form.
-
Once heads begin to develop, reduce nitrogen to avoid excessive leaf growth.
Mulch the surface with straw, dry grass, or leaves to help retain moisture and suppress weeds.
6. Pest and Disease Management
Container-grown cabbage is less prone to many soil-borne diseases, but common pests can still affect it. Watch out for:
-
Cabbage worms
-
Aphids
-
Cutworms
-
Slugs
Use natural pest control methods such as neem oil sprays or hand-picking. Floating row covers can also help protect young plants.
To reduce disease risk:
-
Avoid overhead watering.
-
Provide good air circulation by spacing plants adequately.
-
Remove yellow or damaged leaves promptly.
7. Supporting Healthy Head Development
Cabbage heads form best when the plant receives full sun, regular water, and consistent nutrients.
-
Don’t let the soil dry out for extended periods.
-
Avoid moving containers once heads start forming, as it may disrupt root growth.
-
If heads seem loose, wait a little longer—they will firm up as they mature.
8. Harvesting Cabbage
Cabbage is ready for harvest when the heads feel firm and have reached the desired size for the variety you planted. Typically, this occurs 70–100 days after sowing.
-
Use a clean, sharp knife to cut the head at the base, leaving outer leaves and the roots if you want a second (smaller) crop to form.
-
Harvest in the morning for the crispest flavor.
Red cabbage generally takes slightly longer to mature than green varieties but stores better after harvest.
Final Tips
-
Rotate containers every few days for even sun exposure.
-
Keep your grow bags or pots in sheltered areas during heavy rains or strong winds.
-
After harvesting, compost the leftover leaves or chop them up and return them to your compost bin.
Growing cabbage in containers or grow bags is a rewarding way to enjoy fresh, crunchy, homegrown produce. With minimal space and regular care, you can grow healthy red and green cabbage from seed all the way to harvest—even in a small urban space.


