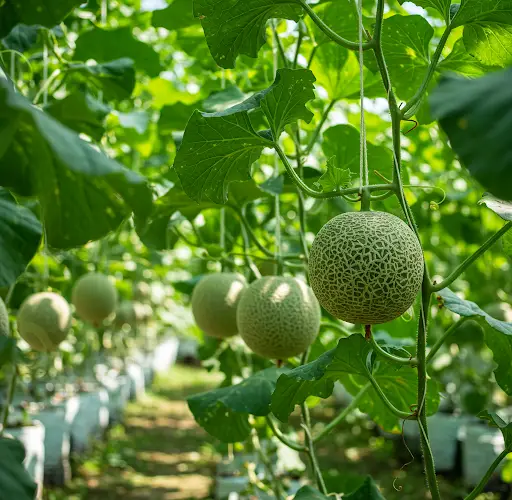
Muskmelon, also known as cantaloupe, is a delicious and refreshing fruit that thrives in warm weather. While most people assume that melons require a lot of water and space to grow, there is an effective and eco-friendly technique that allows you to grow big, sweet muskmelons in plastic buckets without frequent watering.
This low-maintenance method uses recycled materials and simple gardening techniques to help conserve water and space while still producing high-quality fruit. Perfect for balconies, small gardens, or rooftops, this approach is ideal for home gardeners who want to enjoy fresh melons without the hassle of constant watering.
Why Grow Muskmelon in Buckets?
Using plastic buckets to grow muskmelons offers several benefits:
-
Water-efficient – relies on moisture-retaining soil and mulching
-
Space-saving – ideal for limited space or container gardening
-
Recycled materials – reuses old plastic buckets and reduces waste
-
Controlled environment – better management of soil quality and pests
-
Impressive results – produces large, sweet fruits with minimal effort
With the right setup, you can enjoy juicy melons even during dry spells.
Materials Needed
-
20-liter plastic buckets or similar containers (with lids optional)
-
Quality soil mix (loamy with compost or aged manure)
-
Organic mulch (dry leaves, straw, or coconut husk)
-
Muskmelon seeds or seedlings
-
A sharp knife or drill (to create drainage holes)
-
Small pebbles or gravel (for drainage layer)
-
Natural fertilizers (such as compost tea or banana peel solution)
Step-by-Step: How to Grow Muskmelon in Buckets Without Watering
1. Prepare the Buckets
Choose large plastic buckets (15–20 liters) that are clean and food-safe. Drill 4–6 small holes at the bottom for drainage.
If you have bucket lids, cut a circular opening in the center. The lid helps reduce evaporation and acts as a mulch cover to retain moisture. If you don’t have a lid, mulching will still work effectively.
Place a 2-inch layer of small stones or gravel at the bottom to improve drainage.
2. Add Moisture-Retentive Soil
Fill the bucket with a rich, loamy soil mix. Ideal ingredients include:
-
50% garden soil
-
30% compost or aged manure
-
10% coco peat or rice husk (for moisture retention)
-
10% sand (to improve drainage)
Water the soil thoroughly a day before planting to allow moisture to settle. The goal is to store enough water in the soil so that the plant can draw from it over time.
3. Sow the Seeds
Sow 2–3 muskmelon seeds in the center of the bucket, about 1 inch deep. Cover lightly with soil and gently press.
Keep the bucket in a sunny area where the plant will receive at least 6–8 hours of sunlight daily. Muskmelons love warmth and sun exposure.
After germination (usually within 5–7 days), thin the seedlings to leave only the strongest one per bucket.
4. Mulch Generously
To retain soil moisture and reduce the need for watering, apply a thick layer of organic mulch. Use:
-
Dry grass or straw
-
Coconut husk
-
Dried leaves or wood chips
Mulch helps insulate the soil, prevent evaporation, and suppress weeds. It’s the secret to growing muskmelons in buckets without daily watering.
5. Minimal Watering
Once the soil is fully moist and mulched, watering can be reduced to once every 7–10 days, depending on local weather. During dry or windy periods, check the soil 2 inches below the surface. If it’s still moist, there’s no need to water.
The deep roots of the muskmelon will search for stored moisture in the lower layers of the bucket, encouraging strong, healthy growth.
6. Fertilizing for Sweet Fruit
Feed your muskmelon plants every 2–3 weeks using natural fertilizers:
-
Banana peel tea (rich in potassium)
-
Compost tea (overall nutrient boost)
-
Wood ash (adds calcium and potassium)
-
Diluted fish emulsion (nitrogen for early growth)
Once flowering begins, reduce nitrogen and increase potassium to encourage fruit development.
7. Training and Support
Muskmelon vines can grow long, so train them upward using a trellis, fence, or wall if space is limited. Use soft ties to guide the plant.
When fruits start to develop, support them with netting or slings to prevent stress on the vines. You can use old cloth or mesh bags to cradle growing melons.
Harvesting
Muskmelons are typically ready for harvest 70–90 days after planting. Signs of ripeness include:
-
A sweet aroma at the base of the fruit
-
The fruit easily separates from the stem
-
The skin turns slightly yellow or tan depending on the variety
Harvest in the morning when the plant is cool. Let the melon rest for a day or two before eating for the best sweetness.
Final Tips
-
Use deep buckets to encourage root growth
-
Always mulch to retain soil moisture
-
Avoid overwatering—melons prefer dry feet once established
-
If leaves start yellowing, feed with compost tea or seaweed extract
-
Use disease-resistant or compact varieties for best results in containers
Conclusion
With this clever bucket-growing technique, you don’t need a large garden or a steady water supply to enjoy delicious, homegrown muskmelons. By combining moisture-retaining soil, organic mulching, and minimal maintenance, you can grow large, sweet fruits right in your backyard or on your balcony—without the need for daily watering.
This sustainable method not only saves time and water but also gives you a rewarding harvest with surprisingly little effort. Try it out this growing season and enjoy nature’s sweetness, home-grown and chemical-free.


