Dill (Anethum graveolens), often known for its feathery, lacy foliage and fragrant, flavorful seeds, is an easy-to-grow herb that does exceptionally well in containers. Both the leaves (commonly referred to as dill weed) and the seeds are used in cooking, pickling, and herbal remedies. Growing dill in containers allows you to enjoy this versatile herb even if you don’t have a garden space. Whether you’re cultivating it on a balcony, patio, or sunny windowsill, container-grown dill is a rewarding addition to any kitchen garden.
Why Grow Dill in Containers?
Dill’s tall, delicate structure makes it well-suited for pots, especially when you want to control space, soil, and placement. Growing dill in containers also reduces weed problems, improves drainage, and helps you position the plant for optimal sun exposure. Plus, with a pot, you can bring the herb closer to the kitchen, making harvesting fresh dill as easy as stepping outside your door.
Choosing the Right Container
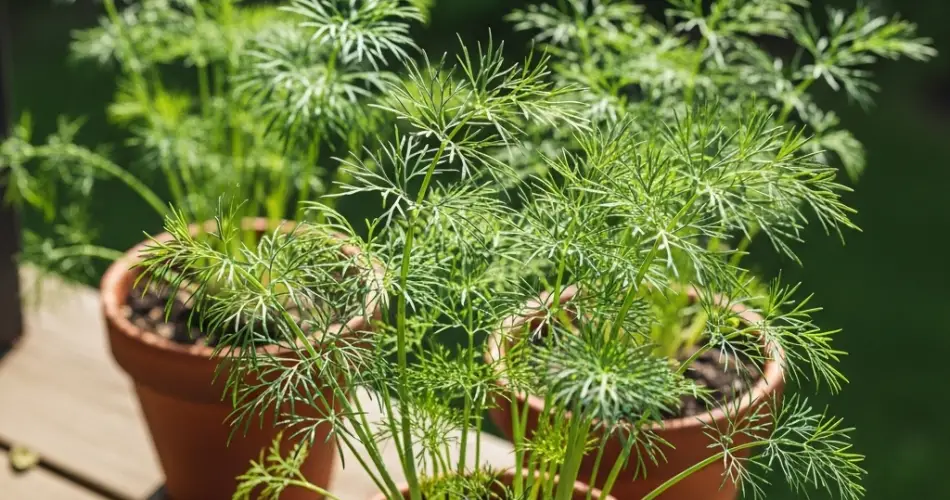
While dill doesn’t develop deep roots like some other herbs, it does produce a long taproot, so a deep container is important. Choose a pot that is at least 12 inches (30 cm) deep and wide to accommodate root growth and provide stability for the tall stems.
Terracotta or clay pots are ideal for dill because they allow the soil to dry out slightly between waterings, preventing root rot. Ensure your container has good drainage holes to avoid waterlogging, which dill does not tolerate well.
Selecting the Best Soil
Dill grows best in loose, well-draining soil rich in organic matter. Use a quality potting mix and add compost or well-rotted manure to improve fertility. Avoid compacted or overly wet soils.
A slightly acidic to neutral pH between 6.0 and 7.5 is ideal. To improve drainage, you can mix in a bit of perlite or coarse sand. Avoid heavy clay soils or moisture-retaining mixes designed for plants that need constant moisture.
Planting Dill in Pots
Dill can be started from seeds directly in the container where it will grow, which is usually better than transplanting since it dislikes being moved once established.
-
Sow seeds about 1/4 inch deep and space them roughly 2 inches apart.
-
Water gently after sowing to avoid washing the seeds away.
-
Germination usually occurs within 7–14 days if the soil stays consistently moist but not soggy.
-
Once seedlings reach about 2–3 inches tall, thin them out to allow about 6–8 inches between plants for proper air circulation and growth.
You can also do successive plantings every two to three weeks to ensure a continuous harvest throughout the growing season.
Sunlight and Temperature Requirements
Dill loves sunlight. Place your container where it receives at least 6 hours of direct sun daily. If you’re growing indoors, a sunny windowsill or a spot under a grow light will suffice.
Dill thrives in temperatures between 60–75°F (15–24°C). It can tolerate cooler temperatures but is sensitive to frost, so wait until all risk of frost has passed before sowing seeds outdoors or moving pots outside.
Watering and Feeding
Dill prefers consistently moist soil, especially during the early stages of growth. Water when the top inch of soil feels dry, being careful not to overwater. Allow excess water to drain freely from the container.
Fertilizing dill is optional if the soil mix is rich, but you can feed the plant once a month with a diluted balanced liquid fertilizer. Avoid high-nitrogen fertilizers, as they may encourage leaf production at the expense of flavor and seed development.
Pruning and Harvesting
To harvest dill leaves, snip off the feathery green foliage from the top of the plant, starting with the outermost stems. Regular harvesting encourages new growth and prevents the plant from bolting too early.
If you want to harvest dill seeds, allow some of the flowers to mature fully and dry on the plant. Once the seed heads turn brown and dry, cut them and place them in a paper bag to catch the seeds as they fall.
Managing Pests and Common Issues
Dill is generally pest-resistant, but it may occasionally attract aphids or caterpillars, including swallowtail butterfly larvae. While the caterpillars can chew on the leaves, they are often considered beneficial pollinators and can be tolerated in small numbers.
Use insecticidal soap or simply hose off aphids if they become a problem. Keep the area around the plant clean and provide good air circulation to prevent fungal issues.
Supporting Tall Growth
As dill matures, its tall, hollow stems may need support, especially in windy or exposed locations. You can stake individual plants or use a small tomato cage to keep the foliage upright.
End-of-Season Care
At the end of the season, dill will bolt and set seed. Allow a few plants to go to seed if you want to collect them for culinary use or sowing next year. Otherwise, remove the plant once it stops producing usable leaves.
In mild climates, dill can reseed itself in pots. In colder regions, simply collect the seeds and store them in a cool, dry place until spring.
Final Thoughts
Growing lacy dill in containers is a convenient and enjoyable way to bring fresh flavor into your kitchen. With minimal care, dill will reward you with fragrant leaves and seeds throughout the season. Its airy foliage adds beauty to your garden, and its culinary versatility makes it a must-have for any herb enthusiast. Whether you’re adding it to salads, fish, pickles, or soups, fresh homegrown dill is always a flavorful delight.


