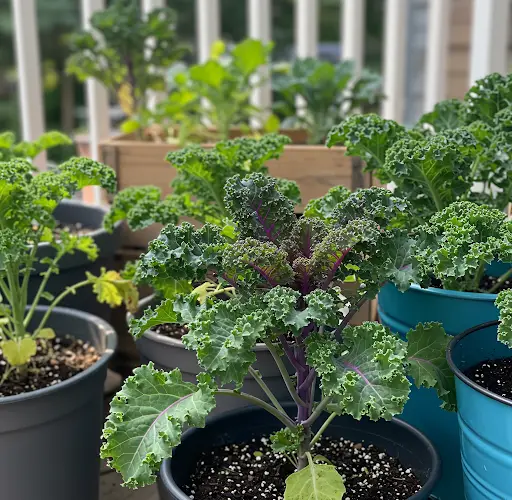
Kale is a nutrient-packed leafy green that thrives in containers, making it an excellent choice for gardeners with limited space. Whether you’re growing it on a balcony, patio, or even indoors, kale grows well in pots and grow bags. This guide will walk you through the steps to grow kale from seed in containers and grow bags, providing tips for optimal growth and a bountiful harvest.
Why Grow Kale in Containers?
Growing kale in containers and grow bags offers several benefits:
-
Space Efficiency – Kale can be grown in small spaces like balconies, patios, or even windowsills.
-
Control over Growing Conditions – Containers allow you to control the quality of the soil, drainage, and temperature, helping your plants grow more efficiently.
-
Mobility – You can easily move your container to follow the sun or protect your plants from extreme weather conditions.
-
Faster Growth – Kale grows quickly and will be ready to harvest in as little as 50 to 75 days, making it a great option for container gardening.
What You’ll Need
Before you start, gather the following materials:
-
Kale seeds (available at most garden centers or online)
-
Containers or grow bags (at least 12 inches deep and wide enough for several plants)
-
Well-draining potting mix
-
Compost (optional, to improve soil fertility)
-
Fertilizer (optional)
-
Watering can or hose
-
A sunny location that receives at least 6 hours of direct sunlight per day
Step-by-Step Guide to Growing Kale from Seed in Containers and Grow Bags
1. Choose the Right Container or Grow Bag
The first step in growing kale in containers is choosing the right size. Kale needs room to grow, so select containers or grow bags that are at least 12 inches deep. This depth will allow the roots to spread out and the plants to grow tall.
-
Grow bags are an excellent option for kale because they provide good drainage and prevent the roots from becoming root-bound.
-
Plastic or ceramic containers with drainage holes also work well.
-
Ensure that your container is wide enough to accommodate multiple plants (if desired) and has proper drainage holes to allow excess water to escape.
2. Prepare the Soil
Kale thrives in rich, well-draining soil. You can use a high-quality potting mix that drains well but also retains enough moisture for healthy plant growth. If you want to boost the soil’s fertility, consider adding compost or organic matter.
-
Fill your container or grow bag with potting mix, leaving about 1 inch of space at the top.
-
If desired, you can mix in a balanced fertilizer to provide extra nutrients for strong kale growth. A slow-release, organic fertilizer is often a good choice for kale.
3. Plant the Kale Seeds
Kale is relatively easy to grow from seed, and it doesn’t require much effort to get started:
-
Sow seeds about 1/4 to 1/2 inch deep into the soil. Space the seeds about 2 inches apart if you’re planting multiple seeds in a container.
-
Water gently to settle the seeds and ensure good seed-to-soil contact.
-
Keep the soil moist but not soggy, and place the container in a sunny spot that receives at least 6 hours of sunlight per day. If you’re growing kale indoors, place the container near a south-facing window or under grow lights.
Kale seeds typically germinate in 5 to 10 days. During this period, keep the soil consistently moist but not waterlogged.
4. Thinning and Spacing the Plants
Once the kale seedlings have grown large enough (about 2 inches tall), it’s time to thin them out. Proper spacing is essential for healthy growth:
-
Thin the seedlings by cutting the weaker ones at the base, leaving about 6–12 inches between each plant. This allows enough room for the remaining plants to grow large and healthy.
-
Kale plants need ample space for their leaves to spread out and capture sunlight, so avoid overcrowding.
5. Watering and Fertilizing
Kale requires consistent moisture to grow well, but it doesn’t like to sit in soggy soil. Make sure the container has good drainage to prevent overwatering.
-
Water regularly to keep the soil evenly moist. Avoid letting the soil dry out completely, as this can stunt growth.
-
Fertilize every 4–6 weeks with a balanced liquid fertilizer or compost. Kale is a heavy feeder, so it benefits from extra nutrients, especially during its growing phase.
6. Sunlight and Temperature
Kale prefers cooler temperatures and grows best in full sun. Aim for a location that receives at least 6 hours of direct sunlight each day. Kale is quite hardy and can tolerate light frosts, which can even improve its flavor.
-
Ideal temperatures for kale are between 45–75°F. In warmer climates, it’s best to plant kale during the cooler months to avoid the heat of summer, which can cause the plants to bolt (flower prematurely).
-
If you’re growing kale indoors, make sure to provide supplemental light using grow lights if natural sunlight is insufficient.
7. Pests and Care
While kale is relatively low-maintenance, it can be susceptible to pests like aphids, caterpillars, and whiteflies. Keep an eye on your plants for signs of insect damage.
-
Inspect leaves regularly and remove any pests you find by hand or use an organic pest control spray.
-
Remove any yellowing or damaged leaves to keep the plant healthy and encourage new growth.
-
If you’re growing kale in containers, rotate the plants occasionally to ensure even sunlight and airflow.
8. Harvesting Kale
Kale is ready to harvest in about 50 to 75 days from planting, depending on the variety. You can begin harvesting when the outer leaves are large enough to eat. Harvesting kale leaves regularly will encourage the plant to continue producing new leaves.
-
Harvest outer leaves by cutting them off near the base of the plant. Leave the inner leaves to continue growing.
-
If your kale plants start to flower, they may become more bitter. To avoid this, harvest the leaves promptly before the plant bolts.
Conclusion
Growing kale from seed in containers and grow bags is a great way to enjoy fresh, nutritious greens right from your own home. With the right container, soil, and care, kale will thrive in small spaces and provide a continuous harvest. Follow these steps for planting, watering, thinning, and harvesting, and you’ll be enjoying your homegrown kale in no time.


