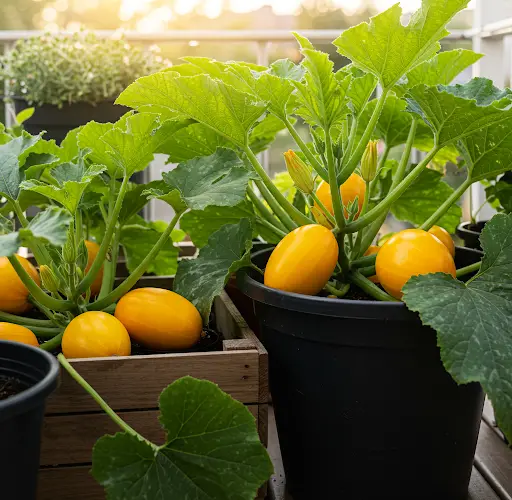
Golden Egg summer squash is a compact, productive, and visually stunning variety of yellow squash, known for its vibrant golden color and egg-like shape. Perfect for roasting, sautéing, or stuffing, this squash is not only delicious but also well-suited for container gardening. Whether you’re working with a small patio, balcony, or urban backyard, growing Golden Egg squash from seed in pots is a rewarding and straightforward gardening project.
In this guide, you’ll learn how to plant, grow, and harvest Golden Egg summer squash in containers, step-by-step.
Why Choose Golden Egg Summer Squash?
Golden Egg is a bush-type summer squash, which means it stays compact and doesn’t spread out like vining varieties. It’s ideal for containers and small gardens, producing flavorful fruits in a short period of time. The bright yellow fruits are rich in vitamins A and C, have tender skin, and are easy to prepare in a wide range of dishes.
Key features:
-
Compact growth habit
-
Fast production (harvest in as little as 45–50 days)
-
High-yielding with regular harvest
-
Bright golden color that adds ornamental value
Step 1: Choosing the Right Container
Container size and drainage are crucial when growing summer squash.
-
Minimum size: Use a pot that’s at least 5 gallons in volume, with a depth of 12–16 inches.
-
Material: Plastic, fabric grow bags, or ceramic containers all work well, as long as they have good drainage.
-
Drainage holes: Ensure your container has several holes at the bottom to allow excess water to escape and prevent root rot.
Larger containers can support bigger root systems and hold moisture longer, reducing the need for constant watering.
Step 2: Soil Preparation
Golden Egg squash thrives in fertile, well-draining soil rich in organic matter.
-
Use a premium potting mix designed for vegetables.
-
Blend in compost or aged manure before planting to boost fertility.
-
Add a handful of slow-release organic fertilizer or worm castings for extra nutrients.
The ideal pH for summer squash is between 6.0 and 6.8.
Step 3: Planting Seeds
You can start Golden Egg squash seeds directly in the pot once nighttime temperatures are consistently above 55°F (13°C), or start seeds indoors 2–3 weeks earlier and transplant later.
To direct sow in containers:
-
Moisten the soil evenly.
-
Plant 2–3 seeds about 1 inch deep in the center of the container.
-
Cover lightly with soil and gently press down.
-
Keep the soil moist but not soggy until germination (usually within 5–10 days).
-
Once seedlings emerge and develop 2–3 sets of true leaves, thin them by snipping the weakest, leaving the strongest seedling to grow.
Step 4: Sunlight Requirements
Golden Egg squash needs at least 6–8 hours of full sun per day. The more sun it receives, the better it will grow and produce.
-
Place your container in the sunniest spot available: patios, balconies, rooftops, or driveways.
-
If growing indoors or in partially shaded areas, consider using grow lights to supplement natural light.
Step 5: Watering and Moisture Control
Consistent moisture is essential for healthy squash plants, especially in containers where soil can dry out quickly.
-
Water deeply whenever the top inch of soil feels dry to the touch.
-
Avoid overhead watering—water at the base to prevent mildew and fungal problems.
-
Mulch the soil surface with straw, shredded leaves, or compost to retain moisture and reduce temperature swings.
Pro tip: Use self-watering containers or drip irrigation to make watering easier and more consistent.
Step 6: Feeding and Fertilization
Squash are heavy feeders and benefit from regular fertilization.
-
Apply a balanced liquid fertilizer every 2–3 weeks during the growing season.
-
Once flowering and fruiting begin, switch to a formula with slightly more phosphorus and potassium to support fruit development.
-
Organic options like compost tea, seaweed extract, or fish emulsion work well in containers.
Step 7: Supporting Growth and Managing Pests
While Golden Egg squash has a compact form, the plant can still benefit from a small tomato cage or plant support to help keep leaves upright and improve air circulation.
Common pests and issues:
-
Squash vine borers and squash bugs – inspect leaves regularly and remove eggs by hand.
-
Powdery mildew – improve airflow and avoid wetting the leaves; apply neem oil if needed.
Keep the area around your container tidy and weed-free to reduce pest habitats.
Step 8: Harvesting Golden Egg Squash
Golden Egg summer squash grows quickly, and fruits are best harvested when they’re 4 to 6 inches long—small, firm, and tender.
-
Use scissors or garden shears to cut the squash cleanly from the plant.
-
Harvest regularly to encourage continued fruiting.
-
Check daily during peak season—squash can double in size overnight!
The more you harvest, the more the plant will produce.
Final Tips for Success
-
Rotate pots to ensure even sun exposure if needed.
-
Avoid overwatering, especially during cooler periods or after rainfall.
-
If reusing pots, clean them thoroughly between growing seasons to prevent disease carryover.
Conclusion
Golden Egg summer squash is a beautiful and delicious addition to any container garden. With its compact growth, quick production, and stunning color, it’s an ideal choice for gardeners of all experience levels. By following these simple steps, you can grow a bountiful harvest of bright, golden squash right from your patio, balcony, or small backyard.
Whether you’re cooking them fresh or preserving them for later, these cheerful little squashes are sure to bring both flavor and color to your summer meals.


