Growing chili peppers in crate beds is a fantastic way to enjoy homegrown spice even if you’re living in a compact urban space. With just a bit of sunlight, some recycled materials, and the right care, you can cultivate vibrant, productive pepper plants right on your balcony. This guide will walk you through the process step by step—from setting up the crate to harvesting your first fiery pods.
Materials You’ll Need
To start your chili pepper garden in a crate bed, you’ll need the following materials:
-
A wooden or plastic crate (at least 12 inches deep)
-
Landscape fabric or an old rice sack for lining
-
Potting mix (preferably rich in organic matter)
-
Compost or aged manure
-
Chili pepper seedlings or seeds
-
Mulch (optional)
-
Small garden tools (trowel, hand fork)
-
Watering can or spray bottle
Step 1: Prepare the Crate Bed
Choose a sturdy crate that allows for proper drainage and has enough depth for root development. If the crate doesn’t have holes, drill several in the bottom to prevent waterlogging. Line the inside with landscape fabric or a breathable sack to keep soil in place while still allowing water to drain.
Place the crate in a spot on your balcony that receives at least 6–8 hours of sunlight daily. Chili peppers love heat and sun, so light exposure is critical for flowering and fruiting.
Step 2: Fill with Nutrient-Rich Soil
In your lined crate, create a soil mix using two parts potting soil, one part compost, and a handful of sand or perlite for better drainage. Chili plants prefer slightly acidic to neutral soil with good structure and fertility.
Mix the components well, then fill the crate, leaving about an inch of space at the top to make watering easier.
Step 3: Choose Your Chili Variety
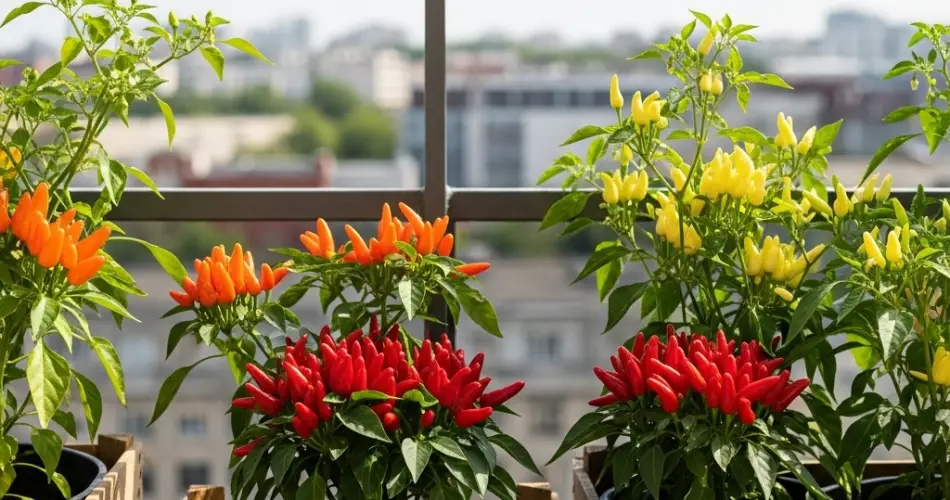
There are many types of chili peppers you can grow—ranging from the mildly spicy Anaheim to the fiery hot Bird’s Eye or Cayenne. For balcony gardening, opt for compact or dwarf varieties if space is tight.
If you’re starting from seed, sow them indoors in seed trays 6–8 weeks before the last frost, then transplant them into the crate once they’re around 4–6 inches tall and have at least two true leaves. Alternatively, use nursery seedlings to save time.
Step 4: Transplanting and Spacing
Once your chili seedlings are ready, transplant them into the crate bed. Depending on the crate size, space them about 10–12 inches apart to allow air circulation and root expansion. Press the soil gently around the base of each plant and water thoroughly after transplanting.
If you’re using seeds directly in the crate, sow them half an inch deep and keep the soil consistently moist until germination.
Step 5: Watering and Mulching
Chili peppers prefer evenly moist soil but not soggy conditions. Water them when the top inch of soil feels dry to the touch. Avoid overwatering, which can lead to root rot or fungal issues.
To help retain moisture and reduce weed growth, apply a thin layer of organic mulch like rice hulls, shredded leaves, or straw around the plants.
Step 6: Feeding and Care
Once the plants are established, feed them every two weeks with a diluted liquid fertilizer rich in potassium and phosphorus to promote flowering and fruiting. You can also top-dress with compost every month for a slow-release nutrient boost.
Keep an eye out for pests like aphids or spider mites. A gentle spray of neem oil or a soapy water solution can help keep them in check. Remove yellowing or damaged leaves regularly to keep the plant healthy and vigorous.
If your plants grow tall or start bearing heavy fruit, provide support using bamboo sticks or small trellises.
Step 7: Pollination and Flowering
Chili peppers are self-pollinating, but giving the flowers a gentle shake or using a soft brush can help improve fruit set, especially in enclosed or less breezy balconies.
You’ll notice white or purple flowers blooming a few weeks after transplanting. Soon after, small green chilies will form.
Step 8: Harvesting Your Peppers
Chili peppers can be harvested when they reach their mature size and color. Depending on the variety, this could be green, red, yellow, or even purple. Use scissors or garden snips to cut the fruits cleanly from the plant to avoid damaging the stems.
Regular harvesting encourages the plant to produce more fruit, so pick often once they’re ripe.
Growing chili peppers in balcony crate beds is a rewarding endeavor for any urban gardener. With just a crate, some quality soil, and consistent care, you can enjoy a steady supply of homegrown heat in your meals—all while making efficient use of small space.


