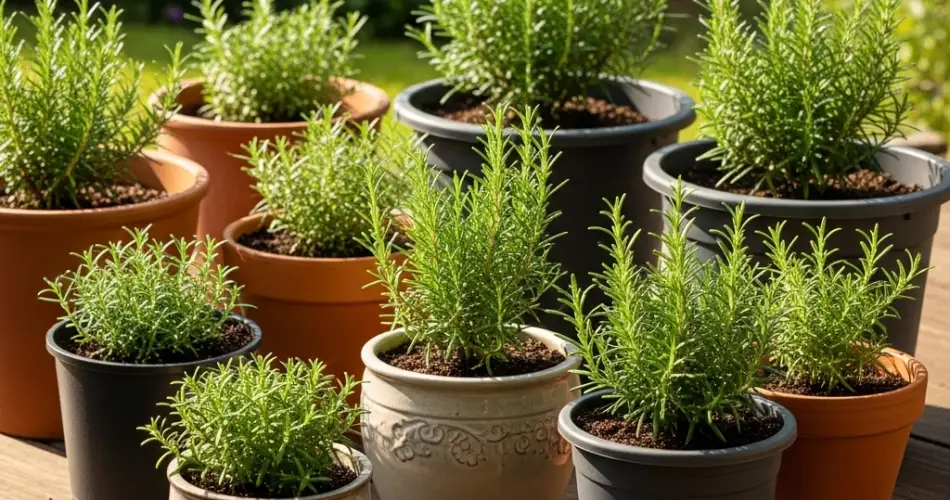
Rosemary is a fragrant, hardy herb that adds depth to countless recipes and brings a fresh, earthy aroma to your home. While it’s widely available in stores, growing your own rosemary offers more than just a continuous supply—it connects you to nature and your food in a simple and rewarding way. And the best part? You can grow rosemary from kitchen scraps with surprising ease, even if you’ve never gardened before.
Here’s how to propagate rosemary using leftover stems and care for it as it grows—no special tools or green thumb required.
Why Grow Rosemary from Kitchen Scraps?
Rosemary is a perennial herb with needle-like leaves and a woody stem. It’s drought-tolerant, pest-resistant, and thrives both in pots and in garden beds. Growing it from store-bought stems or cuttings is an economical and satisfying alternative to buying potted plants or seeds.
Benefits of growing rosemary from scraps:
-
Saves money
-
Reduces waste
-
Encourages sustainability
-
Requires minimal effort
-
Provides a continuous supply of fresh herbs
With just a few steps, your leftover rosemary sprigs can transform into a healthy, thriving plant.
Step 1: Choose the Right Rosemary Cuttings
Not all rosemary stems will grow roots, so selecting healthy cuttings is key to success.
What to look for:
-
Fresh, green stems (not dry or woody)
-
4–6 inches long
-
No signs of decay or mold
-
Preferably cut from an organic source or garden-fresh bundle
If you’re using rosemary from a grocery store, make sure the stems haven’t been treated with preservatives, as these may prevent rooting.
Step 2: Prepare the Cuttings
Once you’ve selected your rosemary stems, follow these simple preparation steps:
-
Strip the bottom leaves: Remove the leaves from the lower 2 inches of the stem. This bare section will go into the water or soil.
-
Trim the stem just below a node (the spot where leaves once grew). This encourages rooting.
-
If the stem is too woody at the base, gently scrape a bit of the outer layer with a knife—this can stimulate root growth.
At this stage, your rosemary cuttings are ready to root.
Step 3: Rooting the Cuttings
You can root rosemary either in water or directly in soil. Water propagation allows you to observe root development, which can be exciting for beginners.
Option A: Rooting in Water
-
Fill a glass or jar with room-temperature water.
-
Place the cuttings in the jar, making sure the stripped part of the stem is submerged.
-
Keep the jar in a warm, sunny location, like a windowsill.
-
Change the water every 2–3 days to prevent bacteria buildup.
In 10–14 days, you should see roots forming. Once the roots are at least an inch long, the cuttings are ready to be planted.
Option B: Rooting in Soil
-
Fill a small pot with a well-draining potting mix.
-
Insert the cuttings about 2 inches into the soil.
-
Water lightly and cover with a plastic bag or container to create a mini greenhouse.
-
Place the pot in indirect sunlight and keep the soil slightly moist.
Roots may take a little longer to form in soil, but once established, the plant can grow directly in the same container.
Step 4: Transplanting and Caring for Your Rosemary
Once the cuttings have rooted, it’s time to transplant them into a larger pot or directly into your garden.
Ideal conditions for rosemary:
-
Soil: Well-drained, slightly sandy soil
-
Light: At least 6–8 hours of sunlight per day
-
Watering: Allow the soil to dry out between waterings
-
Pot: Use a clay or terracotta pot with drainage holes
Rosemary doesn’t like soggy roots, so good drainage is essential. Water deeply but infrequently.
Step 5: Prune and Harvest for Continuous Growth
As your rosemary plant matures, regular pruning helps maintain shape and stimulates new growth.
-
Start pruning once the plant is at least 6–8 inches tall
-
Use scissors or garden shears to snip off the top few inches
-
Always leave several inches of growth to keep the plant healthy
The trimmings can be used fresh, dried, or frozen for cooking. Regular harvesting encourages bushier, fuller growth and helps prevent the plant from becoming too woody.
Step 6: Troubleshooting Common Issues
Though rosemary is hardy, a few issues can slow its development:
-
Yellowing leaves: Usually due to overwatering or poor drainage
-
No root formation: May happen if the stem is too woody or water isn’t changed regularly
-
Leggy growth: Indicates the plant needs more sunlight
Addressing these problems early ensures your rosemary thrives long term.
Final Thoughts
Growing rosemary from kitchen scraps is not only surprisingly easy, but it also turns a simple herb into a symbol of sustainability and self-reliance. With minimal effort, you can transform leftover sprigs into lush green plants that enhance your cooking, fragrance your home, and brighten your living space.
Whether you’re starting with just one cutting or growing a full windowsill herb garden, rosemary is the perfect plant for beginners—and it all starts with what’s already in your kitchen.


