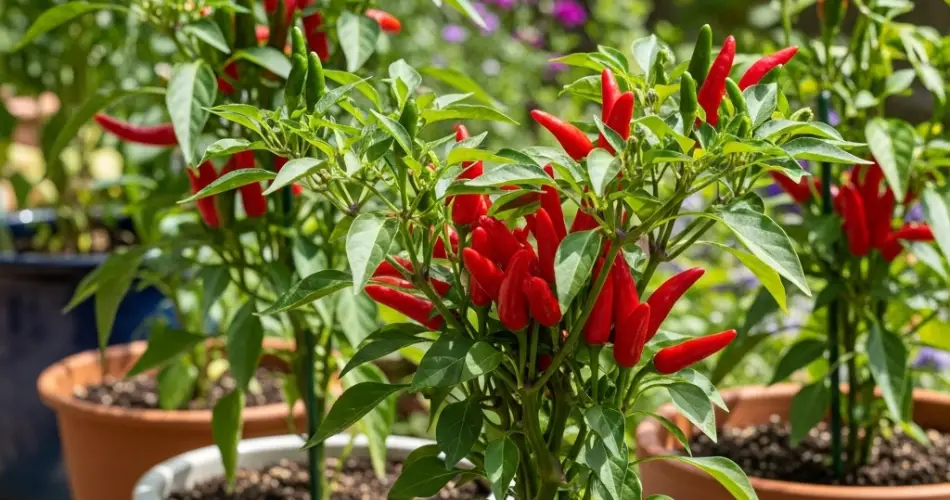
Love a bit of heat in your meals? Growing chili peppers at home is easier than you might think—and you don’t need a garden to do it. With just a sunny spot and a container, you can grow a variety of chili peppers in pots, from mild jalapeños to blazing-hot habaneros. Container gardening not only saves space but also gives you better control over your plants’ health and productivity.
Whether you’re an experienced gardener or just starting out, chili peppers are a rewarding and flavorful addition to your homegrown produce.
Why Grow Chili Peppers in Pots?
Chili peppers are well-suited to container growing for many reasons:
-
Perfect for small spaces – Ideal for balconies, patios, rooftops, and windowsills
-
Better soil control – Customize your soil mix for optimal drainage and nutrition
-
Easy mobility – Move pots to follow sunlight or shelter them from extreme weather
-
Fewer pests and diseases – Reduce contact with ground-borne problems
-
Beautiful and functional – Many pepper plants produce ornamental foliage and colorful fruits
Growing chili peppers in pots makes it easier to manage their needs while enjoying a bountiful harvest even in limited space.
Choosing the Right Chili Pepper Varieties
There are hundreds of chili pepper varieties, but not all are equally suited to container gardening. Compact or bushy types work best in pots. Here are some good options:
-
Jalapeño – Mild to moderate heat, perfect for salsa and pickling
-
Cayenne – Slim, red peppers ideal for drying or making hot sauce
-
Thai Hot – Small but fiery; very compact plant structure
-
Habanero – Extremely hot with a fruity flavor; needs a larger pot
-
Chiltepin – Wild-type pepper with small, round fruit; attractive and spicy
-
Numex Twilight – Ornamental and edible; colorful and compact
Choose a variety that fits your taste preference and the amount of heat you can handle. Look for “container” or “patio” on seed packets or plant tags for varieties that adapt well to small spaces.
What You’ll Need
Before planting, gather the following supplies:
-
A container at least 10–12 inches deep with good drainage
-
Quality potting mix with compost or organic material
-
Slow-release fertilizer or organic liquid feed
-
Chili pepper seeds or seedlings
-
A sunny location (6–8 hours of sunlight daily)
-
Mulch (optional, for moisture retention)
-
Stakes or support (for taller varieties)
Step 1: Prepare the Pot
Choose a container made from clay, plastic, or fabric. Ensure it has drainage holes to prevent waterlogging, which can lead to root rot.
Fill it with a light, well-draining potting mix enriched with compost or aged manure. Avoid garden soil, which can be too dense for container use.
Moisten the soil before planting.
Step 2: Planting the Chili Peppers
If using seeds, start them indoors 6–8 weeks before the last expected frost. Transplant them into pots once they have 4–6 leaves and the weather is warm and stable (above 65°F or 18°C).
When transplanting seedlings, plant them slightly deeper than they were in their nursery pots. Press the soil around the roots firmly and water thoroughly after planting.
Step 3: Sunlight and Temperature
Chili peppers love warmth and need 6–8 hours of direct sunlight daily. Place your pots in the sunniest spot available, such as a south-facing balcony or patio.
If nighttime temperatures dip below 60°F (15°C), consider moving the pots indoors or using covers to protect the plants.
Step 4: Watering and Feeding
Water your chili peppers when the top inch of soil feels dry. Avoid letting the soil dry out completely or become waterlogged. During hot spells, daily watering may be necessary.
Feed the plants every 2–3 weeks with a balanced liquid fertilizer or one higher in potassium to support flowering and fruiting. Be careful not to over-fertilize with nitrogen, which promotes leafy growth at the expense of fruit.
Step 5: Supporting and Pruning
While many chili pepper varieties are naturally compact, some may require staking once fruiting begins. Use bamboo sticks or small cages to keep the plant upright.
Remove any yellowing or damaged leaves to improve airflow and reduce disease risk. Pinching the tips of the plant early in the season can encourage bushier growth.
Step 6: Harvesting Your Hot Peppers
Chili peppers can be harvested once they reach the desired size and color. Most varieties start green and turn red, orange, yellow, or even purple as they ripen.
Use scissors or pruners to cut the peppers, leaving a short stem attached. Avoid pulling, as this can damage the plant.
Harvesting regularly encourages the plant to produce more fruit. Wear gloves if handling hot varieties, and wash your hands thoroughly afterward.
Final Thoughts
Growing chili peppers in pots is a fun and flavorful way to spice up your gardening. With a sunny spot, regular care, and the right variety, you can enjoy a steady supply of homegrown heat throughout the growing season.
Whether you prefer mild jalapeños or fiery habaneros, container-grown chili peppers let you control the quality, flavor, and freshness—right from your own balcony or windowsill.


