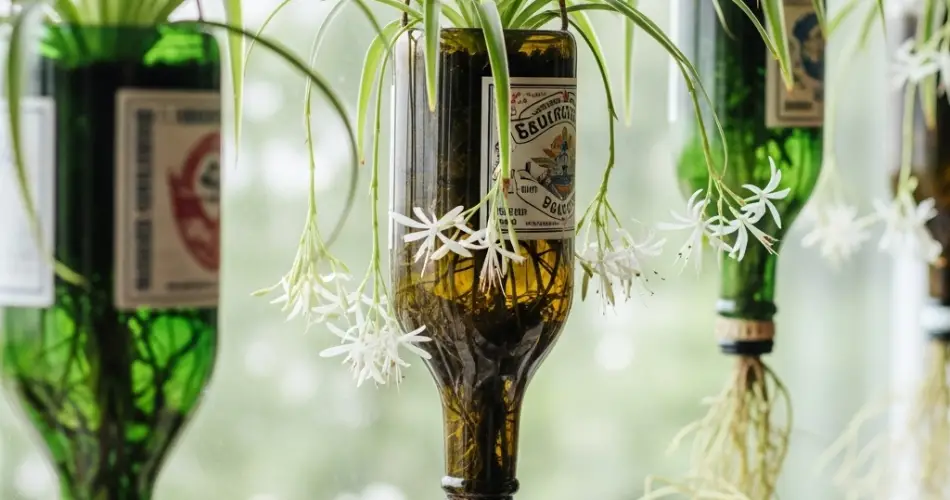
Spider plants (Chlorophytum comosum) are among the most adaptable and charming houseplants, famous for their cascading green-and-white leaves and air-purifying qualities. Easy to grow and propagate, they’re perfect for creative vertical gardening—especially in small spaces. One of the most practical and eco-friendly ways to showcase their graceful, trailing form is by using DIY hanging planters made from recycled plastic bottles.
This project combines sustainable gardening with home décor, turning simple plastic waste into eye-catching greenery that can liven up balconies, kitchens, bathrooms, or bedrooms. With minimal supplies, you can create a hanging spider plant setup that not only saves space but also makes your home greener and more stylish.
Why Spider Plants Are Perfect for Hanging Bottle Planters
Spider plants naturally grow in a fountain-like shape, with long arching leaves and baby plantlets—often called “spiderettes”—dangling on slender runners. This growth habit makes them ideal candidates for hanging displays.
Their resilience and low-maintenance nature mean they adapt well to small containers and varying indoor conditions. They thrive in indirect light, tolerate occasional neglect, and are non-toxic, making them great for households with pets or children.
Using hanging bottle planters adds vertical interest to your space while keeping your countertops and floors clutter-free. It’s a brilliant way to garden upwards while reusing materials that would otherwise go to waste.
Materials You’ll Need
-
Healthy spider plant (mature plant or spiderette)
-
Clean plastic bottle (1 to 1.5 liters)
-
Sharp scissors or craft knife
-
Cotton rope, twine, or wire (for hanging)
-
Well-draining potting soil (preferably for indoor plants)
-
Optional: pebbles for drainage and decoration
-
Decorative fabric, paint, or washi tape for styling
Preparing the Bottle Planter
Select a plastic bottle that suits your space. Bottles with straight sides are easiest to work with.
Steps:
-
Wash and dry the bottle thoroughly.
-
Cut an opening along the side or near the top to create a “pocket” for planting. Leave enough height below the opening to hold soil securely.
-
Poke 3–4 small drainage holes in the bottom to prevent water buildup.
-
Make two small holes near the upper edges of the bottle (on opposite sides) to thread twine or wire for hanging.
-
Add a thin layer of small pebbles or gravel at the bottom for extra drainage.
If you want to enhance the look, wrap the bottle with fabric, paint it in soft earth tones, or use jute rope for a rustic finish. Just avoid sealing off too much of the container—plants still need airflow.
Choosing and Planting the Spider Plant
You can use a small spider plant or a spiderette (the baby plant that hangs off the mother plant).
For spiderettes:
-
Cut one with small roots already forming.
-
Let the base dry for a few hours before planting.
To plant:
-
Add potting soil up to two-thirds of the bottle’s height.
-
Place the spider plant in the center and gently pack in more soil around the roots.
-
Water lightly until soil is evenly moist but not soggy.
The roots of spider plants don’t like to sit in wet soil, so always check for proper drainage before hanging the planter.
Hanging and Placement
Use the pre-punched holes near the bottle’s rim to thread cotton rope, wire, or twine. Tie the ends securely and hang the planter from a ceiling hook, balcony railing, or wall bracket.
Spider plants prefer bright, indirect light. Hanging them near a window with filtered sunlight is ideal. Avoid direct afternoon sun, which can scorch the leaves.
If placing outdoors, ensure the area is protected from heavy rain and strong winds.
Watering and Care Tips
Spider plants like slightly moist soil but are sensitive to overwatering. Allow the top inch of soil to dry out before watering again. In a bottle planter, water less frequently, as plastic retains moisture longer than terracotta.
-
Mist the leaves occasionally, especially in dry climates.
-
Fertilize lightly every 4–6 weeks during the growing season with diluted liquid fertilizer.
-
Trim brown tips to keep the plant tidy, and remove dead leaves regularly.
If you see roots circling inside the container or pushing through the drainage holes, it may be time to transplant the spider plant into a larger bottle or pot.
Propagating More Spider Plants
Spider plants are prolific producers of baby offshoots. Once a spiderette develops small roots, it can be snipped off and placed in water or soil to grow a new plant.
You can even hang multiple spiderettes in a series of small bottle planters along a vertical rack or hanging ladder for a cascading green effect.
Stylish and Sustainable Greenery
Creating hanging spider plant planters with plastic bottles is more than just a gardening project—it’s a commitment to sustainability and a step toward greener living. This approach is ideal for small spaces, renters, or anyone wanting to add natural charm without spending on expensive planters.
With minimal tools and effort, you can turn ordinary bottles into decorative plant homes that showcase the elegance of spider plants. Not only do they improve air quality and reduce stress, but they also serve as daily reminders that beauty and sustainability can go hand in hand.


